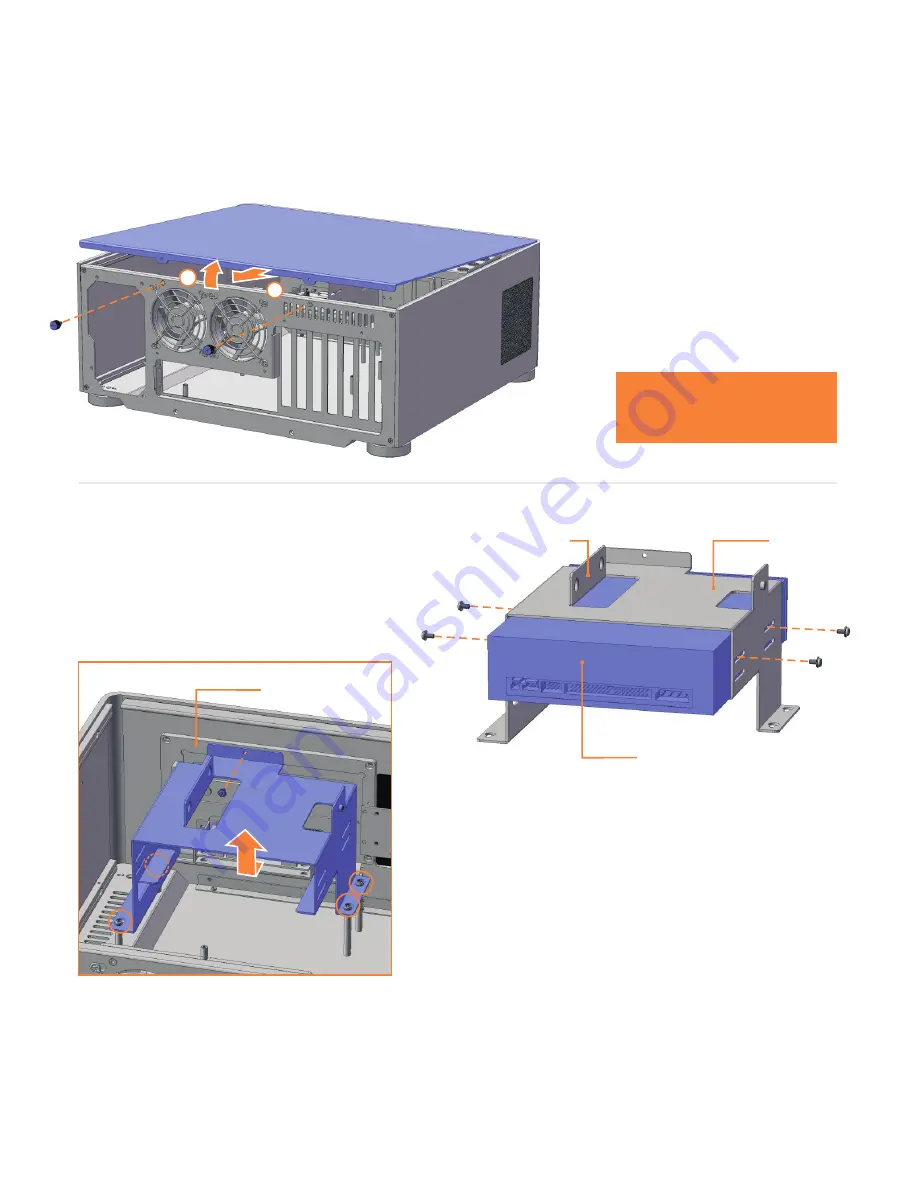
Opening the case
Remove the thumb screws
as indicated. Carefully raise
the p
and
anel as shown (about
30mm is enough)
pull
out to remove. Reverse the
procedure to replace.
1
2
ODD cage removal
Remove the top fixing screw completely.
4 fixing
screws circled.
it to slide
back and be lifted out over the screw
heads, ready for ODD installation.
Loosen (no need to remove) the
Keyhole shaped holes
on the base of the cage allow
front I/O plate
DO NOT force upwards
as this could cause
damage to the top panel
.
Optical disc drive installation
Unclip the existing plastic drive bezel from your
ODD. The disc tray should be ejected for this and
usually requires some upward force to the bezel.
Slide the optical disk drive through the front of
the cage. Before securing the drive screws,
check/adjust the ODD’s position in the chassis -
it should sit as close to the front I/O plate as
possible without the drive eject button becoming
depressed. Secure all fixing screws and double
check the eject button functions correctly.
ODD
cage
Optical
disk drive
Hard drive
mount
4
Summary of Contents for S16T
Page 1: ...Origen S1 6T user guide...


