Oregon Scientific VR668 Operation User'S Manual Download Page 8

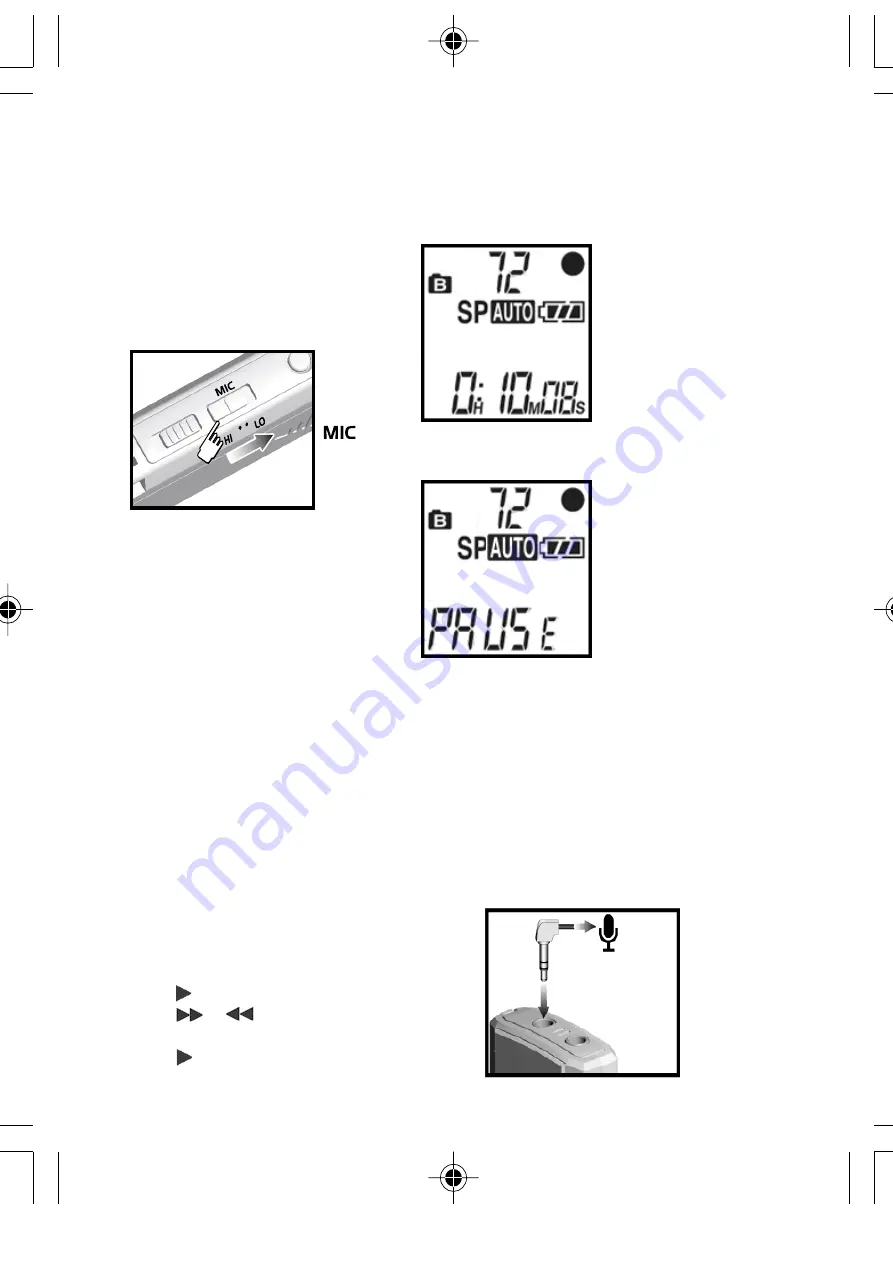
Voice Activated Recording Paused:

TIP: 

If the background noise is relatively high

and the microphone sensitivity is set to 

Hi,

the recorder will not recognize a silence
and keep on recording; setting the micro-
phone sensitivity to 

Lo 

should solve this.

Connecting an External Microphone

To use an external microphone for
recording, insert the microphone jack into
the microphone connector.

Recording will
begin automatically
when sound is
detected.

Recording is
paused
automatically
when no sound is
detected for two
seconds or more.

  8

Hi

High sensitivity - Clear and louder recording,
but more susceptible to noise and distortion.

Lo

Low sensitivity - Lower recording volume,
but less suseptible to noise and distortion.

Voice Activated Recording (Aut)

You can activate the automatic record
function (Aut) so that your player will
begin recording whenever a sustained
audible sound is picked up.

To access this function:

1.

Enter STOP mode.

2.

Press MENU until “Aut” is displayed.

3.

Press     to activate.

4.

Press       or        to switch this
feature “on” or “off”.

5.

Press     to confirm.

During a recording the memory gets
used up.

NOTE:

 You can erase messages to

make extra room for recording (->10).

Microphone Sensitivity (Sen)

You can choose between two different
levels of sensitivity:

NOTE:

 Having activated the 

Aut

 function,

you must also slide the record switch on.

Voice Activated Recording In Progress:

VR668 SX1 M-EN(6Apr)

4/6/04, 11:57 AM

8

All manuals and user guides at all-guides.com

Summary of Contents for VR668

Page 1: ...6 Folder Selection 7 Record Quality Selection 7 FULL Displayed On Screen 7 Microphone Sensitivity 8 Voice Activated Recording 8 Connecting External Microphone 8 Playback 9 Playing Back a Message 9 Fu...

Page 2: ...REC Switch Starts or stops recordings 7 IMP Mark messages as important 8 MENU Repeat MENU Mode selection Repeat Repeat messages 9 VOL Buttons Press to change the volume 10 Erase Button Press to delet...

Page 3: ...For AC Adaptor Connection Icons Name Status Mode Message and Alarm display Displays current mode message count and selected alarm Folder A B Message storage folder Recording Mode Recording format Long...

Page 4: ...STOP mode 2 Press MENU until SETTING mode is displayed 3 Setting the Date and Time Press to start changing values Pressing changes values and pressing sets them 4 1 Check package contents VR668 Digita...

Page 5: ...n locations larger than the above it is recommended that you use an external microphone for extra coverage Press Press Press Press Press Press Press twice 1 CLOCK mode 2 Set Year 3 Set Month 4 Set Day...

Page 6: ...ing recording You can add an important mark by pressing and holding for two seconds during recording or playback 6 Press while recording is in progress Ind will show on the display Press and hold whil...

Page 7: ...ifferent recording quality settings In STOP mode press MENU until LP or SP is displayed To change settings Press to activate then choose the desired folder by shifting or Press to save the selection R...

Page 8: ...ion Lo Low sensitivity Lower recording volume but less suseptible to noise and distortion Voice Activated Recording Aut You can activate the automatic record function Aut so that your player will begi...

Page 9: ...Press VOL or VOL Adjust Volume Functions Scan forward through current message Press and hold Scan backwards through current message Press and hold Mark important messages Press and hold 2 seconds to m...

Page 10: ...E Time count shown may be inaccurate during fast or slow playback Searching for Important Messages In STOP mode Press and hold for two seconds Search for previous or next important message by pressing...

Page 11: ...ton press confirmation beep will not sound during recording to prevent the beep tone from being recorded Format FO This feature formats the memory In format setting press when FO blinks press and hold...

Page 12: ...to reconfigure the settings Battery Life At full capacity the batteries should last approximately 16 hours of continuous playback at medium volume 20 hours of continuous recording NOTE When battery le...

Page 13: ...tor be sure to turn off the power of the recorder Do not disconnect the AC adaptor while recording as this may cause damage to the data NOTE Recorded messages are not lost after the batteries have bee...

Page 14: ...it manually by A Double click the My Computer icon on desktop B Double click CD ROM icon 14 3 Click Next 4 Follow the onscreen installation guide 5 When installation is complete click Finish then clos...

Page 15: ...the PC in WAV format and then play it Play a previously saved WAV message 3 Choose the directory you want to save the file to Save As or you can play a message by selecting Open then finding the file...

Page 16: ...vb message to load to your voice recorder 4 A message option box will popup choose the folder on your voice recorder you want the message to be saved to then click OK NOTE Indexes marked during record...

Page 17: ...one External microphone not plugged in Make sure microphone is plugged in correctly 8 Condenser type microphone not used Plug in a condenser type microphone Cannot record messages FULL is displayed on...

Page 18: ...r a time out USB cable is properly attached File error When you try selecting a file format that is not supported The file was not created by Voice Recorder Link software Failed to save the file to th...

Page 19: ...impact or shock while recording About Noise During recording OR playback noise may be generated if too close to a power lead florescent light or portable phone If the unit is bumped or rubbed during...

Page 20: ...s gear and weather stations The website also includes contact information for our customer service department in case you need to reach us Type Description Recording Time Standard Long 132 min 265 min...

Reviews: