background image

7

GB

DISPLAYING AND SETTING THE

ALARM

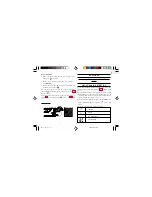
This unit is equipped with a daily alarm.  To view the preset alarm
time, press 

[ALARM]

.

To set 

alarm time:

1. Press and hold 

[ALARM]

 for 2 seconds in alarm display mode.

The hours will blink.

2. Enter the hour by using 

[VOL +]

 or 

[VOL -]

.  Press 

[ALARM]

to confirm.

3. The Minutes will then blink.

4. Enter the minutes by using 

[VOL +]

 or 

[VOL -]

.  Press

[ALARM]

 to confirm the entry.

5. The beep alarm 

 ]

 or radio alarm icon 

 ]

 will blink.

6. Select the alarm-sounding mode by using 

[VOL +]

 or 

[VOL -]

.

Beep alarm is a 2-minute crescendo alarm. In Radio alarm mode,
the radio will activate and remain on for 2 hours unless manually
deactivated. Press 

[ALARM]

 to confirm.

7. If Radio alarm mode 

is chosen

, the radio 

will automatically turn

on and the Radio Station Number will flash.  Select the radio
station by using

 [STATION]

.  Please note that in this Radio

Alarm mode, manual tuning cannot be used to set the station.
Press 

[ALARM]

 to confirm.

8. The Volume will then flash.  Again, select the radio volume by

using 

[VOL +]

 or 

[VOL -]

.  Press 

[ALARM]

 to confirm and

exit the setting mode.  Press 

[RADIO]

 to turn 

the radio off.

Day-of-the-week

Affichage du jour

Wochentaganzeige

Giorno della settimana

Día de la semana

Dia de Semana

Monday Tuesday Wednesday Thursday  Friday 

Saturday Sunday

Lundi

Mardi

Mercredi

Jeudi

Vendredi Samedi Dimanche

Montag

Dienstag Mittwoch

Donnerstag Freitag

Samstag Sonntag

Lunedí

Martedí

Mercoledí Glovedí

Venerdí

Sabato

Domenica

Lunes

Martes

Miércoles Jueves

Viernes

Sábado

Domingo

Segunda Terça

Quarta

Quinta

Sexta

Sábado Domingo

Language

Langues

Sprache

Lingue

Idiomas

Lingua

English
Anglais
Englisch
Inglese
Inglés
Inglês

French
Français
Französisch
Francese
Francés
Francês

German
Allemand
Deutsch
Tedesco
Alemán
Alemão

Italian
Italian
Italienisch
Italiano
Italiano
Italíano

Spanish
Espagnol
Spanisch
Spagnolo
Español
Espanhol

RRM968PM_EN_R03

8/23/04, 10:40 AM

7

Summary of Contents for RRM968P

Page 1: ...ion that allows the user to display either 1 the Current Time with Indoor Temperature or 2 the pre set Alarm time with Indoor Temperature on the ceiling wall or any other flat surface In addition theA...

Page 2: ...station setting mode when Radio is On A9 VOL VOL BUTTONS Press to increase decrease the volume when Radio is On Press to increase decrease the values in setting modes Press and hold for 2 seconds to a...

Page 3: ...setting mode C3 PROJECTION ON BUTTON Slide to enable disable continuous projection when Adapter is connected C4 HEADPHONE JACK PROJECTION UNIT D1 180 ROTATION BUTTON Press to flip the projected image...

Page 4: ...antenna for FM radio E3 RESET BUTTON Press to return all settings to default values E4 4 5 V DC JACK WITH RUBBER COVER For AC power adapter installation BATTERY INSTALLATION This unit can be operated...

Page 5: ...up Using AC Power FEATURES Section I Radio Controlled Calendar Clock ABOUT RADIO RECEPTION After battery installation the unit will automatically synchronize its time and date with the radio signal wh...

Page 6: ...alendar Indoor Temperature 2 Clock with Weekday Calendar Indoor Temperature 3 Clock with Weekday Clock 2nd Zone time Indoor Temperature 4 Clock withWeekday 2nd Zone time Calendar 2nd Zone time Indoor...

Page 7: ...his Radio Alarm mode manual tuning cannot be used to set the station Press ALARM to confirm 8 The Volume will then flash Again select the radio volume by using VOL or VOL Press ALARM to confirm and ex...

Page 8: ...activate or deactivate this function in the clock and calendar setting mode please refer to Section SETTING THE CLOCK AND CALENDAR MANUALLY Section II Digitally tuned PLL AM FM Radio HOW TO USE THE R...

Page 9: ...d the sleep function will be activated automatically Section III Indoor Thermometer DISPLAY OF INDOOR TEMPERATURE Once batteries are installed into the main unit it will start to detect and display th...

Page 10: ...service if you handle it carefully Here are a few precautions 1 Do not immerse the unit in water If you spill liquid over it dry it immediately with a soft lint free cloth 2 Do not clean the unit with...

Page 11: ...ume to avoid hearing damage SPECIFICATIONS Radio controlled Calendar Clock Display format 12 or 24 hour Calendar Month Day Second or Month Day Day of Week Day of Week in 5 languages English French Ger...

Page 12: ...ow Voltage Directive 73 23 EC the EMC Directive 89 336 EC and carries the CE marking accordingly Carmelo Cubito Agrate Brianza MI Italy January 2004 Manufacturer s EU R TTE Representative ABOUT OREGON...

Page 13: ...e exist or the Main Unit is located within reinforced concrete wall or shadowed area location Orientation of placement is not at optimum position for reception of clock radio signal LocatetheMainUnitf...

Reviews: