6
GB
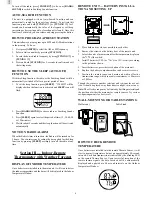
REMOTE UNIT — BATTERY INSTALLA-
TION AND SETTING UP
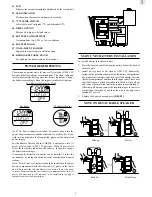
1. Place both units as close as possible to each other.
2. Remove the screws on the battery door of the remote unit.
3. Select the units of measurement for the temperature display on
the
°
C/
°
F slide switch.
4. Install 2 batteries (UM-3 or "AA" size 1.5V) strictly according
to the polarities shown.
5. Insert batteries or press the reset button of the main unit.
6. Replace the battery compartment door and secure its screws.
7. Position the remote sensor and main unit within effective
transmission range, which in usual circumstances, is 80 meters
or 240feet.
Though the sensor is weather resistant, and is meant for use out-
side, it should be placed away from direct sunlight, rain, or snow.
Note: The effective range may be limited by building materials and
the position of either the main unit or remote sensors. Try various
set-up arrangements for best result.
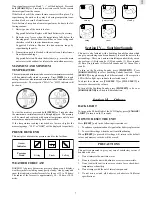
WALL-MOUNTING OR TABLE STANDING
Wall-mount
Table Stand
HOW TO CHECK REMOTE
TEMPERATURE
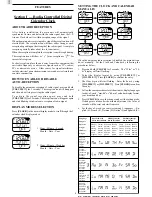
Once batteries are installed into the remote Thermo Sensor, it will
start to transmit temperature data at an approximately 40-second
intervals. Such data transmission is indicated by the blinking LED
on the remote Thermo Sensor. Upon successful reception of the
remote thermo signals the data received will be automatically
displayed and updated at a 40-second intervals on the Outdoor
Temperature Window.
To turn off the radio, press [ POWER
] to do so or [RADIO/
SOUND] to switch to Soothing Sounds function.
AUTO-SEARCH FUNCTION
The unit is equipped with an Auto-Search function and can
automatically search for the next clear channel. To activate this
function, press and hold [TUNING
▲
] or [TUNING
▼
] for 2
seconds and automatically the value of the frequency will keep
increasing or decreasing until a clear channel is found. Once this
function is activated, you can release and stop pressing the button.
HOW TO PROGRAM A PRESET STATION
This unit allows you to program up to 8 FM and 8 AM radio stations
in the memory. To do so:
1. First press [AM/FM] to select the AM or FM frequency.
2. Select a station number by pressing [STATION].
3. Locate the desired radio frequency by using [TUNING
▲
] or
[TUNING
▼
].
4. Press and hold [STATION] for 2 seconds to confirm and exit
the setting mode.
HOW TO USE THE SLEEP (AUTO-OFF)
FUNCTION
With this Sleep function, the radio or the Soothing Sounds will be
automatically switched off after a pre-set period of time.
1. To set the sleep function, press [SLEEP]. “120 MIN” will be
displayed when the function is activated and SLEEP icon will
flash.
2. Press [RADIO/SOUND] to choose radio or Soothing Sounds
Function.
3. Press [SLEEP] again to select the period of time (15, 30, 60, 90
or 120 minutes).
4. Wait for about 5 seconds and the sleep function will be activated
automatically.
NOTE ON RADIO ALARM
When the Radio Alarm is turned on, the Radio will be turned on for
2 hours. You can intervene by setting the time period for the Sleep
function by pressing [SLEEP] or simply turn off the radio at any
time.
Section III — Indoor-Remote
Thermometer with Weather Forecast
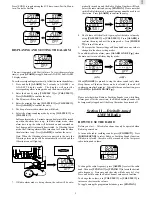
DISPLAY OF INDOOR TEMPERATURE
Once batteries are installed into the main unit, it will start to detect
the indoor temperature and the data will be displayed in the Indoor
Temperature Window.


