4
GB
FEATURES
Section I — Radio-Controlled Digital
Calendar Clock
ABOUT RADIO RECEPTION
After battery installation, the main unit will automatically
synchronize its time and date with the radio signal from the U.S.
Atomic Clock when it is within reception range of the signal.
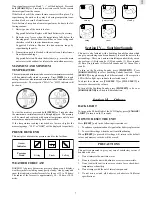
When the main unit is receiving radio signal, the reception icon will
start to blink. The reception icon will show either strong or weak
reception depending on the strength of the radio signal. A complete
reception generally takes about two to ten minutes.
When the reception is complete the reception icon will stop blinking.
The reception icon will show as “ “ for no reception or “
“ for
successful reception.
For best reception, place the unit away from other equipment that
emit radio frequency or microwave signals such as TVs, radios,
PCs or microwave ovens. Other causes for signal interference
include electrical power transmission tower and/or steel reinforced
concrete construction.
HOW TO ENABLE OR DISABLE
AUTO-RECEPTION
To disable the automatic reception of radio signal, press and hold
[VOLUME
▼
] for 2 seconds. The reception icon will disappear
and the unit will stop receiving the radio signal.
To activate the signal reception again, press and hold
[VOLUME
▲
] for 2 seconds. The reception icon will appear again
and start blinking to indicate auto reception of radio signal.
DISPLAY MODES SELECTION
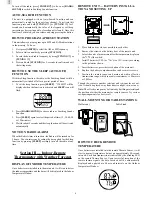
Press [CLOCK] in the normal display mode to scroll through the 2
calendar clock display modes:
1. Hour – Minute – Second
Month – Date – Year
2. Hour – Minute – Weekday
Month – Date – Year
SETTING THE CLOCK AND CALENDAR
MANUALLY
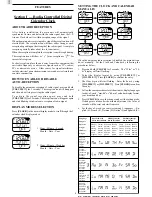
When the automatic radio reception is disabled, the main unit can
be set manually. Set the Clock and Calendar by following the
procedures below:
1. Press and hold [CLOCK] for 2 seconds. The “12-hr” or “24-
hr” display will start flashing.
2. Select the display format by using [VOLUME
▲
] or
[VOLUME
▼
]. Press [CLOCK] to confirm the entry.
3. The Hour digits will start flashing. Enter the hour by using
[VOLUME
▲
] or [VOLUME
▼
]. Press [CLOCK] to confirm
the entry.
4. Follow the same procedures to set the minutes, display languages
for day-of-week, “mm:dd” or “dd:mm” calendar display format,
year, month and day.
5. Press [CLOCK] to save the changes and exit the setting mode.
If changes are made after the minute adjustment, the value of
seconds will be reset and start from zero.
6. For the day-of-week you can select among 5 languages —En-
glish (E), French (F), German (D), Italian (I) and Spanish (S).
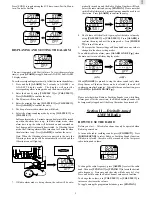
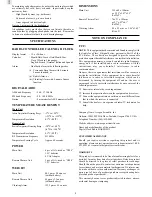
US TIME ZONE SELECTION
Day-of-the-week
Affichage du jour
Wochentaganzeige
Giorno della settimana
Día de la semana
Dia de Semana
Monday Tuesday Wednesday Thursday Friday
Saturday Sunday
Lundi
Mardi
Mercredi
Jeudi
Vendredi Samedi Dimanche
Montag
Dienstag Mittwoch
Donnerstag Freitag
Samstag Sonntag
Lunedí
Martedí
Mercoledí Glovedí
Venerdí
Sabato
Domenica
Lunes
Martes
Miércoles
Jueves
Viernes
Sábado
Domingo
Segunda Terça
Quarta
Quinta
Sexta
Sábado Domingo
Language
Langues
Sprache
Lingue
Idiomas
Lingua
English
Anglais
Englisch
Inglese
Inglés
Inglês
French
Français
Französisch
Francese
Francés
Francês
German
Allemand
Deutsch
Tedesco
Alemán
Alemão
Italian
Italian
Italienisch
Italiano
Italiano
Italíano
Spanish
Espagnol
Spanisch
Spagnolo
Español
Espanhol


