


6. Motion Sensor Reviewing and Changing Your Program
• If using a motion sensor, turn dial to (MOTION SENSOR),
otherwise move to Section 4 .
• Press (STATION) button to select desired station for
programming .
• Use + or – to select the how many minutes the lights will
remain on when motion is detected .
Note: Motion sensor must be connected to controller. (See page
11 for installing a motion sensor.) If a station is set to turn on
with a motion sensor, the motion sensor will only turn lights on
during the programmed lighting duration. Motion Sensors sold
separately (Orbit
®
part number 06730).
If you want to review or change HOW OFTEN, START TIME,
STOP TIME, or MOTION SENSOR, simply follow the directions
again for that option . After reviewing or changing a lighting
schedule, remember to turn the dial back to (AUTO) for
automatic operation .
Note: Door must be closed after setting to prevent water damage.
Section 4:
Additional Features
Manual Lighting
Your Landscape LED Light Controller has the ability to allow
you to manually turn on your lights without disturbing the
preset program .
• Turn the dial to (AUTO) .
• Press the (MANUAL) button .
• Display will show STATION 123 (upper left corner), after a
few seconds or by pressing (ENTER) the controller will
begin manual lighting .
• To specify a specific station, press the (
) buttons to
select desired station or combination of stations .
• Press the (+/-) to choose between manual ON or desired
time from 1 to 240 minutes .
• Press (ENTER) to activate or wait a few seconds for the
controller to begin manual lighting .
• To stop Manual Lighting press (CLEAR) .
• The controller will go back to your original automatic
lighting schedule .
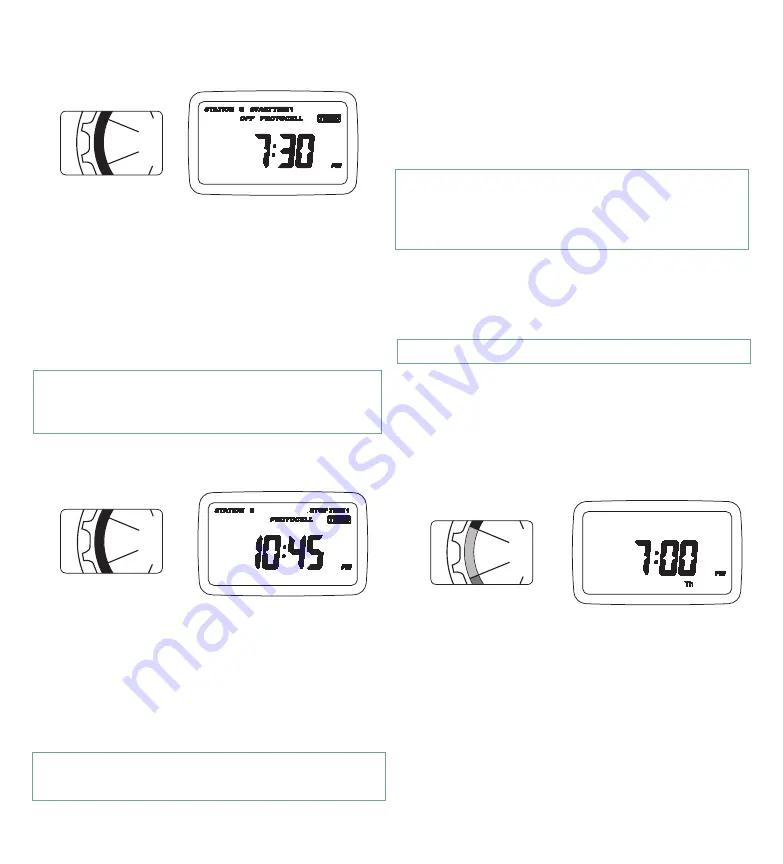
4. Start Time
• Turn the dial to (START TIME) .
• Press (STATION) to select desired station for programming .
• Use
or
to scroll to the [TIMED] option . Press
[ENTER] to select .
• Enter one start time for each lighting station using the +
or – buttons .
• If you desire to turn on a station of lights with a light
sensor, use
or
to select (PHOTOCELL) .
STATION is each lighting station or area that will be lighted . On
this screen the (START TIME) for each station is set .
Note: If you desire lights to turn on a second time during the
same day (or desire an AM scheduling option), set stop times
for each station, turn dial back to START TIME. Then press the
(START TIME 1<- ->2) and set a second start time.
5. Stop Time
• Turn the dial to (STOP TIME) .
• Press (STATION) to select desired station for
programming .
• Use
or
followed by (ENTER) to select (TIMED) .
• Enter one stop time for each lighting station using the +
or – buttons to scroll to the [TIMED] option . Press
[ENTER] to select .
• If you desire to turn off lights with a light sensor, use
or
to select (PHOTOCELL) .
Note: Your prior programming will not be disturbed unless
altered. Always be aware of the station you are in ( 1, 2, or 3 )
when you are making changes.
10
AUTO
OF
F
SE
T
CL
OC
K
SET D
AY
MOTION
SENSOR
STO
P
TIM
E
START
TIME
HO
W
OF
TE
N
AUTO
O
FF
SET
CLO
CK
SET
DAY
MOTION
SENSOR
STOP
TIME
ST
ART
TIME
H
O
W
O
FT
EN
AUTO
OF
F
SE
T
CL
OC
K
SET
D
AY
MOTION SENSOR
ST
OP
TIM
E
START
TIME
HO
W
OF
TE
N
Figure 7: Light Sensor
Adjustment Dial


