background image

Forwar

d-Facing Installation

62

62

Forwar

d-Facing Installation

63

63

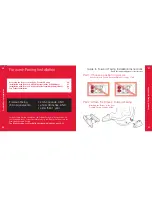
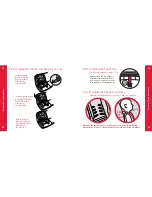
The Braces are two supports (left and right) 
that ensure a stable and secure installation 
of the Toddler Car Seat when installed in 
the car Foward-Facing (without the Orbit 
Base).  They come in a small bag, the 
Brace Bag (Photo A), inside the box with 
your Toddler Car Seat.

If you have misplaced the Braces, 
visit www.orbitbaby.com/support
or call 1-877-ORB-BABY
(1-877-672-2229) for replacements.

Remove the Braces from the Brace Bag 
and pull the Braces apart so they are ready 
to be installed.

On each side of the Toddler Car Seat, 
you will see two Brace Plugs - small grey, 
fi gure-8 shapes. Each Plug has an opening 
that will accept one of the metal rods 
extending from the Brace (Photo B).

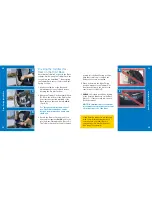
1. Ensure that the Locking Knob on 

each Brace is turned to UNLOCKED.       
(Photo C).

Attaching the Braces to 
the Seat, Forward-Facing

3. Position each Brace on the appropriate 

side of the carseat:  Make sure that the 
RED strip on the Brace matches the 
RED Forward-Facing strip on the label 
near the back of the carseat, and that 
the FRONT OF VEHICLE arrow will face 
the front of your vehicle (Photo D). 

4. Slide both Brace Rods evenly into 

the Brace Plug openings in the shell 
until the Brace is fully docked and you 
cannot see the Brace Rods anymore 
(Photo E).  

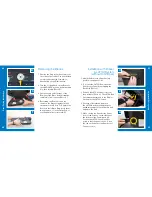
5. Turn the Locking Knob to lock the Brace 

in place by fi rst pushing it in, then 
turning (Photo F).  Tug on the Brace to 
ensure that it is locked in position. 

A small amount of movement is 
normal, but the Brace should not 
pull off.

6. Install the remaining Brace on the other 

side of the Toddler Car Seat by following 
steps 1-5.

A

B

C

D

E

F

Braces

Brace Bag

Summary of Contents for Toddler

Page 1: ...ToddlerCarSeat Manual ...

Page 2: ...ward Facing Installation 56 Attaching the Braces to the Seat Forward Facing 62 Installation with Braces LATCH System without Orbit Base 65 Installation with Braces Vehicle Seat Belts without Orbit Base 68 Top Tether Installation 72 Buckling the Restraint Harness 76 Adjusting the Restraint Harness to Fit Your Child 80 Your Child s Safety Depends on You 5 Expiration Date 8 Registering Your Toddler C...

Page 3: ...yone else using the Orbit Toddler Car Seat reads it carefully as well Before You Begin Not all photos in this manual include the most up to date product specifications Your Child s Safety Depends on You Your Child s Safety Depends on You 5 Expiration Date 8 Registering Your Toddler Car Seat 9 Lock Off Clamp LATCH Connectors Tether Hook Rear Access Panel Restraint Harness Brace Indicator Side Impac...

Page 4: ...7 Secure your child The sections in Securing Your Child provide you with instructions to secure and adjust the Restraint Harness to the proper fit for No child restraint system can guarantee protection from injury in every situation However proper use of the Orbit Toddler Car Seat reduces the risk of serious injury or death to your child Your child s safety depends on you installing and using this...

Page 5: ...gistering Your Orbit Toddler Car Seat DO NOT use the Orbit Toddler Car Seat after the Expiration Date which can be found on the Product Information Label located behind the Rear Access Panel at the rear of the Toddler Car Seat The Product Information Label on the Toddler Car Seat also shows its specific serial number and model number For your convenience you can copy this information into the boxe...

Page 6: ...ld NEVER place Toddler Car Seat on beds sofas or other soft surfaces FALL HAZARD Child s movement can slide Toddler Car Seat NEVER place Toddler Car Seat near edges of counter tops tables or other elevated surfaces Death or Serious Injury Can Occur Some Important Warnings Keep this instruction manual for future use It can be stored in the pocket inside the Rear Access Panel at the rear of the Todd...

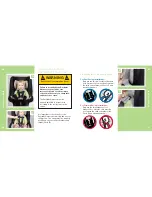
Page 7: ... When installing with the Braces check the level of the Braces Never leave your child unattended in the Toddler Car Seat WARNING Death or Serious Injury Can Occur PROPERLY SECURE THE RESTRAINT HARNESS Child MUST be secured properly by the Restraint Harness at all times whenever the Toddler Car Seat is used in a vehicle or outside of a vehicle STRANGULATION HAZARD Your child can strangle in a loose...

Page 8: ...tion Rear Facing Use 15 35 pounds all children under 1 year of age MUST stay Rear Facing Forward Facing Use Over 1 year old AND 20 50 pounds AND under 49 inches The Right Position for Your Child s Weight and Height Discontinue usage of the Toddler Car Seat when your child grows beyond 50 pounds or 49 inches or his her ears are above the top of the seat back See pages 32 33 Rear Facing Use or pages...

Page 9: ...tion e Installation in this seating location is permitted by the vehicle manufacturer Seat Positions Vehicle Restraint Options Rear Facing Considerations When used Rear Facing the Toddler Car Seat can be docked on the Orbit Base or installed by itself with the addition of the included Braces Safety technicians recommend keeping children in a Rear Facing position for as long as possible Important N...

Page 10: ...es not remain tight or the Toddler Car Seat can move more than 1 inch in any direction your child could be seriously injured in a sharp turn sudden stop or crash Move the Toddler Car Seat to another seating location and try again If in doubt refer to the vehicle owner s manual for specific instructions regarding child restraint use Seat Positions Vehicle Restraint Options cont d Guidelines Never s...

Page 11: ...jury and Death See your Vehicle Owner s manual regarding requirements for using LATCH anchorages with this child restraint system If you are unsure how to identify or use the LATCH system contact the vehicle manufacturer LATCH Connectors must be secured to the vehicle LATCH anchors only Connections to other vehicle components could result in an insecure installation of the Toddler Car Seat Never a...

Page 12: ...ting location that is recommended by the vehicle manufacturer For rear center seating positions that have a center to center LATCH anchor spacing between 11 and 20 inches 280 mm and 500 mm See Image A only use if recommended by the vehicle manufacturer Seat Positions Vehicle Restraint Options cont d Pay careful attention to the type of LATCH anchors and vehicle seat belts that are in your vehicle ...

Page 13: ... Occur Some vehicle seat belts cannot securely hold the Orbit Toddler Car Seat and Orbit Base The vehicle seat belt must hold a child restraint system tightly at all times There are many types of vehicle seat belts Different types of seat belts may even be used at different seating locations within the same vehicle If the vehicle seat belt does not remain tightly adjusted around the carseat or the...

Page 14: ...d child passenger safety technician in your area Do not install the Orbit Base or Toddler Car Seat using any of the vehicle seat belt types listed above Select another seating position or use compatible LATCH anchorage points instead If you determine that there are no acceptable vehicle belt systems in your vehicle contact the vehicle manufacturer for options The following vehicle seat belt system...

Page 15: ...ead the indicated pages for instructions NOTE Your Orbit Base must have a Green Circular Seal to use it with the Toddler Car Seat See page 16 for details Rear Facing child requirements 15 35 pounds all children under 1 year of age MUST stay Rear Facing NOTE Safety technicians recommend keeping your child in a Rear Facing position for as long as possible The Right Position for Your Child s Weight H...

Page 16: ... Toddler Car Seat Part 3B Attach the Braces Rear Facing Part 4B Install the Toddler Car Seat with the Braces See your Orbit Base Manual Installation on the Orbit Base see pgs 37 40 Attaching the Braces to the Seat Rear Facing see pgs 41 44 Braces and LATCH System pgs 45 48 Braces and Shoulder Lap Style Seat Belts pgs 49 51 Braces and Lap Style Seat Belts pgs 52 54 ...

Page 17: ...s 80 87 Adjusting the Restraint Harness to Fit Your Child see pgs 80 87 Discontinue Rear Facing use and use Forward Facing when the child is uncomfortable or the child exceeds 35 pounds and at least one year old Side Impact Brace Chest Clip Headrest YES Only use the two lowest sets of harness slots for Rear Facing installations Harness slots must be at or below the child s shoulders NO ...

Page 18: ...bit Baby or by visiting www orbitbaby com support upgrade All Bases can be used with the Infant Car Seat Option 2 Installation with the Side Impact Braces If you do not own an Orbit Base or are traveling without your Orbit Base the Toddler Car Seat must be installed using the Braces They can be attached and detached from the Toddler Car Seat easily and can be stored in the included Brace Bag Smart...

Page 19: ...r on the Toddler Car Seat is pulled the Toddler Car Seat is not secured properly to the Base see Photo A PINCH HAZARD When installing the Toddler Car Seat on the Orbit Base make sure all fingers and hands are clear of the SmartHub area WARNING When Using the Orbit Base Terms You Need to Know Rear Facing Belt Path Brace Plugs Release Levers Upholstery Lower Panel LATCH Connectors Tether Hook A For ...

Page 20: ...Toddler Car Seat will only lock when For increased comfort and ease of use the Toddler Car Seat can be docked from almost any angle onto the Base rotated into the Rear Facing position Note that it will only lock when the Release Levers are not pulled 4 When locked into the Rear Facing position make sure the Toddler Car Seat does not touch the back of the seat in front of it Photo E 5 CHECK the loc...

Page 21: ...s and seat front when lifting PINCH HAZARD Clear your child s fingers and hands from the Side Handle area The Braces are two supports left and right that ensure a stable and secure installation of the Toddler Car Seat when installed in the car without the Orbit Base They come in a small bag the Brace Bag inside the box with your carseat Photo K Before starting the installation remove the Braces fr...

Page 22: ...ymore Photos O and P 5 To lock the Brace first push the Locking Knob in then turn Photo Q Tug on the Brace to ensure that it is locked in position NOTE A small amount of movement is normal but the Brace should not pull off 6 Install the remaining Brace on the other side of the Toddler Car Seat by following steps 1 5 NOTE The Toddler Car Seat can still be used on the Orbit Stroller when the Braces ...

Page 23: ... Orbit Stroller for later use Removing the Braces 1 Attach the Braces in a Rear Facing position see pages 41 43 2 To access the LATCH Belt open the Rear Access Panel by unclipping the Back Clip Photo U 3 Remove the LATCH connectors from their pockets Photo V The LATCH Belt is permanently attached to the Toddler Car Seat by the LATCH Leash 4 For ease of installation lengthen the LATCH belt by press...

Page 24: ...nter the yellow stitch line of the LATCH Belt on the carseat shell Photo C 10 Secure the open Blue Lock Off Clamp firmly upon the LATCH belt by flipping the two Clamp arms down over the belt and locking them in place Listen for a CLICK Photo D 11 Buckle both LATCH Connectors by pushing onto the vehicle lower anchorage on each sides of the car seat Pull to be sure they are locked to the vehicle s a...

Page 25: ...f your child Do not use until properly installed 1 Attach the Braces in a Rear Facing position see pages 41 43 2 Position the carseat Rear Facing on the vehicle seat The child seat should face the rear of the vehicle The FRONT OF VEHICLE arrow on the Braces should point to the front of the vehicle Photo I 3 Open the Upholstery Lower Panel marked by the Blue Dot Photo J 4 Fully open both arms of th...

Page 26: ...e belt path in various directions the Toddler Car Seat should not move more than 1 inch in any direction If it is loose remove and re install it beginning at Step 3 10 Check that the Toddler Car Seat is level by looking at the Level Indicator on the Brace Photo N If the seat is not level remove the seat and reinstall by repeating Steps 3 to 8 If the Toddler Car Seat cannot be secured tightly and l...

Page 27: ...llation Installation with Braces Lap Style Vehicle Seat Belts without Orbit Base 5 Position the vehicle seat belt through the openings in the shell and the open Blue Lock Off Clamp as shown and buckle the seat belt buckle Photo R 6 Push down on the carseat and press down as you pull on the Lap Belt to tighten it around the child restraint Photo S 7 When tight push down both arms of the open Blue L...

Page 28: ...Car seat in a different seating position b Remove the seat Position a rolled towel underneath it Photo W and repeat steps 2 to 9 c Seek assistance from one of the resources in the Need Help Securing Your Toddler Car Seat and Base page 27 11 Close the Upholstery Lower Panel NOTE The Toddler Car Seat must be property reclined to prevent ejection Do not use until properly installed Installation with ...

Page 29: ... to dock the Toddler Car Seat onto the Orbit Base Forward Facing The Right Position for Your Child s Weight Height see pgs 14 15 Part 2 Attach the Braces Forward Facing Guide to Forward Facing Installation Instructions Read the indicated pages for instructions Attaching the Braces to the Seat Forward Facing 62 Installation with Braces LATCH System without Orbit Base 65 Installation with Braces Veh...

Page 30: ... Braces Shoulder Lap Style Seat Belts without Orbit Base see pgs 68 69 Installation with Braces Lap Style Seat Belts without Orbit Base see pgs 70 71 Always attach the Top Tether if possible Attach the Top Tether over the back of the vehicle seat to an approved anchorage point Part 5 Adjust the Restraint Harness Adjust the Restraint Harness to Fit Your Child see pgs 80 87 Only use the three higher...

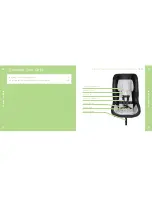
Page 31: ...o Fit Your Child see pgs 80 87 Red Belt Lock Off Clamp LATCH Connectors Tether Hook Rear Access Panel Upholstery Upper Panel Restraint Harness Red strip Side Impact Braces Locking Knob The Forward Facing configuration may be used with children weighing between 20 and 50 pounds under 49 inches tall and over 1 year of age Discontinue use when the child s ears are visible over the top of the child re...

Page 32: ...ing from the Brace Photo B 1 Ensure that the Locking Knob on each Brace is turned to UNLOCKED Photo C Attaching the Braces to the Seat Forward Facing 3 Position each Brace on the appropriate side of the carseat Make sure that the RED strip on the Brace matches the RED Forward Facing strip on the label near the back of the carseat and that the FRONT OF VEHICLE arrow will face the front of your vehi...

Page 33: ...on on the Orbit Stroller remove the Braces and store in the Cargo Pod 1 Install the Braces onto the Toddler Car Seat Forward Facing See pages 62 63 2 Open the Rear Access Panel by unclipping the Back Clip Photo J 3 Remove the LATCH connectors from their pockets Photo K You will notice the connectors are permanently attached to the Toddler Car Seat If you will be attaching the Top Tether later refe...

Page 34: ... the center of the vehicle Photo P 9 Feed the LATCH belt through the Installation with Braces LATCH System without Orbit Base cont d Forward Facing Belt Path in the shell and the Clamp Ensure that the LATCH connectors face the outside of the vehicle Photo Q Center the yellow stitching across the carseat Photo R 10 Secure the open Red Belt Lock Off Clamp firmly upon the LATCH belt by flipping the t...

Page 35: ...aces Shoulder Lap Seat Belts without Orbit Base belt in the first clamp you pass Photo E then position both the shoulder and lap belts through second clamp Photo F Two magnets on the shell help hold the vehicle seat belt s tongue in place for your convenience Buckle the belt 7 If your car is model year 2000 or newer it probably has vehicle seat belts with Auto Retraction Mode consult your vehicle ...

Page 36: ...th arms of the red Belt Lock Installation with Braces Lap Style Seat Belts without Orbit Base Off Clamp closest to the center of the vehicle Photo P 6 Position the belt through the Forward Facing Belt Path in the shell and the open Red Belt Lock Off Clamp Photo P Two round magnets on the shell help keep the seat belt s tongue in place for convenience Buckle the seat belt 7 Push down on the carseat...

Page 37: ...ether Strap extending out from its slot Photo U 3 Determine the shortest path from the child restraint to the Tether Anchorage Top Tether Installation S T U Forward Facing Installation 73 73 Forward Facing Installation 73 73 This may involve raising the headrest so the Tether belt travels directly over the top of the seat Photo V 4 Clip the Tether Hook to the Tether Anchorage Photo W For more slac...

Page 38: ...5 Securing Your Child Terms You Need to Know Toddler Car Seat Adjuster Strap Crotch Buckle Crotch Pad Chest Clip Restraint Harness Shoulder Pads Adjustable Headrest Buckling the Restraint Harness 76 Adjusting the Restraint Harness to Fit Your Child 80 ...

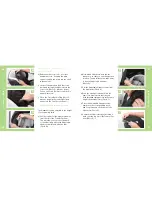
Page 39: ... Buckle and Buckle Tongues when buckling 2 Unbuckle both Buckle Tongues by pushing the Red button on the Crotch Buckle Photo B 3 To hold the harness out of the way secure the Restraint Harness to the sides with the side hook and loop fastener dots Photo C Place your child into the Toddler Car Seat making sure both back and bottom are fully supported by the seating surfaces 4 Position the Restraint...

Page 40: ...hould not allow any slack The straps should lie in relatively straight lines without sagging They should not press on the child s flesh or push the child s body into an unnatural position Buckling the Restraint Harness cont d 13 Proceed to page 80 Adjust the Restraint Harness to Fit Your Child to determine whether your child fits in the Restraint Harness properly and to adjust if necessary To remo...

Page 41: ...t of a sharp turn sudden stop or crash The Restraint Harness must be properly adjusted to fit your child according to the instructions in this section Adjusting the Restraint Harness to Fit Your Child 1 Adjusting the Shoulder Strap Height For Rear Facing Installations Only use the two lowest sets of harness slots Harness slots must be at or below the child s shoulders see Photo C and illustration ...

Page 42: ...f the Toddler Car Seat again and secure each shoulder strap loop entirely onto the Splitter Plate as shown Photo H Adjusting the Restraint Harness to Fit Your Child cont d f CHECK that the straps are secured by pulling on the shoulder straps from the front g CHECK that the upholstery around the shoulder strap slots do not interfere with the free movement of the Restraint Harness h Close the Rear A...

Page 43: ...lstery Photo L e Open the Front Access Panel underneath the carseat Photo M f Find the metal plate under the shell that secures the crotch belt in its slot g To remove the Crotch Buckle turn the metal plate vertical and feed it up through the shell Photo N c If the Shoulder Straps of the Restraint Harness are still too tight after loosening them all the way they can be lengthened by using the alte...

Page 44: ...the Toddler Car Seat Photo V 4 Adjusting the Adjustable Headrest The Headrest can be adjusted to the height of your growing child a Pull the top part of the Upholstery away from the rim of the Toddler Car Seat This will allow you to access the back of the Upholstery where the Adjustable Headrest is attached with two tabs Photo Q Adjusting the Restraint Harness to Fit Your Child cont d h Determine ...

Page 45: ... Toddler Car Seat Terms You Need to Know Using the Toddler Car Seat on the Orbit Stroller 90 Using Your UV Sunshade 94 Using in an Aircraft 96 90 94 96 Rear Access Panel Traveling with Your Toddler Car Seat UV Sunshade Sunshade Fitting Slots LATCH Connector Side Pockets ...

Page 46: ...ransferred to the Stroller you can store LATCH connectors in side pockets while strolling Photo A Tether Storage When transferring the Orbit Toddler Car Seat to the Stroller always store the Tether in the Rear Access Panel so that it does not drag on the ground or become tangled in the Stroller Using the Stroller with Braces The Toddler Car Seat can still be used on the Orbit Stroller when the Bra...

Page 47: ...Toddler Car Seat 93 Only rotate the Toddler Car Seat when the Stroller is stationary and the wheel brakes are locked Always fully support the carseat by firmly grasping it with both hands To ensure full support grasp the Toddler Car Seat with one hand on the side rim and the other on the opposite side of the front rim Always make sure that the seat is locked in Forward or Rear Facing position befo...

Page 48: ...e Sunshade over the rim of the seat Photo G 3 Snap sides of the Sunshade onto the Upholstery snaps Photo H To remove the Toddler Car Seat Sunshade Unsnap the sides of the Sunshade Pull the backside of the Sunshade out from under the rim of the seat Push each Sunshade Fitting out of its slots from the back of the shell as you squeeze the buttons on the Fittings Photo I Be careful as you remove the ...

Page 49: ...Make sure that the aircraft seat belt can be tightly secured around the Toddler Car Seat If the aircraft lap belt is too short ask your flight attendant for a belt extender Using in an Aircraft 3 If installing the Toddler Car Seat Rear Facing it is important to ensure that the back of the carseat will not touch the back of the aircraft seat in front of you both when the aircraft seat is upright an...

Page 50: ... 99 99 Maintaining Your Toddler Car Seat Terms You Need to Know Cleaning 100 Limited Customer Warranty 106 Sunshade Adjustable Headrest Side Tabs Shoulder Pads Shoulder Straps Center Panel Restraint Harness Crotch Buckle Crotch Buckle Flap Rim Upholstery Shoulder Strap Slots ...

Page 51: ...ook and loop fasteners from the behind the Upholstery and pulling it free from the Upholstery Photo C Cleaning 100 5 Unbuckle the Restraint Harness Open the Center Panel from top to bottom by freeing the sides where the shoulder straps enter Photo D 6 Free the Shoulder Pads from the Shoulder Straps and pass the Shoulder Straps through the now open Center Panel to free the Upholstery from the back ...

Page 52: ...e slots they come through the Shell 3 Pull the lap portions of the straps through the slots at the sides of the bottom of the Upholstery Photo I Make sure the straps can move freely through the slots Re Installing the Upholstery 4 Pull the Crotch Buckle back through the buckle opening in the bottom of the Upholstery again making sure to use the same corresponding Upholstery slot as the slot positi...

Page 53: ...ers Do not disassemble the Restraint Harness Cleaning cont d Crotch Buckle and Buckle Tongues If a child eats and drinks in the Toddler Car Seat the Crotch Buckle and Buckle Tongues should be periodically checked and cleaned of any accumulated debris or liquids The Crotch Buckle may be cleaned with a damp cloth or removed see page 84 and thoroughly rinsed with warm water Towel dry Test the Crotch ...

Page 54: ...ear and tear What Orbit Baby will do If you believe the product is defective please return it to Orbit Baby in the manner described below within the limited warranty period If Orbit Baby determines a defect is covered by this limited warranty Orbit Baby will at its option repair or replace the product or components of the product This limited warranty extends to repaired and replacement products a...

Page 55: ...on Label See page 8 Customer Service Replacement Parts If your Orbit Toddler Car Seat and or Orbit Base were involved in a vehicle collision please contact Orbit Baby customer service or go to www orbitbaby com support to find out more about our After Impact Exchange program policies After Impact Exchange ORB300192 Rev 5 1 2009JUN U S Pat No 7 338 122 Other U S Patents Pending European Patent Appl...

Reviews: