background image

5

EN

•  Do not expose the device to indoor use to water or moisture. Do 

not place any containers of water or other liquids on the device.

•  Do not install the device near heat sources or other devices that 

generates excessive heat.

•  Do not place any objects on top of the device that may cause a 

hazardous situation (eg burning candles, etc.).

•  To avoid the risk of electric shock (in the case of equipment 

that operates with hazardous AC power), do not disassemble 

the device or attempt to service it yourself. Leave any electrical 

equipment repairs to qualified service personnel.

Operation/Use 

Caution!

• In places where the use of mobile phones is 

not permitted, or where the device may cause 

interference or danger, for example in hospitals 

and near high-sensitivity electronic medical 

devices, fuels, chemical substances, or places 

where blasting operations are carried out, switch 

off mobile devices with caution.

• Follow all safety instructions and warnings in 

these locations.

• A digital weather station that operates in the 

433 MHz band may interfere with other wireless 

devices or networks.

• If this device is placed too close to other 433MHz 

devices, it may not work properly and may cause 

problems due to radio wave interference.

Warning!

• The manufacturer and the supplier are not 

responsible for improper operation at the location 

where interference occurs.

• If there is any difference in weather forecast 

between the local weather station and this 

device, the weather forecast in the local weather 

station is preferred. The manufacturer is not 

responsible for the incorrect weather forecast 

provided by this device.

Summary of Contents for Meteo

Page 1: ...1EN Instruction manual EN Digital weather station with alarm clock...

Page 2: ...damage to equipment and other material values Safety instructions for operation and use The electrical device is designed and manufactured in such a way as to allow safe operation and use by persons...

Page 3: ...will not be the responsibility of the manufacturer for any damage to health or property Always keep the manual instructions together with the device for future reference and use by new users Use the...

Page 4: ...thod for routine cleaning and maintenance of electrical equipment Do not use chemical solvents or abrasive cleaning items for cleaning Never clean the device in a way that may cause immersion in liqui...

Page 5: ...r for example in hospitals and near high sensitivity electronic medical devices fuels chemical substances or places where blasting operations are carried out switch off mobile devices with caution Fol...

Page 6: ...rformance Technology Frequency band This device uses the 433 MHz unlicensed radio frequency band Certifications This device complies with frequency limits and has been certified to demonstrate complia...

Page 7: ...outside sensor stop using the device immediately If any problem persists contact your nearest ORAVA dealer Power Supplies Battery power The indoor main device can be powered by 3 1 5V AAA batteries In...

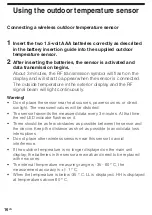
Page 8: ...en the battery compartment 2 Insert 2 1 5V AAA batteries into the battery compartment of the outdoor temperature sensor Observe the correct polarity and marked inside the compartment 3 Close the batte...

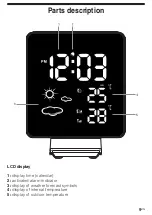
Page 9: ...9EN Parts description LCD display 1 display time calendar 2 activated alarm indicator 3 display of weather forecast symbols 4 display of internal temperature 5 display of outdoor temperature...

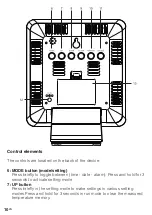
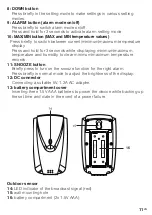
Page 10: ...mode setting Press briefly to toggle between time date alarm Press and hold for 3 seconds to activate setting mode 7 UP button Press briefly in the setting mode to make settings in various setting mo...

Page 11: ...hile displaying minimum maximum temperature and humidity to clear minimum maximum temperature records 11 SNOOZE button Briefly press to turn on the snooze function for the right alarm Press briefly in...

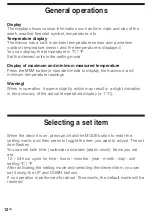
Page 12: ...imum and minimum temperature readings Warning When in operation it warms slightly which may result in a slight deviation in the accuracy of the actual temperature display 1 C Selecting a set item When...

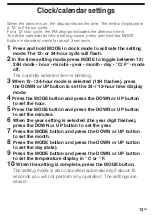
Page 13: ...is selected 12H flashes press the DOWN or UP button to set the 24 12 hour time display mode 4 Press the MODE button and press the DOWN or UP button to set the hour 5 Press the MODE button and press th...

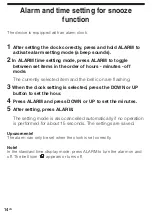
Page 14: ...selected item and the bell icon are flashing 3When the clock setting is selected press the DOWN or UP button to set the hour 4 Press ALARM and press DOWN or UP to set the minutes 5 After setting pres...

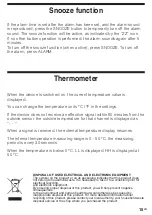
Page 15: ...s displayed as When a signal is received the external temperature display resumes The internal temperature measuring range is 0 50 C the measuring period is every 30 seconds When the temperature is be...

Page 16: ...e sensor near heat sources power sources or direct sunlight The measured values will be distorted The sensor transmits the measured data every 3 minutes At that time the red LED indicator flashes on i...

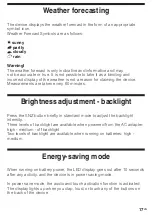
Page 17: ...y 60 minutes Brightness adjustment backlight Press the SNZ button briefly in standard mode to adjust the backlight intensity Three levels of backlight are available when powered from the AC adapter hi...

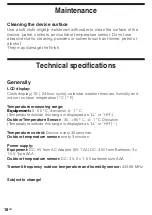
Page 18: ...humidity and indoor outdoor temperature C F Temperature measuring range Equipment 0 50 C deviation 1 C Temperature outside this range is displayed as LL or HH Outdoor Temperature Sensor 30 60 C 1 C De...

Page 19: ...ean Parliament and of the Council The full text of the Declaration of Conformity is available at www orava eu This product meets all the essential requirements of the EU directives that apply to it Pr...

Reviews: