3-8
Installing and Operating the Tablet and Base Station E-Series
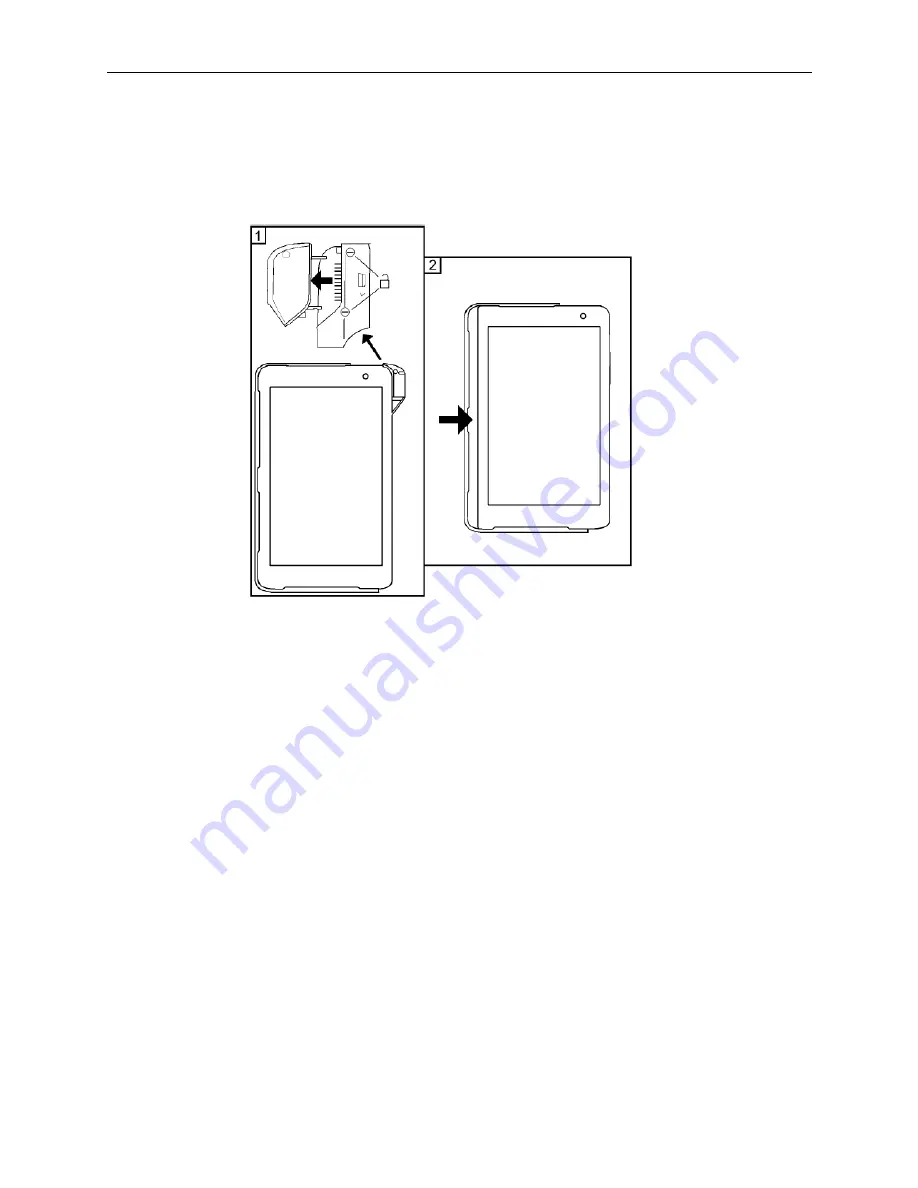
Removing the Tablet E-Series 8 MSR Sleeve
To remove the E-Series 8 MSR Sleeve, follow the instructions below.
1.
Turn the screws to the Unlock position and remove the USB Plug.
2.
Place your thumbnail in the slot shown by the arrow and remove the tablet from the
sleeve.
Figure 3-5 Removing the E-Series 8 MSR Sleeve
Installing the Tablet E-Series 11 MSR Sleeve
To install the Tablet E-Series 11 into the optional MSR sleeve, follow the instructions
below.
1.
Start by inserting the tablet into the sleeve with the Micro and Standard USB
connectors oriented as shown.
2.
Slide and attach the side of the sleeve with the MSR.
3.
Place the unit facedown and, using a small flat blade screwdriver, turn the screws to
the Lock position.
Summary of Contents for e-series
Page 1: ...Oracle MICROS Tablet and Base Station E Series Setup Guide November 2015...
Page 10: ......
Page 36: ......
Page 64: ......
Page 70: ...A 2 Appendix A MICROS Tablet E Series 11...
Page 71: ...Appendix A A 3 MICROS Tablet and Base Station E Series...
Page 72: ...A 4 Appendix A MICROS Tablet and Base Station E Series with Integrated LCD Customer Display...
Page 73: ...Appendix A A 5 MICROS Tablet and Base Station E Series LCD Customer Pole Display...
Page 74: ...A 6 Appendix A MICROS Tablet and Base Station E Series with Integrated Mini Printer...
Page 75: ...Appendix A A 7 MICROS Tablet and Base E Series with Integrated Scanner...
Page 76: ...A 8 Appendix A MICROS Tablet Multi Unit Charger Surface Mount...
Page 77: ...Appendix A A 9 MICROS Tablet Multi Unit Charger Wall Mount...
Page 78: ......


