


3-6
Installing and Operating the Tablet and Base Station E-Series
2.
The unit powers up.
Tablet E-Series 8 - After a few seconds, a circular progress indicator appears.
The MICROS logo is not displayed.
Tablet E-Series 11 - After a few seconds, the MICROS logo appears, followed by
the MSR Status LED flashing Blue, then the circular progress indicator. If
installed on the Base Station E-Series, it powers up as well.
3.
After several seconds, the screen clears and the unit boots to the Windows 8.1 Start
screen.
4.
If previously installed, the MICROS CAL starts. To install CAL, tap the
Install
CAL
icon on the desktop. After the installation completion, CAL starts automatically.
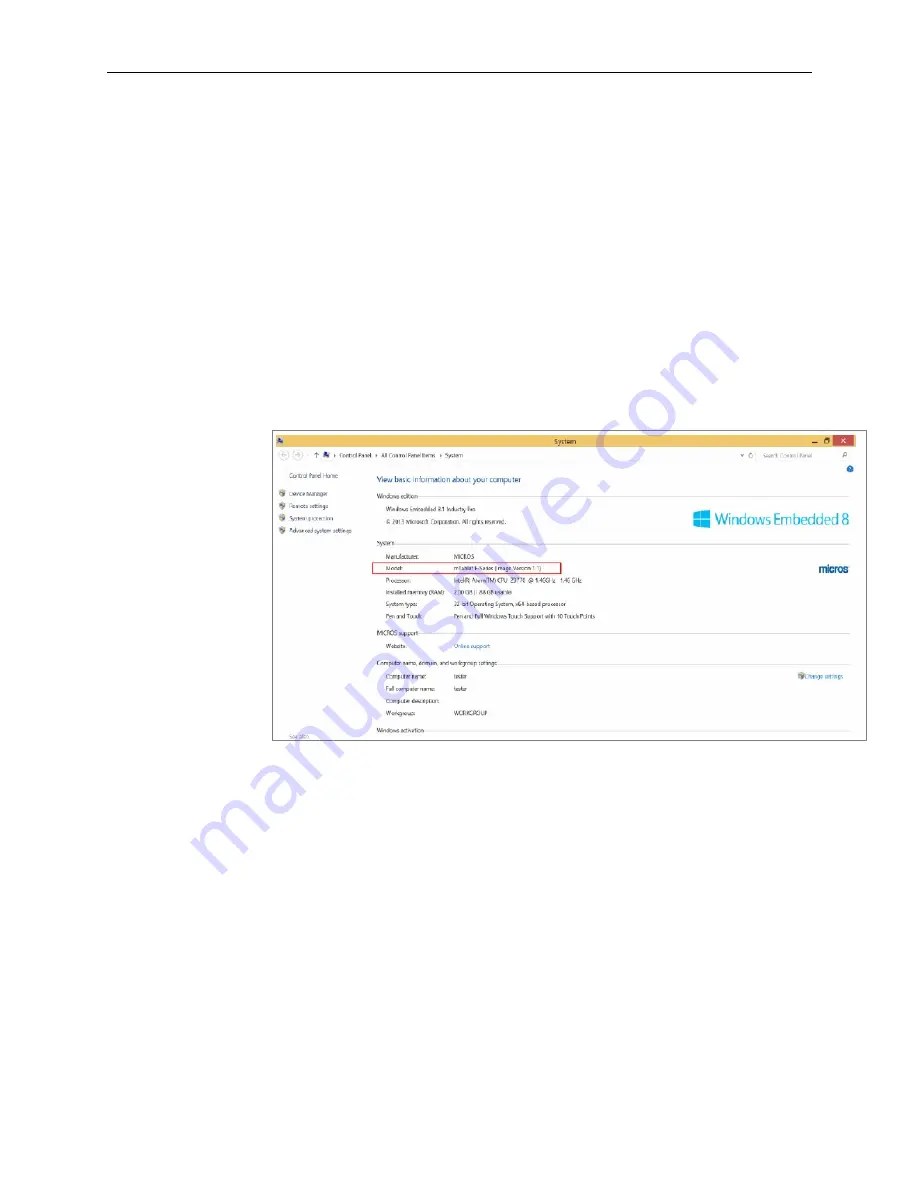
5.
To view the MICROS Image Version or Model number:
a.
From the Start screen, tap
File Explorer
.
b.
Tap the
Properties
icon under the File tab.
c.
The System screen appears. The
Model
is the Image Version and is located in
the
System
section of the screen.
Figure 3-3 Checking the MICROS Windows Embedded 8.1 Image Version
Turning the unit Off from the On state
To turn off the device, press and hold the Power Button until you feel the haptic pulse,
and then release. The Tablet E-Series device powers off.
Enter/Exit Suspend Mode from the ON State
When the Tablet E-Series 8 and 11 are mobile, the Power Button is used to enter/exit the
suspend mode as described below. Suspend mode may not be supported by all
application software.
1.
To enter Suspend from the ON state, press the Power Button for one second, and
then release. The LCD and Battery LED turn off.
2.
To resume operation from Suspend mode, press the Power Button for less than two
seconds. When the display resumes, release the button. The LCD and Battery LED
are restored to the previous state.
3.
To turn off the Tablet from Suspend, press and hold the Power Button for at least five
seconds. When you feel the haptic ‘pulse’, release the Power Button.
Summary of Contents for e-series
Page 1: ...Oracle MICROS Tablet and Base Station E Series Setup Guide November 2015...
Page 10: ......
Page 36: ......
Page 64: ......
Page 70: ...A 2 Appendix A MICROS Tablet E Series 11...
Page 71: ...Appendix A A 3 MICROS Tablet and Base Station E Series...
Page 72: ...A 4 Appendix A MICROS Tablet and Base Station E Series with Integrated LCD Customer Display...
Page 73: ...Appendix A A 5 MICROS Tablet and Base Station E Series LCD Customer Pole Display...
Page 74: ...A 6 Appendix A MICROS Tablet and Base Station E Series with Integrated Mini Printer...
Page 75: ...Appendix A A 7 MICROS Tablet and Base E Series with Integrated Scanner...
Page 76: ...A 8 Appendix A MICROS Tablet Multi Unit Charger Surface Mount...
Page 77: ...Appendix A A 9 MICROS Tablet Multi Unit Charger Wall Mount...
Page 78: ......


