


24
23
Fault Screens and Trouble Shooting
If at any time a fault is identified by the charger the following will appear:
“Check Battery” icon red LED will illuminate.
A fault message will be displayed in the LCD center display.
Below are the OPTIMA
®
Digital 400 LCD fault screens in addition to basic trouble shooting steps.
Verify both leads from the charger are connected to the battery.
Verify connection type (clamps or ring terminal) is correct.
Battery voltage may be too low to accept a charge. Return
battery to dealer for testing. If battery is under 1.25VDC another
battery may be used in parallel to start the charging process,
then be removed.
Verify aux. ring terminal connector is securely plugged into charger.
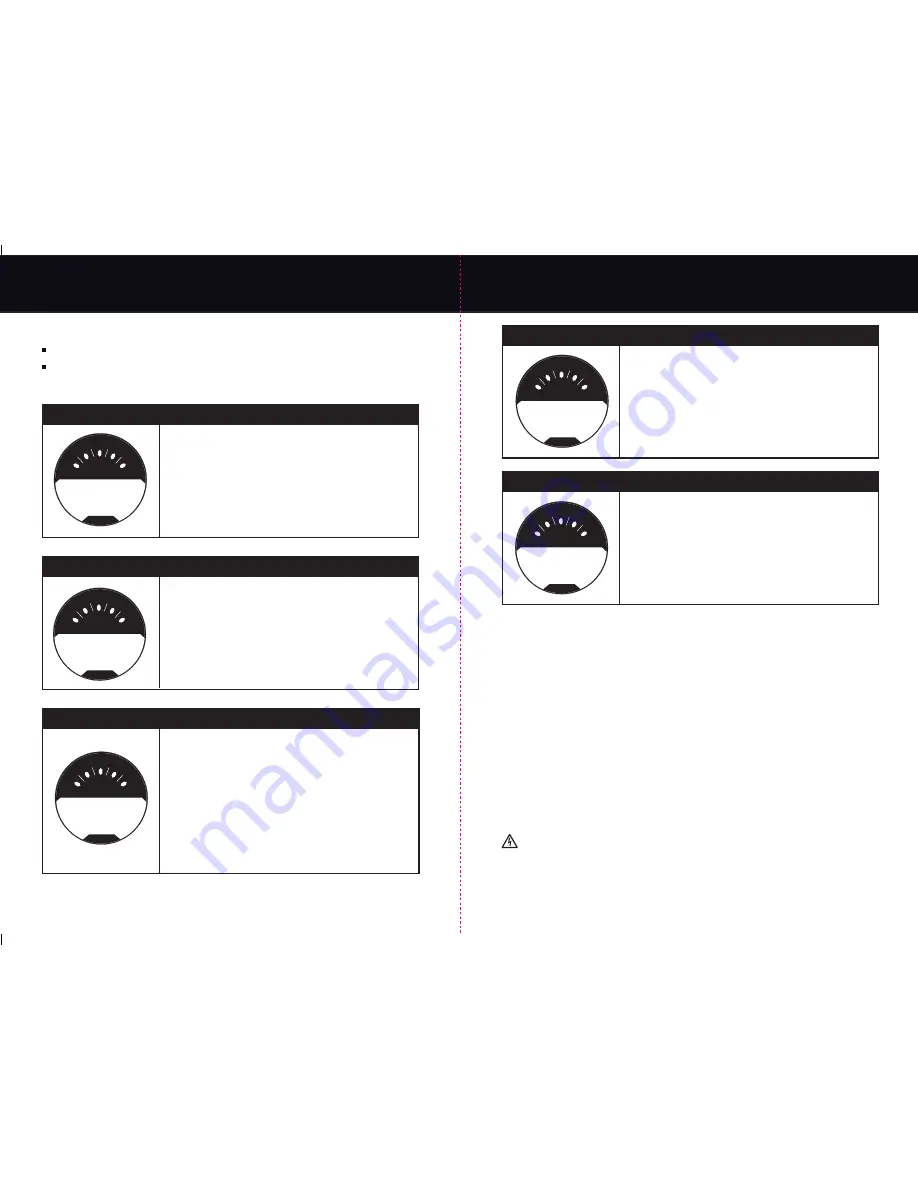
Check Connection or Battery < 1.25V
Reverse Polarity - Wiring Fault
Check connection red postive cable clamp or ring
terminal to positive post.
Check battery voltage with Pre-Charge Status. If greater than
12.0 volts, restart charger once. Do not repeat more than
once. If it fails again, return battery to dealer for testing. For
deep discharge applications we suggest the Digital 1200 for
the improved recovery, faster charging and prolonged battery
life of deeply discharged batteries.
Re-verify battery is a 12 Volt battery versus a 6 Volt battery
or other unsupported voltage.
Unable to Charge - Check Battery
Fault Screens and Trouble Shooting
Other General Trouble Shooting Steps:
Note 1: To clear the charger at any time, unplug the charger and wait until the BLUE AC power
indicator is completely off. For typical negative chassis ground applications, disconnect the
battery by removing the BLACK NEGATIVE (NEG, N, -) cable clamp followed by the RED POSITIVE
(POS, P, +) cable clamp. Re-connect your battery, apply AC power per the guidelines of this
manual and make a quick set selection to re-start the function of your choice.
Note 2: For instances where the charger is properly connected and the AC power cord is plugged
into a properly protected 110 VAC GFCI outlet, there are NO LEDs on and the main center LCD
display is not on, follow these steps:
1. Confirm the GFCI protected outlet has not tripped due to a ground fault.
2. Confirm there is 110 VAC present by plugging in a table lamp or meter.
3. Reset and apply power to resume using the OPTIMA
®
Digital 400.
4. If power is present and there are still no LEDs on and the center display is not working then
follow the customer service return steps on page 26 for warranty or out of warranty service.
Note 3: For instances where LCD backlight is not illuminated - to save energy, LCD backlight
will turn off after 30 minutes. To toggle backlight off/on, press "LCD Backlight" button.
WARNING - AVOID SERIOUS INJURY OR DEATH FROM FIRE, EXPLOSION OR ELECTRICAL SHOCK.
There are no serviceable or replaceable items inside the charger. DO NOT ATTEMPT SERVICE OR
REPAIR AS THIS IS DANGERIOUS AND CAN CAUSE RISK OF EXPLOSION, ELECTRICAL SHOCK OR
LOSS OF LIFE. THIS WILL ALSO VOID ALL WARRANTY COVERAGE.
Out of Range - Battery > 17V
Battery voltage is high. Check to see if there is another
battery connected (remove additional battery). Verify there
is not another charger or maintainer source that is connected
or on. Remove if either is present.
Ensure engine is off. Have a dealer check your battery
and/or charging system.
Charger Hi-Temp - Fault Condition
Ambient temperature and/or unit temperature are too high
to charge at this time.
Charger will automatically resume charging when appropriate.
If recharging a deeply discharged battery it is not uncommon
for the charger to enter the Hi-Temp fault condition in order
to protect the charger and battery. Charger will automatically
resume charging in 3 to 15 minutes depending on the ambient
temperature and condition of the battery. Do not cover or
enclose unit - Use either by hanging with the unit hood latch,
hook wall bracket or on a flat surface with the kickstand.
Digital 400
Digital 400
see manual
Volts DC Amps DC
F
E
50
25
0
75
100
% Charge
REVERSE POLARITY
WIRING FAULT
00.0 0.0
see manual
Volts DC Amps DC
F
E
50
25
0
75
100
% Charge
CHECK CONNECTION
OR BATTERY<1.25V
00.0 0.0
see manual
Volts DC Amps DC
F
E
50
25
0
75
100
% Charge
CHARGER HI-TEMP
FAULT CONDITION
00.0 0.0
see manual
Volts DC Amps DC
F
E
50
25
0
75
100
% Charge
UNABLE TO CHARGE
CHECK BATTERY
00.0 0.0
see manual
Volts DC Amps DC
F
E
50
25
0
75
100
% Charge
OUT OF RANGE
BATTERY>17V
00.0 0.0