20
280ES / 420ES / 650ES / 1000ES / 1400ES
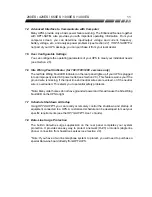
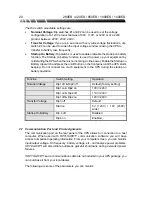
The Dip switch adjustable settings are:
•
Nominal Voltage:
Dip switches #1 and #2 can be used to set the voltage
configuration of a 1x0V product between 100V, 110V, or 120V or of a 2x0V
product between 220V, 230V, 240V.
•
Transfer Voltage:
If you are in an area with very wide voltage fluctuations, dip
switch #3 can be used to widen the input voltage window causing the UPS to
transfer to battery less frequently.
•
Startup On Battery:
Dip switch 4 is used to enable or disable the startup on battery
function. The Startup on battery function is used to power up your equipment by
cold starting the UPS when there is no incoming ac line power. Enable the Startup on
Battery dip switch and press the on/off button on the front panel until the UPS starts
beeping. Do not connect too much equipment to the UPS during the startup on
battery operation.
Function
Switch Setting
Operation
Nominal Voltage
Dip1 off & Dip2 off
Default (factory setting)
Dip1 on & Dip2 on
100V / 220V
Dip1 on & Dip2 off
110V / 230V
Dip1 off & Dip2 on
120V / 240V
Transfer Voltage
Dip3 off
Default
Dip3 on
5V (120V) / 10V (230V)
wider
Startup On Battery
Dip 4 off
Disabled
Dip 4 on
Enabled
2.7 Communication Port and Pin Assignments
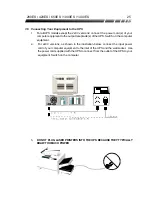
The communication port on the rear panel of the UPS allows for connection to a host
computer. When used with
OPTI-SAFE™+
communication software you will have
access to important operating information. From your computer screen, you can monitor
input/output voltage, AC frequency, battery voltage, etc., and analyze power problems.
OPTI-SAFE™+
will also initiate automatic graceful shutdowns during extended power
failures.
If
OPTI-SAFE™+
and a communication cable are not included in your UPS package, you
can purchase it from your local dealer.
The following are some of the parameters you can monitor:


