background image

Optelec 

ClearView One 


English 

Page 6 

4.  Operation 

When using the ClearView One, place your hands on the wrist support at the front of the 
table for easier access to the control buttons, and for steady table movement.  


Operation 

– Switching ON / OFF  

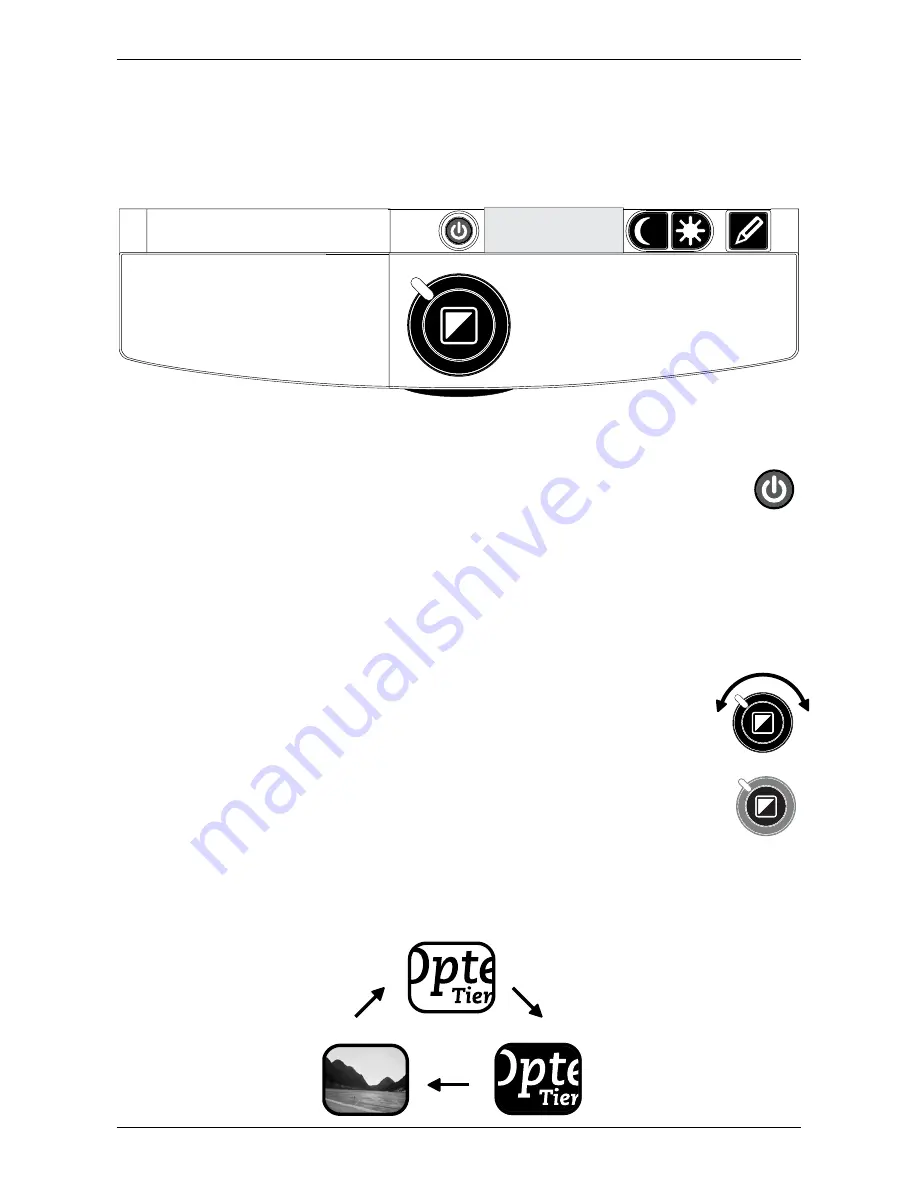
To  power  the  system,  press  the  ON  /  OFF  button  that  is  located  right  above  the 
magnification  button  on  the  reading  table.  The  ClearView  One  will  start  up  in  the 
same viewing mode as when it was powered off. 
 
It  takes  about  10  seconds  for  the  camera  unit  to  initialize  before  it  displays  an  image. 
Within  about  1  minute,  the  ClearView  One 

system’s  light  source  will  achieve  full 

brightness, providing optimal image quality. 

 
Please  note

 that a non-Optelec supplied monitor may have additional controls and need 

to be switched on and off separately.  
 

Adjusting the magnification  

Locate  the  zoom  button  in  the  centre  of  the  table,  and  turn  it  clockwise  to 
increase the magnification, and counter-clockwise to decrease it.  
 

Choosing viewing modes  

Pressing this button will cycle you through 3 different viewing modes: 

1-  Photo mode full colour

;


2-  Reading mode

: This mode enhances the foreground / background contrast. 

Pictures and text will be displayed in high contrast black and white; 

3-  Reverse  reading  mode

This mode reverses the chosen background and foreground 

colour combinations of the reading mode. 


Summary of Contents for clearview one

Page 1: ...A Version 1 1 Copyright 2010 Optelec the Netherlands All rights reserved Optelec P O Box 399 2993 LT Barendrecht The Netherlands Telephone 31 0 88 6783 444 Fax 31 0 88 6783 400 E mail info optelec nl...

Page 2: ......

Page 3: ...iance 9 10 Specifications 10 Contact information 11 Optelec was founded in 1975 in Rockanje the Netherlands Since 1975 Optelec has been developing and producing innovative products to assist visually...

Page 4: ...2 Safety and Care Please read the instructions carefully before setting up your ClearView One Keep this user manual for future reference Use the ClearView One indoors Do not expose the ClearView One t...

Page 5: ...VGA compatible monitor or TV Your ClearView One system consists of the following A base unit with a reading table and integrated control panel The ClearView One electronic box with the camera module...

Page 6: ...arView One system s light source will achieve full brightness providing optimal image quality Please note that a non Optelec supplied monitor may have additional controls and need to be switched on an...

Page 7: ...any time When switching the ClearView One on the system will start up in the auto focus mode Pressing the auto focus lock button stops the ClearView One from continuously focusing on the object being...

Page 8: ...le by squeezing the red button located under the front of the table Inspect the tracks for dust or any other obstructions 7 Contacting Product Support If you have questions about operating installing...

Page 9: ...r than those specified and sold by the manufacturer of the ClearView One as replacement parts for components may result in increased emissions or decreased functioning of the ClearView One 10 Specific...

Page 10: ...glish Page 10 Humidity 70 no condensation Storage transportation conditions Temperature 10 C to 40 C Humidity 95 no condensation Date of first issue June 2010 Updated March 2012 Optelec Barendrecht th...

Page 11: ...ec Canada Inc 1832 Boulevard Marie Victorin Longueuil QC J4G 1Y9 Canada T 1 0 450 677 1171 www optelec ca Optelec GmbH Fritzlarer Strasse 25 34613 Schwalmstadt Germany T 49 0 6691 96170 www optelec de...

Page 12: ...Optelec ClearView English Page 12 Optelec US Inc 3030 Enterprise Court Suite C Vista CA 92081 U S A T 1 800 826 4200 www optelec com...

Page 13: ...www optelec co uk...

Reviews: