


3
Unpack all hardware and ensure that all components are included.
(See
What's Included
in the Table of Contents.)
Connect all peripherals (i.e. keyboard, mouse, monitor, etc.)
Connect the network cable to the RJ45 Port (Ethernet Jack) Primary LAN Network.
Power on the unit. Wait for the Windows Desktop to appear.
Note:
The primary active network interface card (NIC), used for the Local Area
Network is set to IP address: 192.168.1.110. If you want to change this IP address,
use the Ocularis IP Configuration Utility.
Do I need to change my IP address? If you are not sure, contact
.
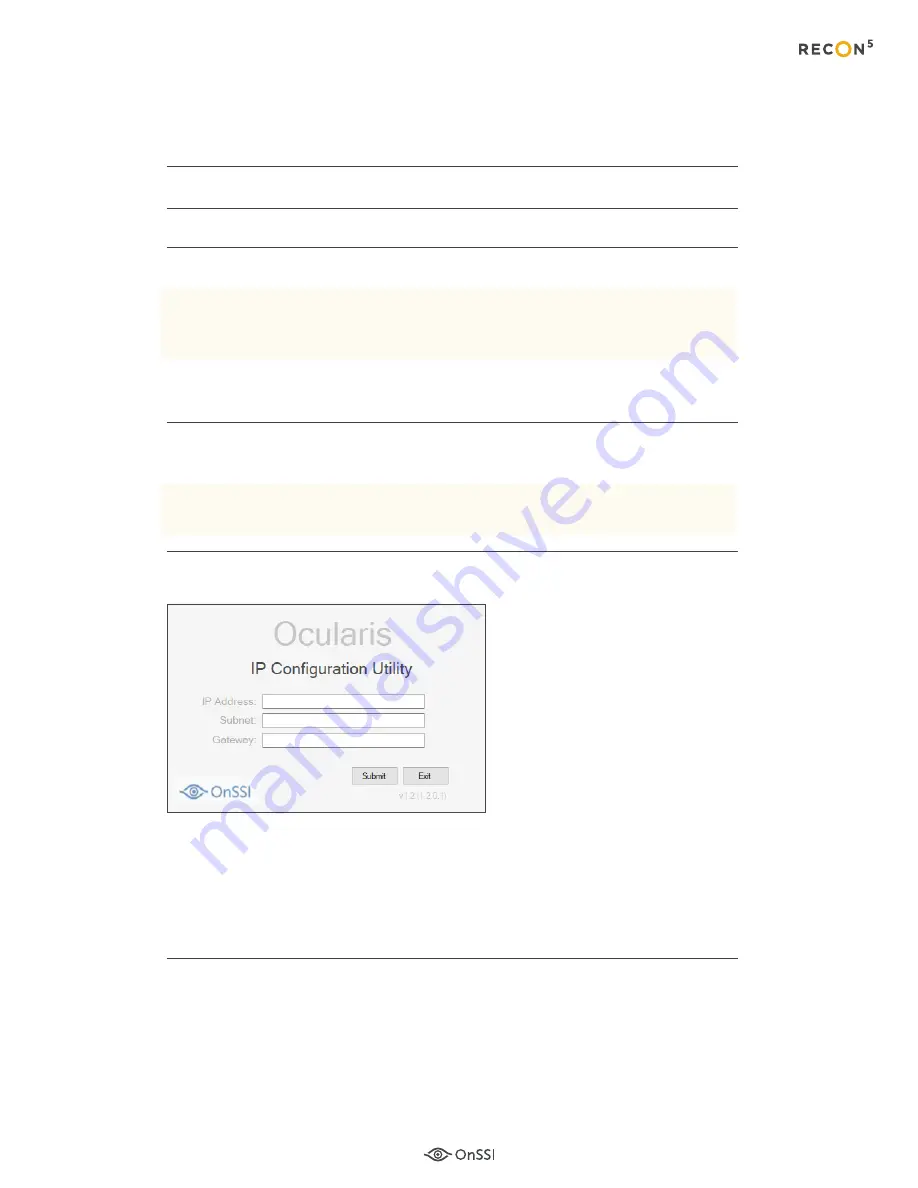
Right-click the 'Ocularis IP Configuration Utility' icon on the Windows Desktop
and select ‘Run as administrator’.
Note:
In order for the IP Configuration Utility to work properly, the unit's IP address
must be 192.168.1.110.
In the Ocularis IP Configuration Utility:
a. Enter the new
IP Address
.
b. Enter the new
Subnet
.
c. Enter the new
Gateway
.
d. Click
Submit
. You should see a progress bar and then a
pop-up that the IP Address was successfully changed.
e. Click
Exit
.
You are done with initial setup.
Note:
The second active network interface card (NIC), used for the camera
connections, is set to IP address: 192.168.2.110. If you want to change this IP
address, use the standard Windows IP configuration steps (see Windows
Control Panel.)
1
2
3
4
5
6
7
Figure 1
IP Configuration
Utility
SETTING UP A SYSTEM
RecOn5 Quick Start Guide
Summary of Contents for RecOn5
Page 1: ...Quick Start Guide RecOn5 NVR RecOn5 Server...
Page 23: ......


