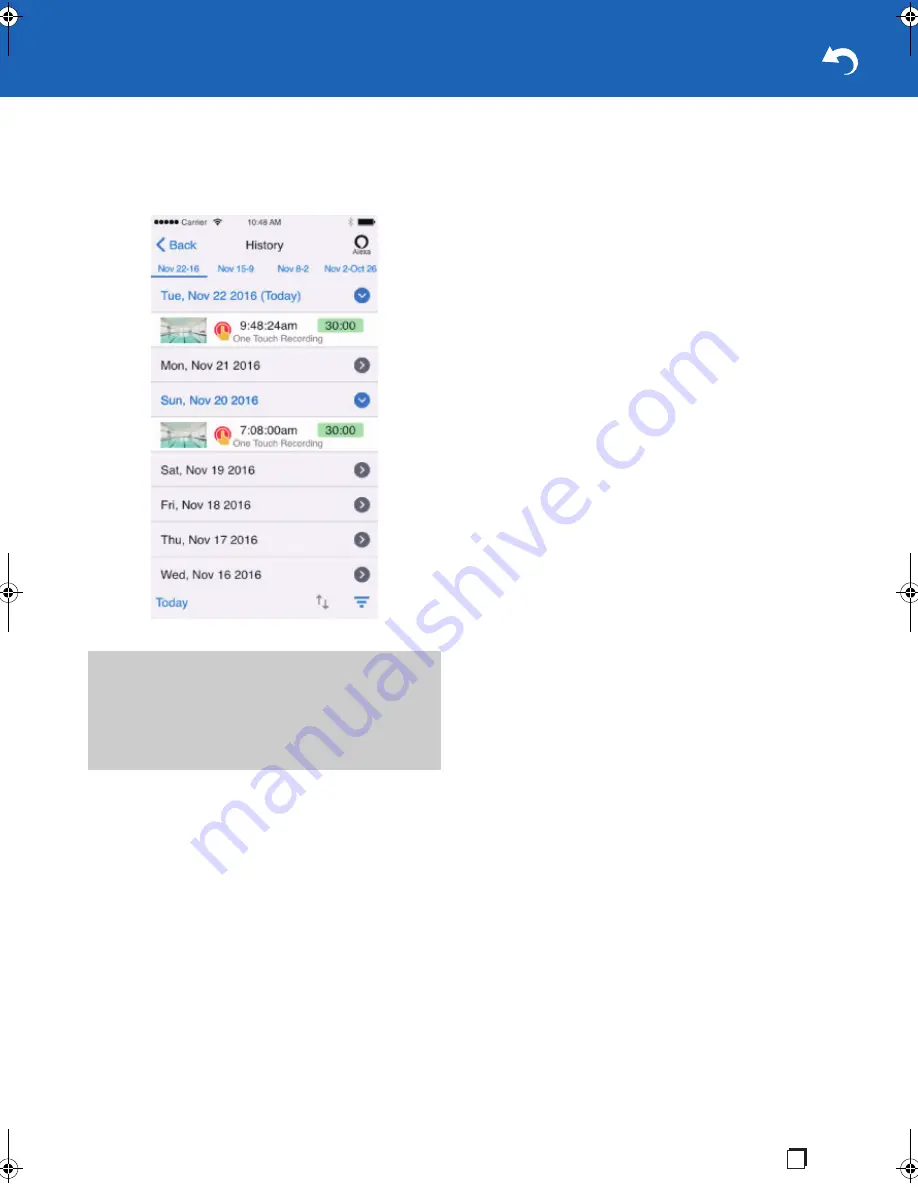
Onkyo VC-FLX Instruction Manual Download Page 19

19

En

History Screen

Recording history on the cloud is displayed on the 

History


screen. Up to 64 Notification History will be stored.
In addition, you can change order of the list according to the 
cause of recording.

* The screen appearance is subject to change without notice.

Important

0

Cloud recording is executed only for users who 
purchase account services.

0

If you do not buy the services, the history of temperature 
and humidity is displayed.

0

The history retention period varies depending on the 
account service you bought.

SN29403199_VC-FLX_En_1708xx.book  19 ページ  2017年8月4日 金曜日 午後5時4分

Summary of Contents for VC-FLX

Page 1: ...4 Parts Name 6 Light Ring Status 8 Preparation and Setup 9 Initial Setup and Pairing 10 Items on Home Screen 13 Setting Manager Screen 14 Sensors Manager screen 15 Rules Manager Screen 18 History Scre...

Page 2: ...age ACCORDINGLY ONKYO Corporation ITS AFFILIATES AND SUPPLIERS DISCLAIM ANY AND ALL LIABILITY ARISING OUT OF THE USE OF THE PRODUCT IN ANY CRITICAL APPLICATIONS IF YOU USE THE PRODUCT IN A CRITICAL AP...

Page 3: ...risk of interference to other devices or services is perceived or identified as harmful If you are uncertain of the policy that applies on the use of wireless devices in a specific organization or en...

Page 4: ...connect to the Toshiba Smart Home Services a cloud based service and use the Toshiba Smart Home App As part of the setup you will be required to agree to the applicable Terms of Service and Privacy P...

Page 5: ...other server issues During such a time the Alexa function of the product may not function properly or may be restricted Trademarks The Spotify software is subject to third party licenses found here h...

Page 6: ...y to activate Bluetooth pairing mode Press and hold for about 5 seconds to activate Wi Fi pairing mode Note 0 Each pairing mode is activated for 60 seconds 2 USB terminal The USB terminal is for servi...

Page 7: ...7 En Accessory AC adapter...

Page 8: ...s found Lights up green This unit is in its normal status Flashes blue slowly This unit is searching for a nearby wireless router Flashes red slowly This unit is unable to find a wireless router This...

Page 9: ...e app Download the Toshiba Smart Home app to your smartphone or tablet from the App Store or Google Play The app is where you will control most of the features and settings of the unit 4 Start the Tos...

Page 10: ...Plug in your unit Plug the included AC adapter into your unit and connect to an AC outlet When you first plug in the light ring will be white When this unit is ready for the next step the light ring w...

Page 11: ...s router and tap Done 8 When the screen below appears confirm the message and tap Go to Pairing to pair with this unit 9 Tap OK on the displayed screen Pairing with this unit is now completed 10 Log i...

Page 12: ...a Smart Home app 2 Tap Add User 3 Enter the invitation code you received 4 Tap Done 5 Tap on the Home screen 6 Tap Account 7 Tap Login 8 Enter the ID and password used for your smartphone already conn...

Page 13: ...ry 6 Rules button Tap to display the Rules Manager screen Rules Manager Screen P18 7 Sensors button Tap to check control the status of Z Wave ZigBee Internal sensors or to display the screen to add re...

Page 14: ...r photo applied for the zone as a background Note 0 Select a photo for the background from that registered to app 6 Sensors Displays the sensors manager Sensors Manager screen P15 7 Camera Tap to perf...

Page 15: ...Turning on off electric appliances You can turn on off the electric appliances such as a lamp 0 Increasing decreasing levels You can dim or brighten a room lamp for example 0 Binary sensor You can se...

Page 16: ...below appears 4 Operate the sensor you are adding so that the app can find it Refer to the instruction manual supplied for the sensor for details When the app finds a sensor the screen below appears...

Page 17: ...yed screen 4 Confirm the message on the bottom and then tap on the message 5 Tap Delete sensor on the displayed screen 6 Tap OK on the displayed screen The sensor has been deleted Editing a sensor On...

Page 18: ...ap Add New Rules Follow the instructions on the displayed screen Editing Rules 1 Tap an item to edit on the Rules Manager screen The Edit Rule screen appears 2 Tap an item to edit on the Edit Rule scr...

Page 19: ...er of the list according to the cause of recording The screen appearance is subject to change without notice Important 0 Cloud recording is executed only for users who purchase account services 0 If y...

Page 20: ...is completed Initial Setup and Pairing P10 1 Make sure this unit is plugged in 2 Make sure Wi Fi is activated on your smartphone to connect 3 Play an audio source on your smartphone When You Use the u...

Page 21: ...se decrease the speaker volume of this unit 5 Siren button Tap to sound a siren like sound When you want to start tap this button and then tap OK on the next screen Tap this button again to stop the s...

Page 22: ...hold the Microphone mute Talk button to start up Amazon Alexa Amazon Alexa starts up and this unit is ready for your command 3 Talk to this unit to ask it for an operation Sensors on the unit This uni...

Page 23: ...phone Check4 Check the volume level of this unit and the application on your smartphone Cannot View Image from Live Video Check1 Make sure this unit is plugged in Check2 Make sure this unit s lens cov...

Page 24: ...LED Top Mic mute indicator 2 Red LED Top Mode indicator 7 colors LED Front Recoding indicator 1 Red LED Front Internal camera Maximum resolution 1080p Angle horizontal 114 degree vertical 78 degree d...

Page 25: ...fr For Product Support Team Only 1 800 229 1687 http www us onkyo com 2 3 12 Yaesu Chuo ku Tokyo 104 0028 JAPAN http www onkyo com Hong Kong Unit 1033 10 F Star House No 3 Salisbury Road Tsim Sha Tsu...

Reviews: