Page 7
SKU 96622
For technical questions, please call 1-800-444-3353.
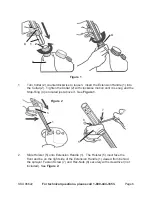
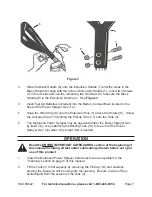
Figure 3
6
6
8
7
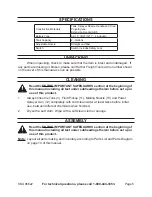
Slide the Black Handle (6) onto the Extension Handle (1) until the holes in the
Black Handle (6) align with the holes in Extension Handle (1). Insert two Screws
(7) in front holes and use the remaining two Hex-Nuts (8) to secure the Black
Handle (6) to the Extension Handle (1). See
Figure 3.
Insert four AA Batteries (included) into the Battery Compartment located in the
base of the Power Sprayer Gun (12).
Snap the Wand Clip (9) onto the Extension Pole (1) above the Holster (5). Screw
the Universal Cap (10) holding the Pickup Tube (11) onto the Tank (3).
The Motorized Power Sprayer may be used with either the Power Sprayer Gun
by itself (12), or by attaching the Misting Tube (13) to the end of the Power
Sprayer Gun (12) when only a light mist is needed.
operation
read the entire important saFeguards section at the beginning of
this manual including all text under subheadings therein before set up or
use of this product.
Clean the Motorized Power Sprayer before each use as explained in the
“Cleaning” section on page 5 of this manual.
Fill the Tank (3) to full capacity by removing the Fill Cap (14) and carefully
pouring the liquid you will be using into the opening. Be sure to wipe off any
spilled liquid from the exterior of the Tank (3).
3.
4.
5.
6.
1.
2.


