background image

8

9

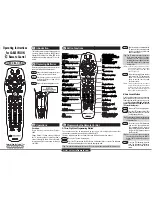
Using The Valet / Override Switch 


The 

Valet


/Override Switch

 can be used to place the system into 

Valet 

Mode

, which is used to stop or interrupt any automatic system functions which 

may be programmed to operate.  The Valet/Override Switch, in conjunction 

with your ignition key, also permits 

System Override

, which allows starting the 

vehicle if the optional starter interrupt is installed, and the transmitter becomes 

lost or damaged. 


Valet Mode: 

 You may activate the Valet Mode at any time by press-

ing and holding the Valet/Override Switch for 3 seconds, unless the doors have 

been locked by the transmitter

 (in which case the Status Indicator will be flash

-

ing slowly).  When the system enters Valet Mode, the Status Light will illuminate 

solid steady Red. If the REC-12 is installed with audible confirmation, the sys

-

tem will chirp twice when it enters Valet Mode.  Remember to check the Status 

Light - if it is not lighted or flashing fast, the system may be placed into Valet 

Mode. If the Status Light is on steady, the system is already in Valet Mode. If 

it’s flashing slowly, a System Override must first be performed (see next page).


While the system is in the Valet Mode, the Status Light will remain solid 

Red (not flashing) at all times. If the audible confirmation is connected, every 

time the ignition switch is turned “off”, the system will chirp once as a reminder 

of this condition.  Also, the  transmitter will operate normally while the system 

is in Valet Mode, i.e., it will still lock and unlock the doors, and the transmitter’s 

“TRUNK” and “

...

“ buttons will still operate - but the optional Starter Disable 

will not operate, and any programmed automatic functions are suspended.   


To exit Valet Mode

 simply press and release the Valet Switch at any 

time; the Status Light will change from being on solid steady Red to being off.


System Override:

  If the last system operation was locking the doors 

by the transmitter, a System Override is required before then placing the 

system into Valet Mode, or starting the engine if the optional  Starter Disable is 

installed.  To obtain a System Override:

Step 1

   Enter the vehicle normally.

Step 2

   Using your key, turn the ignition “ON”. 

Step 3

   Within 5 seconds, press and release the Valet Switch once.  The Status


  Light will turn off.

1

2

3

Summary of Contents for REC-12

Page 1: ...PYRIGHT OMEGA RESEARCH DEVELOPMENT 2009 This product is designed for professional installation only REC 12 DELUXE KEYLESS ENTRY SYSTEM OWNER S INSTALLATION MANUAL production manual has full color cove...

Page 2: ...ifferent transmitters Each transmitter is embedded with a unique security code and can only operate one system at a time It has 4 buttons a LOCK button an UNLOCK button a TRUNK button and a button whi...

Page 3: ...ribed on pages 10 11 Transmitter Functions Reference Guide LOCK Press and release the LOCK button The horn will honk once the lights will flash oncE The doors will lock the optional starter interrupt...

Page 4: ...rovide visual audible confirmation when activated ACTIVATE 5TH CHANNEL Press and release the TRUNK buttons simultaneously Consult your installer about this optional feature there is no visual or audib...

Page 5: ...already in Valet Mode If it s flashing slowly a System Override must first be performed see next page While the system is in the Valet Mode the Status Light will remain solid Red not flashing at all t...

Page 6: ...stem s memory These indicators are part of the Automatic Transmitter Verification operation This indicator will flash for 10 seconds after the vehicle s ignition is turned ON Visual Confirmations The...

Page 7: ...L The Starter Disable output activates whenever the doors are locked via the transmitter except in valet mode It can be configured to activate automati cally by configuring programmable feature 9 Prog...

Page 8: ...configured as an additional light flash output for vehicles with split parking light systems This should only be configured by the installer Feature 7 Flashing light relay output Default setting Flas...

Page 9: ...e starter disable will engage The only way to cancel the sequence is to turn the ignition OFF back ON then within 10 seconds press the valet switch If you plan to utilize this feature it is ideal to m...

Page 10: ...times for the 2nd transmitter 3 times for the 3rd etc the status light will flash once to indicate learn and twice for the 2nd remote etc The system will exit transmitter programming if 10 seconds pas...

Page 11: ...it into the corre sponding port Wiring Connections Main 5 pin harness BLACK Chassis Ground This wire supplies ground for all of the system s operations Connect this wire to the metal structure of the...

Page 12: ...ature 7 WHITE BLACK wires Domelight Supervision Output By default these wires will turn on the vehicle s interior lights for 30 seconds after unlocking by the transmitter Connect the FUSED wire to eit...

Page 13: ...s Doorlock Relay Control Unit Doorlock Switch Doorlock Switch Doorlock Switch 3 Wire Negative Doorlocks With The Optional DLS And 2 SPDT Relays 3 Wire Negative Doorlocks With All Unlock Function Usin...

Page 14: ...n You would still connect the LOCK circuit as described but would utilize the PINK UNLOCK 2 output wire instead of the BLUE UNLOCK 1 output wire to activate the vehicle s UNLOCK circuit The BLUE wire...

Page 15: ...put for trunk release Yellow wire Ignition 12 volts Black wire Chassis ground Red wire Constant 12 volts Pink 3rd Channel Output Brown Horn Output Yellow Green OEM Alarm Disarm Output White Parking Li...

Page 16: ...ter Ign Off After Unlock Ign Off Unlock OFF 10 Anti Carjacking Ignition Remote Ign Remote OFF 11 Lights On After Unlock ON OFF 12 Button Function 3rd Ch Pulse 3rd Ch Latch 3rd Ch 30 Sec Panic This dev...

Page 17: ...nal owner during the lifetime of the car in which it was originally installed All products for warranty repair must be sent postage prepaid to Omega Research Development Inc P O Box 508 Douglasville G...

Reviews: