background image

Before You Begin

Table of Contents 

Quick Task Index

1.

Preparation

2.

Shooting

3.

Playback

4.

Menu Functions

5.

Connecting the camera to a 
smartphone

6.

Using Field Sensor Data

7.

Connecting to a Computer

8.

Cautions

9.

Troubleshooting

10.

Information

11.

SAFETY PRECAUTIONS

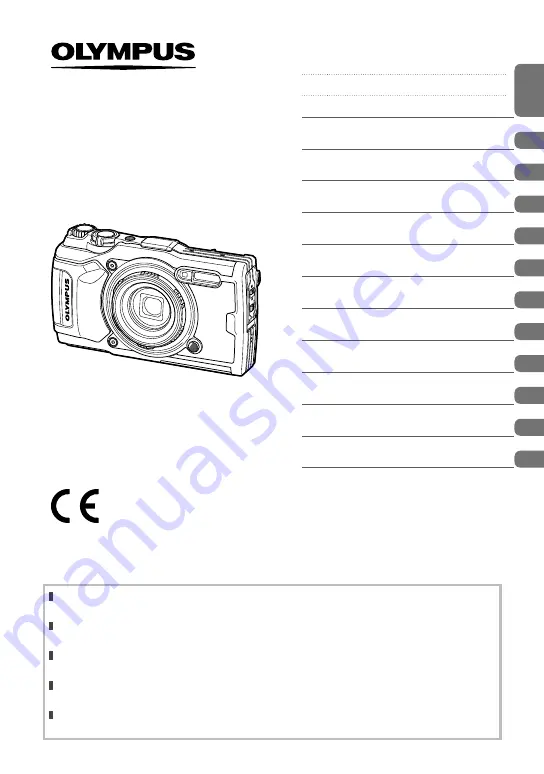
Model No. : IM015

TG-6

Instruction Manual

DIGITAL CAMERA

  Thank you for your purchase of an Olympus digital camera. Consult this manual while 

operating the camera to ensure that you are using the product safely and correctly.

  Be sure you have read and understood the contents of “11. SAFETY PRECAUTIONS”, 

before using this product. Keep these instructions available for future reference.

  We recommend that you take test shots to get accustomed to your camera before taking 

important photographs.

  The screen and camera illustrations shown in this manual were produced during the 

development stages and may differ from the actual product.

  If there are additions and/or modifications of functions due to firmware update for the 

camera, the contents will differ. For the latest information, please visit the Olympus website.

Summary of Contents for TG-6

Page 1: ...that you are using the product safely and correctly Be sure you have read and understood the contents of 11 SAFETY PRECAUTIONS before using this product Keep these instructions available for future reference We recommend that you take test shots to get accustomed to your camera before taking important photographs The screen and camera illustrations shown in this manual were produced during the dev...

Page 2: ...ocal regulations arising from use of this product outside the country or region of purchase Wireless LAN and GPS The camera features built in wireless LAN and GPS Use of these features outside the country or region of purchase may violate local wireless regulations be sure to check with local authorities before use Olympus will not be held liable for the user s failure to comply with local regulat...

Page 3: ...uction Manual can be downloaded from the OLYMPUS website or directly using the OLYMPUS Image Share OI Share smartphone app Maintaining Water Resistance This document lists precautions regarding water resistance Read these instructions together with Important Information about Water and Shock Resistant Features P 123 Indications used in this manual The following symbols are used throughout this man...

Page 4: ...ling exposure Exposure F 41 Zoom Digital teleconverter 42 Performing the sequential self timer shooting 42 Pro Capture 44 Using a flash Flash photography 45 Focus lock 46 Using the LED illuminator 47 Before You Begin 2 Quick Task Index 8 Names of parts 10 1 Preparation 12 Unpacking the Box Contents 12 Inserting and Removing the Battery and Card 13 Removing the battery 14 Removing the card 15 Usabl...

Page 5: ...ation display 63 Viewing Photographs and Movies 64 Index display Calendar display 65 Close up playback 65 Movie playback 66 Erasing images during playback 66 Using the Playback Menu 67 Play H 67 RAW Data Edit JPEG Edit 68 Play Movie 69 Movie Edit 69 Share Order 71 0 71 R 72 Rotate 72 y 73 Image Overlay 74 75 Erase 75 Selecting images 0 Erase Selected Share Order Selected 76 Scrolling Panoramas 77 ...

Page 6: ...tor 101 MF Assist 101 Adding information displays 102 Viewing camera images on TV 104 Combinations of JPEG image sizes and compression rates 105 5 Connecting the camera to a smartphone 106 Adjusting Settings for Connection to a Smartphone 107 Transferring Images to a Smartphone 108 Shooting Remotely with a Smartphone 108 Changing Connection Method 109 Resetting Wireless LAN Settings 109 Changing t...

Page 7: ...torage 122 Pixel Mapping Checking the image processing functions 122 Important Information about Water and Shock Resistant Features 123 Using Separately Sold Accessories 125 Attaching optional silicone jackets 125 Taking pictures with the Olympus Wireless RC Flash System 125 Optional Accessories 126 9 Troubleshooting 130 Some Common Issues and Their Solutions 130 10 Information 136 List of Setting...

Page 8: ...heading Field sensors 111 Taking pictures with colors at the same shade as they appear White balance 53 Changing an aspect ratio Aspect ratio 55 When the camera will not focus on your subject Focusing on one area AF target settings 82 Keeping a moving subject in focus Tracking 83 Taking photos in the dark taking photos under low light conditions LED illuminator 47 AF Illuminator 101 Capturing flee...

Page 9: ... a print order 75 Erasing the sound recorded to a still image R 72 Changing the number of frames or adding frames to the index playback display G Info Settings 102 Camera Settings g Synchronizing the date and time Setting the date time 18 94 Restoring default settings Reset 80 Changing the menu display language W 95 Turning off the auto focus sound 8 Beep sound 97 Saving settings Custom mode C1 C2...

Page 10: ... P 104 Speaker Micro USB connector P 16 116 Lens Self timer lamp LED Illuminator AF illuminator P 42 P 47 P 101 Lens ring release button P 127 Lens ring removable P 127 Monitor Internal flash P 45 Strap eyelet P 12 Tripod socket Battery card compartment cover lock P 13 Battery card compartment cover P 13 LOCK knob P 13 ...

Page 11: ...ase button P 66 H Left u mode function button P 30 33 34 I Right Flash button P 45 Q button Live Control P 48 Arrow pad FGHI INFO button P 24 63 115 R Movie select button P 38 P 76 MENU Wi Fi button P 78 P 107 q Playback button P 64 Mode dial P 27 Stereo microphone ON OFF button P 17 Zoom lever P 26 65 LOG switch P 113 GPS antenna P 112 Indicator lamp P 16 Shutter button P 25 Control dial P ...

Page 12: ...e dealer from whom you purchased the camera Camera with removable lens ring Strap USB cable CB USB12 or Basic Manual Maintaining Water Resistance Warranty card Lithium ion battery LI 92B USB AC adapter F 5AC Contents may vary depending on purchase location Attaching the strap 1 3 4 5 2 Lastly pull the strap firmly making sure that it is fastened securely ...

Page 13: ...Formatting the Card P 21 1 Opening the battery card compartment cover 3 1 2 LOCK knob Battery card compartment lock Battery card compartment cover 2 Loading the battery Use only LI 92B batteries P 12 147 Insert the battery as illustrated with the C mark toward the battery lock knob If you insert the battery in the wrong direction the camera is not turned on Be sure to insert it in the correct dire...

Page 14: ...arrow and then remove Do not remove the battery while the card write indicator is displayed Card write indicator 125 F5 6 ISO A 200 L N S ISON S ISON 0 0 0 0 01 02 03 01 02 03 1023 1023 P FHD 30p 30p F Contact an authorized distributor or service center if you are unable to remove the battery Do not use force Notes It is recommended to set aside a backup battery for prolonged shooting in case the ...

Page 15: ...rite protect switch Setting the switch to LOCK prevents data being written to the card Return the switch to the unlock position enable writing LOCK Cards must be formatted with this camera before first use or after being used with other cameras or computers g Formatting the Card P 21 The data in the card will not be erased completely even after formatting the card or deleting the data When discard...

Page 16: ... indicator lamp turns off when charging is complete Charging takes about 3 hours Charging times may increase at high ambient temperatures Indicator lamp Be sure to unplug the power plug of the USB AC adapter from the wall outlet when the charging is complete For charging the battery abroad see Using Your Charger Abroad P 118 Never use any cable other than supplied or Olympus designated USB cable T...

Page 17: ...era The camera will turn on and the indicator lamp and monitor will light ON OFF button Monitor Battery level The battery level icon will be displayed 7 green The camera is ready to shoot 8 green The battery is not full 9 blinks red Charge the battery 125 F5 6 ISO A 200 L N S ISON S ISON 0 0 0 0 01 02 03 01 02 03 1023 1023 P FHD 30p 30p F Camera sleep operation If no operations are performed for a...

Page 18: ...ialog is displaying prompting you to select a language Please select your language Por favor selecciona tu idioma Veuillez choisir votre langue Bitte wählen Sie Ihre Sprache 2 Highlight the desired language using the control dial or the FGHI buttons on the arrow pad The language selection dialog has two pages of options Use the control dial or the FGHI buttons on the arrow pad to move the cursor b...

Page 19: ...e W P 95 4 Set the date time and date format Use the HI buttons on the arrow pad to highlight items Edit the highlighted item using the control dial or the FG buttons on the arrow pad Press the Q button to set the clock The clock can be adjusted at any time from the e setup menu g X Settings P 94 X Y M D Time 2019 Y M D Cancel The time is displayed using a 24 hour clock 5 Highlight a time zone usi...

Page 20: ...light the e tab using the FGH buttons on the arrow pad and press the Q button 2 1 ѯєьѬшѤҟкзҕѥ дјѤэ шѤҟкзҕѥ Wi Fi дѥішѤҟкзҕѥ чѬѓѥёэѤьъѩд s W X дѥішѤҟкзҕѥ 0 5 њѧьѥъѨ k 0 ѳъѕ шѤҟкзҕѥдѥіҙч 3 Highlight W using the FG buttons on the arrow pad and press the Q button 2 1 ѯєьѬшѤҟкзҕѥ дјѤэ шѤҟкзҕѥ Wi Fi дѥішѤҟкзҕѥ чѬѓѥёэѤьъѩд s W 0 5 њѧьѥъѨ ѳъѕ шѤҟкзҕѥдѥіҙч X дѥішѤҟкзҕѥ k 0 4 Highlight the desired language ...

Page 21: ... the MENU button to display the menus 2 1 1 Shooting Menu 1 AF Area Picture Mode I Reset Assign Custom Modes Back Set 2 Highlight the e tab using the FGH buttons on the arrow pad and press the Q button 2 1 Setup Menu Wi Fi Settings Rec View s W X Settings 0 5 sec k 0 English Card Setup Back Set 3 Highlight Card Setup using the FG buttons on the arrow pad and press the Q button If there is data on ...

Page 22: ... 1023 1023 HDR Date FD 1 FD 1 C1 AF AF WB AUTO WB AUTO 1 4x 1 4x Focus Focus LOG P 30p 30p F 2 d e g h a 1 4x 1 4x 2 0x 2 0x 2 2 6 7 8 9 BKT HDR 2 1 F G H I J E D B A 34 0 b i x y w v u t f 5 c z C n o p q r s m l k j Monitor display during movie mode M ISON M ISON L R L R 1 02 03 1 4x 1 4x ISO A 200 L N 16 9 AF AF WB AUTO WB AUTO n 2 0 2 0 FHD 30p 30p F K Shooting ...

Page 23: ... k Picture mode P 50 81 l ISO sensitivity P 52 m White balance P 53 n AF mode P 55 o Aspect ratio P 55 p Image quality still images P 56 q Record mode movies P 57 r Available recording time P 119 s Number of storable still pictures P 119 t Level gauge horizon P 24 102 u Top Flash intensity control P 59 Bottom Exposure compensation P 41 v Exposure compensation value P 41 w Aperture value P 36 x Shu...

Page 24: ...fo P 102 The information display screens can be switched in either direction by rotating the control dial while pressing the INFO button Histogram display A histogram showing the distribution of brightness in the image is displayed The horizontal axis gives the brightness the vertical axis the number of pixels of each brightness in the image During shooting overexposure is indicated in red underex...

Page 25: ...it position 3 Adjust the focus Display the subject in the center of the monitor and lightly press the shutter button down to the first position press the shutter button halfway The AF confirmation mark will be displayed and a green frame AF target will be displayed in the focus location AF confirmation mark 125 F5 6 ISO A 200 L N S ISON S ISON 01 02 03 01 02 03 1023 1023 P FHD 30p 30p F 1 0x 1 0x ...

Page 26: ...it to shooting mode from menus or playback press the shutter button halfway Using the zoom Zoom in to photograph distant objects or zoom out to increase the area visible in the frame Zoom can be adjusted using the zoom lever W side T side 60 F2 0 ISO A 200 L N S ISON S ISON 0 0 0 0 01 02 03 01 02 03 1023 1023 P FHD 30p 30p F 1 0x 1 0x 50 F3 2 ISO A 200 L N S ISON S ISON 0 0 0 0 01 02 03 01 02 03 1...

Page 27: ... subject or the scene you can shoot underwater photographs with a proper setting 34 P The camera meters subject brightness and automatically adjusts shutter speed and aperture for optimal results 35 A You select the aperture and the camera automatically adjusts shutter speed for optimal results 36 C1 Use custom modes to save and recall settings Different settings can be stored in each of the two c...

Page 28: ...ecommended P 107 108 m Children Suitable for photographs of children and other active subjects Nightscapes G Nightscape Suitable for tripod shooting of night scenes Use of a tripod and remote control via OI Share is recommended P 107 108 U Portrait Nightscape Suitable for portrait shooting against a background of night view Use of a tripod and remote control via OI Share is recommended P 107 108 H...

Page 29: ...e camera records two pictures one with the effect applied and one without m Children Suitable for photographs of children and other active subjects E Backlight HDR Suitable for high contrast scenes Each time the shutter button is pressed the camera takes four shots and subsequently merges them into one correctly exposed image To maximize the benefits of the scene modes some of the shooting functio...

Page 30: ...ss the Q button Motion Scenery Nightscapes Indoors People 3 Highlight the desired scene mode using HI or the control dial and press the Q button To return to the previous display press the MENU button without pressing the Q button to select a scene mode To select a different scene mode press the u H button Portrait 4 Shoot ...

Page 31: ...e controlled via OI Share P 108 in wireless remote mode If the focus indicator blinks the camera is not in focus 5 Press the shutter button all the way down to shoot The camera configures the proper settings automatically and starts shooting After pressing the shutter button there is a time lag until shooting starts The composite image will be displayed at regular intervals 6 Press the shutter but...

Page 32: ...utomatically when the pointer and the target overlap To combine only two frames press the Q button Pointer Target mark Cancel Save Screen when combining images from left to right 7 Repeat step 5 to take a third frame The camera automatically combines the frames into a single panorama image To cancel the panorama function press the MENU button Notes Focus exposure and the like are fixed at the valu...

Page 33: ...mode the camera shoots a number of images automatically shifting the focus in each image The number of images and shooting steps are set in Focus BKT P 85 n Microscope Control Optimized for close ups with the subject magnified in the monitor The magnification level when the shooting distance is 1 cm is displayed on the monitor Press I to zoom in on the view through the lens 2 zoom Press again for ...

Page 34: ...roscope Suitable for shooting subjects under water from distances as close as 1 cm _ Underwater HDR Suitable for contrasting underwater scenes This mode captures multiple images and merges them into one properly exposed image This mode may not function well for shooting a fast moving subject 1 Rotate the mode dial to 2 Highlight a secondary sub mode using HI or the control dial and press the Q but...

Page 35: ... N S ISON S ISON 0 0 0 0 01 02 03 01 02 03 1023 1023 P FHD 30p 30p F Shooting mode Shutter speed Aperture value Exposure compensation amount The shutter speed and aperture selected by the camera are displayed Exposure compensation P 41 can be adjusted by rotating the control dial or by pressing the F F button and then using HI The shutter speed and aperture value displays will blink if the camera ...

Page 36: ...se the control dial to select an aperture value 125 F5 6 ISO A 200 L N S ISON S ISON 01 02 03 01 02 03 1023 1023 A FHD 30p 30p F Aperture value After pressing the F F button you can also use FG to select the aperture After pressing the F F button you can adjust exposure compensation P 41 by using the control dial or HI The shutter speed display will blink if the camera is unable to achieve correct...

Page 37: ...o display the menus 3 Highlight the W tab using FGH and press the Q button 4 Highlight Reset Assign Custom Modes and press the Q button 5 Highlight Custom Mode C1 or Custom Mode C2 and press the Q button 6 Highlight Set and press the Q button Any existing settings are overwritten To cancel the registration select Reset Recalling settings 1 Rotate the mode dial to C1 or C2 The settings saved using ...

Page 38: ...so called rolling shutter effect that can cause distortion in pictures of moving objects This distortion is a physical phenomenon that occurs in pictures of fast moving subjects or if the camera is moved during shooting It is particularly noticeable in pictures taken at long focal lengths The R button cannot be used to record movies in the following instances while shutter the button is pressed ha...

Page 39: ...the desired option using HI and press the Q button 4 Press the R button to begin recording Press the R button again to end recording The sound level during recording is shown by the recording level meter The more the meter extends into the red the higher the recording level The recording level can be adjusted from the n video menu g Recording Volume P 87 Recording level meter M ISON M ISON L R L R...

Page 40: ...ngs g List of Settings Available in each Shooting Mode P 136 Live Controls P 48 AUTO AUTO P WB Auto AUTO AUTO L N 4 3 AF AF FHD 30p 30p F WB AUTO WB AUTO ISO AUTO Adjust settings while previewing the results in the display Some functions are not available in some shooting modes g List of Settings Available in each Shooting Mode P 136 Menus P 78 2 1 1 Shooting Menu 1 AF Area Picture Mode I Reset As...

Page 41: ...trolling exposure Exposure F Select positive values to make pictures brighter negative values to make pictures darker Exposure can be adjusted by 2 0 EV Negative No compensation 0 Positive The method used varies with the shooting mode Shooting mode Method P mode custom mode movie mode mode k mode Rotate the control dial or Press the F F button and then press HI A mode Press the F F button and then...

Page 42: ...creases zoom by 2 Press I again for 4 zoom and a third time to cancel zoom 125 F5 6 ISO A 200 L N S ISON S ISON 0 0 0 0 01 02 03 01 02 03 1023 1023 P FHD 30p 30p F 2 Digital teleconverter JPEG images are recorded at the selected zoom ratio In the case of RAW images a frame shows the zoom crop A frame showing the zoom crop is displayed on the image during playback In the case of 4K and high speed m...

Page 43: ... taken YC Custom Self timer Press the INFO button to set Y Timer Number of Frames and Interval Length Use HI to highlight items and FG to select a value Focus exposure and white balance are fixed at the values for the first shot in each series J Pro Capture Sequential shooting begins when you press the shutter button halfway Press the shutter button all the way down to begin recording captured ima...

Page 44: ... button is pressed halfway and begins recording the pictures including those taken when the shutter button was pressed halfway up to 5 to the card when the shutter button is pressed all the way down 1 Press the jY G button 2 Highlight J Pro Capture using HI or the control dial and press the Q button 3 Press the shutter button halfway to start shooting 4 Press the shutter button all the way down to...

Page 45: ...nual Value Control flash output manually If you highlight Manual Value and press the INFO button before pressing the Q button you can adjust flash output using FGHI or the control dial RC Remote Control The dedicated underwater strobe or the Olympus wireless RC flash is used to take pictures For details see Taking pictures with the Olympus Wireless RC Flash System P 125 q LED On The LED turns on w...

Page 46: ... Focus FHD 30p 30p F AF lock mark While focus lock is in effect the focus distance can be fine tuned using FG or the control dial Pressing the Q button zooming operation pressing the MENU button and the other operations also release the focus lock If the focus indicator blinks when the shutter button is pressed halfway with d Live Composite P 28 31 selected for SCN mode you can set focus to infini...

Page 47: ...nds while camera controls are in use or up to 30 seconds if no operations are performed The LED illuminator can be used during movie recording It cannot however be used to film 4K movies If the camera is off The LED illuminator will remain lit for up to around 30 seconds whether or not you attempt to operate camera controls The LED illuminator turns off automatically if you press the ON OFF button...

Page 48: ... P 55 Aspect ratio P 55 K Still image quality P 56 n Movie quality P 57 K Image stabilizer 3 P 59 n Image stabilizer 2 P 59 Flash 3 4 P 45 Flash compensation 3 P 59 Sequential shooting Self timer P 42 Metering mode 3 P 60 Face priority P 60 Accessory P 61 1 Displayed only in scene modes 2 Displayed only in movie mode 3 Not displayed in movie mode 4 The camera stores the settings for P A underwater...

Page 49: ...automatically if no operations are performed for about 8 seconds AUTO AUTO P WB Auto AUTO AUTO L N 4 3 AF AF FHD 30p 30p F WB AUTO WB AUTO ISO AUTO Cursor Displays the selected function name HI or P Cursor F G Some items are not available in some shooting modes g List of Settings Available in each Shooting Mode P 136 Notes For the default settings of each option refer to Default Custom Settings P ...

Page 50: ...ting picture mode edit its parameters and save it as a custom picture mode v e Portrait Produces smooth skin textures This mode cannot be used with bracket photography or when shooting movies F Underwater Process pictures to preserve the vivid colors seen under water We recommend selecting Off for WB P 98 when this option is in effect Pop Art Enhances the color and atmosphere of an image more brig...

Page 51: ...Watercolor Creates a soft bright image by removing dark areas blending pale colors on a white canvas and further softening contours Vintage Expresses an everyday shot in a nostalgic vintage tone using printed film discoloration and fading Partial Color Impressively expresses a subject by extracting colors you want to emphasize and keeping everything else monotone Bleach Bypass The bleach bypass ef...

Page 52: ...se graininess but allows photographs to be taken when lighting is poor 1 Press the Q button and then highlight ISO sensitivity using FG 2 Highlight an option using HI and press the Q button AUTO AUTO AUTO AUTO AUTO AUTO L N 4 3 AF AF FHD 30p 30p F WB AUTO WB AUTO P 250 0 0 F5 6 Recommend 100 100 125 125 160 160 200 200 250 250 320 320 ISO AUTO ISO AUTO ISO AUTO The sensitivity is set automatically...

Page 53: ... to capture the reds in a sunset or the colors in a fireworks display N 7500 K For shooting outdoors in the shadows on a clear day O 6000 K For shooting outdoors on a cloudy day 1 3000 K For shooting under a tungsten light 4000 K For shooting under a fluorescent light g For pictures taken in shallow waters approximately 3 m 9 8 ft or less h For pictures taken underwater at depths of from 3 to 15 m...

Page 54: ...ent color temperatures 1 Highlight P Q W or X one touch white balance 1 2 3 or 4 and press the INFO button The one touch white balance screen appears 2 Photograph a piece of colorless white or gray paper Frame the paper so that it fills the display and no shadows fall it 3 Highlight Yes and press the Q button The new value is saved as a preset white balance option The new value is stored until one...

Page 55: ... d Super macro AF Focus at short distances using auto focus e Super macro MF Focus at short distances using manual focus The camera may be unable to focus if the subject is poorly lit obscured by mist or smoke or lacks contrast d and e are available only in P A and n modes Setting the image aspect You can change the aspect ratio horizontal to vertical ratio when taking pictures Depending on your p...

Page 56: ...e X Middle 3200 2400 XSF XF XN W Small 1280 960 WSF WF WN For small prints and use on a website When you want to select a combination other than YF YN XN and WN change the K Set P 98 settings in Custom Menu 1 Pictures taken at an image quality setting of RAW are automatically recorded as JPEG RAW in the following modes _ o e H E 2 The individual JPEG and RAW files recorded each time a photo is tak...

Page 57: ...hes the video standard used in the device as otherwise the movie may not play back smoothly Video standards vary by country or region some use NTSC others PAL When shooting for display on NTSC devices select 60p 30p When shooting for display on PAL devices select 50p 25p Movies are stored in MPEG 4 AVC H 264 format The maximum size of individual file is limited to 4 GB The maximum recording time o...

Page 58: ...Fine F Fine N Normal 3 Frame rate 60p 30p 50p 25p Record mode HS High speed Record slow motion movies Footage shot at a high frame rate plays back at approximately 30 fps 1 2 1 Frame size 2 Frame rate FHD 1920 1080 120 fps HD 1280 720 240 fps SD 640 360 480 fps Focus and exposure are fixed at the start of recording Recording can continue for up to 20 seconds Sound will not be recorded and are not ...

Page 59: ...slow In these cases it is recommended that you use a tripod The edges of the frame are cropped out when M IS On is selected reducing the area recorded Image stabilizer is set to M IS Off when and is selected for movie quality When using a tripod set Image Stabilizer to S IS Off M IS Off You may notice an operating sound or vibration when the image stabilizer is activated Adjusting flash output Fla...

Page 60: ...reas of the screen separately When set to ESP the center may appear dark when shooting against strong backlighting 5 Spot Shoots the subject at the center during backlighting Meters the brightness at the center of the screen Automatic face detection Face priority The camera detects faces and adjusts focus and digital ESP 1 Press the Q button and use FG to highlight the face priority item 2 Use HI ...

Page 61: ... highlight the accessory item 2 Use HI to select an option and press the Q button Accessory Off P S ISON S ISON ACC OFF ACC OFF FD 1 FD 1 OFF OFF OFF OFF Accessory OFF Accessory Off Take pictures using the camera alone PTWC 01 Select according to the optional accessory attached TCON T01 FCON T01 FCON T02 FD 1 FD 1 g Optional Accessories P 126 ...

Page 62: ...5 1012hPa 145 23 59 W 39 12 30 N 10m 20 5 C 10 10 4 3 L N HDR1 j 2 3 1 4 e f h i a 0 9 g 6 5 78 c b d Overall display F5 6 F5 6 1 0 1 0 G 4 G 4 A 4 A 4 Natural Natural sRGB sRGB ISO 400 ISO 400 125 125 2 0 2 0 18mm 18mm 1 8 4000 3000 4 3 L N 15 100 0015 WB AUTO P 2019 06 26 12 30 00 10 10 s p q r v u t n x y z l k m o A w Playback ...

Page 63: ...Flash intensity control P 59 s White balance compensation P 98 t Color space P 98 u Picture mode P 50 81 v Compression rate P 105 119 w Pixel count P 105 119 x ISO sensitivity P 52 y White balance P 53 z Metering mode P 60 A Histogram P 102 1 Displayed only if an aspect ratio other than 4 3 is selected with a RAW image quality option Switching the information display You can switch the information...

Page 64: ...us frame H Close up playback Changing the close up position You can display the next frame I or the previous frame H during close up playback by pressing the INFO button Press the INFO button again to display a zoom frame and use FGHI to change its position Index calendar playback Highlight image Zoom lever Rotate the zoom lever counterclockwise for index or calendar playback Rotate the zoom lever...

Page 65: ...0 19 18 17 16 29 28 27 26 25 24 23 4 3 2 1 30 1 31 30 29 28 27 26 7 2 3 4 5 6 2019 6 Sun Mon Tue Wed Thu Fri Sat a G a G You can change the number of frames for index display g G Settings P 103 Close up playback To zoom in on the current picture during single frame playback rotate the zoom lever clockwise toward a for zoom ratios of from 2 to 14 and counterclockwise toward G to zoom out Press the ...

Page 66: ...s H to rewind Press H again to increase the rewind speed Adjusting the volume Use FG to adjust the volume Operations while playback is paused Cueing Use F to display the first frame and press G to display the last frame Advancing and rewinding one frame at a time Use HI or the control dial to advance or rewind one frame at a time Keep HI pressed for continuous advance or rewind Resuming playback P...

Page 67: ...G Movies Play H R R R RAW Data Edit R R JPEG Edit R R Play Movie R Movie Edit R Share Order R R R 0 R R R R R R R R Rotate R R R y R R R R Image Overlay R R R R Erase R R R R Play H Voice memos P 72 are played back when the associated image is displayed 1 Select a photo with audio and press the Q button 2 Highlight Play H and press the Q button Audio playback will start To end audio playback press...

Page 68: ...U button to return to the previous display Highlight ART BKT and press the Q button to record the modified copy to the card To create additional copies from the same original highlight Reset and press the Q button To exit without creating more copies highlight No and press the Q button No Exit without editing the image JPEG Edit Shadow Adj Brightens a dark backlit subject Redeye Fix Reduces the re...

Page 69: ... trimming and Aspect can only be used to edit images with an aspect ratio of 4 3 standard Play Movie View the current movie g Movie playback P 66 Movie Edit Edit movies Creating movie stills In Movie Image Capture Save a still copy aspect ratio 16 9 of a frame selected from a 4K movie recorded with the camera 1 Display the movie to which you want to edit and press the Q button 2 Highlight Movie Ed...

Page 70: ...on 4 Highlight Overwrite or New File and press the Q button If the image is protected you cannot select Overwrite 5 Select whether the section to be deleted begins with the first frame or ends with the last frame using HI to highlight the desired option and pressing the Q button to select To jump to the first or last frame rotate the control dial 6 Use HI to select the section to be deleted The se...

Page 71: ...es 0 Erase Selected Share Order Selected P 76 Share orders cannot include RAW images Notes Share marking can be removed from all images via the e setup menu g Cancelling a Share Order P 110 0 Protect images from accidental deletion Display an image you wish to protect and press the Q button to display the playback menu Highlight 0 and press the Q button and then press F or G to protect the image P...

Page 72: ...with audio are indicated by a H icon JPEG R Start No Erase Back Set To delete recorded audio select Erase in Step 3 Notes Audio recording is also available in the q Playback Menu P 88 The recorded audio can be played back using Play H P 67 Rotate Select whether to rotate photographs 1 Play the photograph back and press the Q button 2 Highlight Rotate and press the Q button 3 Press F to rotate the ...

Page 73: ...ack full length of each movie clip in the slideshow or Short to play back only the opening portion of each movie clip 4 Highlight Start and press the Q button The slideshow will start Press FG during the slideshow to adjust the overall volume of the camera speaker Press HI while the volume adjustment indicator is displayed to adjust the balance between the sound recorded with the image or movie an...

Page 74: ...I to select the RAW images and press the Q button to add them to the overlay The overlaid image will be displayed if images of the number specified in step 3 are selected 5 Adjust gain brightness for the pictures in the overlay Use HI to select an image and FG to adjust gain Gain can be adjusted in the range 0 1 2 0 Check the results in the monitor 6 Press the Q button to display the confirmation ...

Page 75: ... selected All pictures Highlight ALL and press the Q button Print Order Back Set ALL 4 Select the date and time format and press the Q button No The pictures are printed without the date and time Date The pictures are printed with the shooting date Time The pictures are printed with the shooting time When printing images the setting cannot be changed between the images X Time Date No Back Set 5 Hi...

Page 76: ...lay the image to which you want to select in single frame playback or highlight it during index playback P 65 2 Press the H button Selected images are indicated by a v icon Press the button again to deselect the image 2019 06 26 12 30 00 21 3 Press the Q button to display a menu 4 Highlight Share Order Selected 0 or Erase Selected and press the Q button ...

Page 77: ...image in the direction of the pressed button Clockwise a side 1x Viewing area During playback you can rotate the zoom lever clockwise to zoom in from 2 to 14 or counterclockwise to zoom out Press the Q button to return to single frame playback To view other images at zoom ratios above 2 press the INFO button and then press HI Press the INFO button again to re enable scrolling You can also view oth...

Page 78: ...t be selectable from the menus when using the arrow pad Items that cannot be set with the current shooting mode g List of Settings Available in each Shooting Mode P 136 Items that cannot be set because of an item that has already been set Settings such as picture mode are unavailable when the mode dial is rotated to B 1 Press the MENU button to display the menus 2 1 1 Shooting Menu 1 AF Area Pictu...

Page 79: ...the Q button to display options for the selected item 2 1 2 Shooting Menu 2 Focus BKT Off Focus Stacking Settings Date Stamp Off Off Intrvl Sh Time Lapse Back Set The current setting is displayed Function Q 1 2 2 Back Set Shooting Menu 2 Focus BKT Off Focus Stacking Settings Date Stamp Off Off Intrvl Sh Time Lapse Off On 4 Use FG to highlight an option and press the Q button to select Press the ME...

Page 80: ...ng default settings saving settings Reset Assign Custom Modes Returning to default settings Reset Camera settings can be easily restored to default settings g Default Custom Settings P 140 1 Highlight Reset Assign Custom Modes in W Shooting Menu 1 and press the Q button 2 Highlight Reset and press the Q button 3 Highlight a reset option Full or Basic and press the Q button Full Reset all settings ...

Page 81: ...de dial to C1 or C2 g Custom Modes Custom mode C1 C2 P 37 Processing options Picture Mode You can make individual adjustments to contrast sharpness and other parameters in Picture Mode P 50 settings Changes to parameters are stored for each picture mode separately 1 Highlight Picture Mode in W Shooting Menu 1 and press the Q button The camera will display the picture mode available in the current ...

Page 82: ...get Area You can select the position of the AF target manually 1 Highlight AF Area in W Shooting Menu 1 and press the Q button 2 Highlight I and press the Q button 3 Use FGHI to select the position of AF target and press the Q button Pressing and holding the Q button before setting the position returns the AF target to the center To reposition the AF target when the camera is ready to shoot press ...

Page 83: ... over your subject and press the Q button keeping the shutter button pressed halfway 5 When the camera recognizes the subject the AF target automatically tracks the subject movement to focus on it continuously To cancel the tracking press the Q button Depending on the subjects or the shooting conditions the camera may be unable to lock the focus or fail to track the subject movement When the camer...

Page 84: ... frame sequence Off Records each frame as a still picture On Records each frame as a still picture and generates a single movie from the frame sequence On Movie Settings Movie Resolution Movie Resolution Select a size for time lapse movies Frame Rate Select a frame rate for time lapse movies Frame Rate The starting and ending times shown in the display are intended as a guide only The actual times...

Page 85: ...site Varying focus little by little over a series of pictures Focus BKT Each time the shutter button is pressed the camera will automatically vary focus over a series of 10 20 or 30 shots 1 Highlight Focus BKT in X Shooting Menu 2 and press the Q button 2 Highlight On and press the I 3 Adjust the following settings and press the Q button Start Waiting Time 0 to 30 sec Select the length of time the...

Page 86: ...r button all the way down to start shooting AF target selection is fixed at I Exposure and white balance are fixed at the values for the first shot in each series Date stamps Date Stamp Stamp photos with the date and or time of recording Off Do not place date and time stamps on photos Date Stamp photos with the date of recording Time Stamp photos with the time of recording Date Time Stamp photos w...

Page 87: ...frame rate for movie recording When shooting movies that will be viewed on a television select a frame rate that matches the video standard used in the device as otherwise the movie may not play back smoothly Video standards vary by country or region some use NTSC others PAL When shooting for display on NTSC devices select 60p 30p When shooting for display on PAL devices select 50p 25p 57 Video Bi...

Page 88: ...the settings in effect at the time the picture was taken such as white balance and picture mode art filters included With JPEG pictures you can make simple edits such as cropping and resizing RAW Data Edit Creates a JPEG copy of a RAW image according to the selected settings JPEG Edit Retouch JPEG pictures and save the resulting copies in JPEG format P 90 Retouching RAW pictures RAW Data Edit 1 Hi...

Page 89: ... menu of available art filters 2 Highlight art filters and press the Q button to select or deselect Selected filters are marked with a v 3 Press the MENU button to return to the previous display 4 Highlight ART BKT and press the Q button The modified copy will be recorded to the card 6 To create additional copies from the same original highlight Reset and press the Q button To exit without creatin...

Page 90: ...erted to the closest image size e Portrait Compensates the skin look for smoothness Compensation cannot be applied in such a case that a face cannot be detected Red eye correction may not work depending on the image Editing of a JPEG image is not possible in the following cases When an image is processed on a PC when there is not enough space in the card memory or when an image is recorded on anot...

Page 91: ...set at the time the image is saved If RAW is selected the copy will be saved in YN RAW format 1 Highlight Edit in the q Playback Menu and press the Q button 2 Use FG to highlight Image Overlay and press the Q button 3 Select the number of images to be overlaid and press the Q button 4 Use FGHI to select the RAW images and press the Q button to add them to the overlay The overlaid image will be dis...

Page 92: ... highlight Sel Image and press the Q button 3 Use HI to select a movie and press the Q button 4 Highlight Movie Edit and press the Q button 5 Use FG to highlight In Movie Image Capture and press the Q button 6 Use HI to select a frame to be saved as a still image and press the Q button Use FG or to skip multiple frames Press the MENU button to return to single frame playback The date of recording ...

Page 93: ...nd press the Q button If the image is protected you cannot select Overwrite 7 Select whether the section to be deleted begins with the first frame or ends with the last frame using HI to highlight the desired option and pressing the Q button to select To jump to the first or last frame rotate the control dial 8 Use HI to select the section to be deleted The section to be deleted is shown in red 9 ...

Page 94: ...n option s 1 k Back Set Rec View Sets whether to display the captured image on the monitor after shooting and the length of time for the display This is useful for a brief check of the picture you have taken You can shoot the next shot by pressing the shutter button halfway even while the captured image is displayed on the monitor 0 3sec 20sec Sets the length of time seconds to display the capture...

Page 95: ... Select a different language for the menus and messages displayed in the monitor 1 Highlight W in the e Setup Menu and press the Q button 2 Highlight the desired language using FGHI or the control dial The language selection dialog has two pages of options Use the control dial or the FGHI buttons on the arrow pad to move the cursor between pages W Back Set Hrvatski Dansk Eesti Deutsch Indonesia No...

Page 96: ...ct the information displayed when the camera is in shooting mode G Settings Select the information shown in the index and calendar displays 102 103 Live View Boost Off Changes to settings such as exposure compensation are reflected in the display in the monitor On Changes to settings such as exposure compensation are not reflected in the display in the monitor instead brightness is adjusted to bri...

Page 97: ...tting Select the shutter speed below which the camera will automatically raise ISO sensitivity in modes P and A If set to Auto the camera automatically sets the shutter speed Noise Filter Select the amount of noise reduction performed at high ISO sensitivities Noise Reduct This function reduces the noise that is generated during long exposures Auto Noise reduction is performed at slow shutter spee...

Page 98: ...balance for each mode 1 Highlight the white balance option you wish to fine tune and press I 2 Highlight the A amber blue or G green magenta axis and use FG to select a value Higher values on the A amber blue axis give images a red cast lower values a blue cast Higher values on the G green magenta axis heighten greens while lower values give images a magenta cast 53 W Keep Warm Color Select On to ...

Page 99: ...es of the photographer and copyright holder to new photographs Names can be up to 63 characters long Copyright Info Select On to include the names of the photographer and copyright holder in the Exif data for new photographs Artist Name Enter the name of the photographer Copyright Name Enter the name of the copyright holder 1 Select characters from 1 and press the Q button The selected characters ...

Page 100: ... in meters m or feet ft ºC ºF Select whether the temperature is displayed in degrees Celsius ºC or degrees Fahrenheit ºF 1 Highlight the desired item using FG 2 Press I 3 Highlight items using FG and press the Q button to select c K Utility Option Description g Pixel Mapping The pixel mapping feature allows the camera to check and adjust the image pickup device and image processing functions 122 L...

Page 101: ... display in on an area of the frame Magnify Magnifies a portion of the screen The subject in the center of the frame is displayed at a higher magnification If you are using focus lock P 46 the location on which focus is locked will be displayed at a higher magnification Peaking Displays clearly defined outlines with edge enhancement You can select the color of the outlines g Peaking Color P 96 Whe...

Page 102: ...ay The Highlight Shadow display shows overexposed areas in red underexposed areas in blue Shadow Highlight 15 Highlight Shadow display LV Info Shooting information displays The histogram Highlight Shadow and level gauge displays can be added to LV Info Select Custom 1 or Custom 2 and select the displays you wish to add The added displays are displayed by repeatedly pressing the INFO button during ...

Page 103: ...g the zoom lever Counterclockwise G side Clockwise a side G Settings B 9 A 4 C 25 C 100 Calendar H Back Q Q Calendar display 8 15 14 13 12 11 10 9 22 21 20 19 18 17 16 29 28 27 26 25 24 23 4 3 2 1 30 1 31 30 29 28 27 26 7 2 3 4 5 6 2019 6 Sun Mon Tue Wed Thu Fri Sat Index display Single frame playback 2019 06 26 12 30 00 20 100 0020 1012hPa 10m 20 5 C 4 3 L N a G 4 frames 2019 06 26 20 12 30 00 9 ...

Page 104: ...o signal type Select a format that matches the input format selected with the TV 4K Priority is given to 4K HDMI output 1080p Priority is given to 1080p HDMI output 720p Priority is given to 720p HDMI output 480p 576p 480p 576p HDMI output Do not connect the camera to other HDMI output devices Doing so may damage the camera HDMI output is not performed while connected via USB to a computer When 4K...

Page 105: ... can set the JPEG image quality by combining image size and compression rate Image size Compression rate Application Name Pixel Count SF Super Fine F Fine N Normal Y Large 4000 3000 YSF YF YN Select for the print size X Middle 3200 2400 XSF XF XN W Small 1280 960 WSF WF WN For small prints and use on a website ...

Page 106: ...he Color Creator For more information visit http app olympus imaging com oipalette Before using the wireless LAN function read Using the wireless LAN function P 152 As with any wireless communication there is always a risk of interception by a third party The wireless LAN function on the camera cannot be used to connect to a home or public access point The transceiver antenna is located inside the...

Page 107: ... OI Share display 4 Follow the on screen instructions in OI Share to scan the QR code and adjust connection settings Some smartphones will need to be configured manually after reading the QR code If you are unable to scan the QR code follow the on screen instructions in OI Share to adjust settings manually To connect enter the SSID and password displayed in the camera monitor into the smartphone W...

Page 108: ...r button The images in the camera are displayed in a list 3 Select the pictures you want to transfer and tap the Save button When transfer is complete you can turn off the camera from the smartphone Shooting Remotely with a Smartphone You can shoot remotely by operating the camera with a smartphone 1 Connect the camera to a smartphone P 107 2 Launch OI Share and tap the Remote button 3 Tap the shu...

Page 109: ...one connects automatically using the settings after the initial connection All OI Share functions are available One Time Connect to multiple smartphones connects using different connection settings each time Only OI Share s image transfer function is available You can view only images that are set for share order using the camera Select Select which method to use each time Off The Wi Fi function i...

Page 110: ...ss I 3 Follow the operation guide and press the R button A new password will be set Reconnect to the smartphone after changing passwords g Adjusting Settings for Connection to a Smartphone P 107 Cancelling a Share Order Cancel share orders that are set on images 1 Highlight Wi Fi Settings in the e Setup Menu and press the Q button 2 Highlight Reset share Order and press I 3 Highlight Yes and press...

Page 111: ...illegal to acquire position information without prior application to the government Because of this in certain sales regions the camera may be set up not to display position information When taking the camera abroad be aware that some regions or countries may have laws regulating the use of this function Be sure to abide by all local laws Before boarding an aircraft or entering other locations whe...

Page 112: ...ails on how to update the data If you are using the GPS function for the first time and the A GPS has not been updated or if the function has not been used for a long time it may take a few minutes for the position measurement to end Using GPS Any of the following enable GPS rotating the LOG switch to LOG P 113 selecting On for Record GPS location P 100 or selecting On for X Settings Auto Time Adj...

Page 113: ...while the log is being saved Do not remove the card until the message has cleared from the display Removing the card while the log is being saved could cause loss of the log file or camera or card malfunction The camera may not begin saving the log to the card when the LOG switch is rotated to OFF if for example wireless data transfer is in progress or the card is full or write protected in which ...

Page 114: ...ing the current log and images The current log and images can be viewed on the smartphone Downloading the current log and images The current log and images can be copied to and browsed on the smartphone Viewing tracks Logs stored on the card can be copied to the smartphone and viewed as tracks Linking images to a log Images shot while log recording was enabled can be linked to the log for viewing ...

Page 115: ...8 9 5 1 Time 2 Log recording in progress 3 Direction information 4 Temperature water temperature 5 Atmospheric pressure 6 Altitude depth 7 GPS icon 8 Latitude 9 Longitude Latitude and longitude If the GPS icon blinks or is not displayed the camera is unable to determine the current position GPS and other data displays These displays are not intended for applications that require a high degree of p...

Page 116: ...ost If nothing is displayed on the camera screen even after connecting the camera to the computer the battery may be exhausted Use a full charged battery If the camera cannot connect to PC disconnect and reconnect the cable The battery can be charged while the camera is connected to the computer via USB The charging time varies depending on the performance of the computer There may be cases in whi...

Page 117: ...guaranteed in the following environments even if your computer is equipped with a USB port Computers with a USB port added by means of an extension card etc computers without a factory installed OS or home built computers Camera controls cannot be used while the camera is connected to a computer If the computer does not detect the camera disconnect the USB cable and then reconnect it to the comput...

Page 118: ...r extended periods shortens their lives potentially rendering them unusable Fully charging the battery using the supplied USB AC adapter takes about 3 hours Charging times may increase at high ambient temperatures Do not use USB AC adapters or chargers not specifically designated for use with batteries of the supplied type Similarly do not use the supplied USB AC adapter with batteries other than ...

Page 119: ...nt Compression File format Number of storable still pictures RAW 4000 3000 Loss less compression ORF 270 YSF 1 2 7 JPEG 436 YF 1 4 638 YN 1 8 1231 XSF 3200 2400 1 2 7 673 XF 1 4 975 XN 1 8 1846 WSF 1280 960 1 2 7 3385 WF 1 4 4514 WN 1 8 7170 The number of storable still pictures may change according to the subject whether or not print reservations have been made and other factors In certain instan...

Page 120: ... Super Fine 25p 1280 720 Fine 30p 29 min 1280 720 Fine 25p 1280 720 Normal 30p 1280 720 Normal 25p 1920 1080 HighSpeed 120fps 20 sec 1280 720 HighSpeed 240fps 640 360 HighSpeed 480fps At movie quality settings of or a maximum of 20 seconds of footage can be recorded per shot The maximum file size of a single movie is 4GB regardless of the capacity of the card Increasing the number of pictures that...

Page 121: ... when using the camera in conditions with foreign materials such as dirt dust or sand If you continue to use the camera in such conditions it could cause damage to the camera To avoid such damage wash the camera using the following method 1 Close and lock the battery card compartment cover and connector cover firmly P 10 2 Fill a bucket or other container with fresh water immerse the camera facing...

Page 122: ... a long time Before taking important pictures be sure to take a test shot and check that the camera works properly Pixel Mapping Checking the image processing functions The pixel mapping feature allows the camera to check and adjust the image pickup device and image processing functions Before using the pixel mapping function to ensure that it operates correctly wait for 1 minute or longer immedia...

Page 123: ...us in house tests performed in accordance with IEC Standard Publication 60529 IPX8 This means that the camera can be used normally under water at a specified water pressure 2 This anti shock performance is confirmed by Olympus testing conditions in accordance with MIL STD 810F Method 516 5 Procedure IV Transit Drop Test For more details of Olympus testing conditions please refer to the Olympus web...

Page 124: ...cause damage to the camera s appearance and or deteriorate water resistance In order to preserve the water resistant feature as with any underwater housing it is recommended that the waterproof packing and seals are replaced annually For the Olympus distributors or service stations where the waterproof packing can be replaced visit Olympus website for your local area The included accessories e g U...

Page 125: ...ptic cable and so on For details about operation of a wireless flash and an underwater strobe refer to the instruction manual for a special external flash or an underwater case 1 Turn on the dedicated strobe 2 Set the flash mode of the dedicated strobe to RC mode When you have to set a channel and a group select CH1 for the channel A for the group 3 Highlight flash settings in live controls and se...

Page 126: ...ens from dirt and scratches during shooting and transport The LB T01 cannot be used with silicone jackets Fisheye converter FCON T01 Capture more of a scene Circular fisheye converter FCON T02 Switch from circular to full frame fish eye just by adjusting zoom Teleconverter TCON T01 Shoot more distant scenes Protective filter PRF D40 5 PRO Protects the lens from dirt and scratches during shooting a...

Page 127: ...lens ring Align the mounting marks and rotate the ring in the attach direction until it clicks into place Attaching and removing LED light guides LED light guide Mounting marks Lens ring release button Remove direction Attach direction Attaching light guides Align the mounting marks and rotate the guide in the attach direction until it clicks into place Removing light guides Keeping the lens ring ...

Page 128: ...sers Keeping the lens ring release button pressed rotate the diffuser in the remove direction Attaching and removing lens barriers Lens ring release button Remove direction Attach direction Mounting marks Lens barrier Attaching lens barriers Align the mounting marks and rotate the barrier in the attach direction until it clicks into place The lens barrier mounting mark can be found on the back of ...

Page 129: ...direction Attaching converter lenses and filters 1 Attach a converter adapter Align the mounting marks and rotate the adapter in the attach direction until it clicks into place 2 Rotate the lens or filter in the attach direction to screw it onto the adapter Removing converter lenses and filters 1 Rotate the lens or filter in the remove direction 2 Remove the converter adapter Keeping the lens ring...

Page 130: ... Ihre Sprache Select a language as described in Initial Setup P 18 No picture is taken when the shutter button is pressed The camera has turned off automatically The camera automatically enters sleep mode to reduce the drain on the battery if no operations are performed for a set period of time g Sleep P 100 Press the shutter button halfway to exit the sleep mode The camera will turn off automatic...

Page 131: ...hot by holding the camera vertically to focus and then returning to the horizontal position to take the picture Noise reduction is activated When shooting night scenes shutter speeds are slower and noise tends to appear in images The camera activates the noise reduction process after shooting at slow shutter speeds During which shooting is not allowed You can set Noise Reduct to Off g Noise Reduct...

Page 132: ...ight is caught in the picture Shooting with flash in dark situations results in an image with many flash reflections on dust in the air Unknown bright dot s appear on the subject in the picture taken This may be due to stuck pixel s on the image pickup device Perform Pixel Mapping If the problem persists repeat pixel mapping a few times g Pixel Mapping Checking the image processing functions P 122...

Page 133: ...tion such as print reservation can be recorded Replace the card or erase unwanted pictures Before erasing download important images to a PC There is no space in the card and print reservation or new images cannot be recorded No Picture There are no pictures on the card The card contains no pictures Record pictures and play back Picture Error The selected picture cannot be displayed for playback du...

Page 134: ...mera Logging function cannot be used at this time The area of camera memory used for temporary storage of the log file is full Insert a card or confirm that the current card is correctly inserted and transfer to log file to the card The battery is exhausted Charge the battery The camera is connected to a television or other device via an HDMI cable Disconnect the HDMI cable Wireless data transfer ...

Page 135: ...Before erasing download important images to a PC g steady The area of camera memory used for temporary storage of the log file is full Insert a card or confirm that the current card is correctly inserted and transfer to log file to the card The battery is exhausted Charge the battery The camera is connected to a television or other device via an HDMI cable Disconnect the HDMI cable Wireless data t...

Page 136: ...age stabilizer R R R R R R n Image stabilizer Flash 1 R R 1 1 1 1 Flash compensation R R R R R R Sequential shooting Self timer 1 R R R 1 1 R Metering mode R R R R R R Face priority R R Accessory 1 R R 1 1 1 1 Reset Assign Custom Modes R R R R R R R AF Area R R R Intrvl Sh Time Lapse R R R R Focus BKT R R R Focus Stacking Settings R R R R R R R Date Stamp R R R R R Movie R R R R R R R R Recording ...

Page 137: ... R R R n Image stabilizer 1 Flash 1 1 1 1 Flash compensation R R R R Sequential shooting Self timer 1 1 1 1 1 Metering mode Face priority 1 Accessory 1 1 1 1 1 1 Reset Assign Custom Modes R R R R R 1 AF Area R R R R R Intrvl Sh Time Lapse Focus BKT Focus Stacking Settings R R R R R R Date Stamp R R R R Movie R R R R R R 1 Recording Volume R R R R R 1 Video Frame Rate R R R R R 1 Video Bit Rate R R...

Page 138: ...ge stabilizer Flash 1 1 1 1 1 Flash compensation Sequential shooting Self timer 1 1 1 1 1 1 1 Metering mode Face priority Accessory 1 1 1 1 1 1 1 1 Reset Assign Custom Modes R R R R R R R R AF Area R R R R R R R R Intrvl Sh Time Lapse Focus BKT Focus Stacking Settings R R R R R R R R Date Stamp R R R R R R Movie R R R R R R R Recording Volume R R R R R R Video Frame Rate R R R R R R R R Video Bit ...

Page 139: ...e stabilizer Flash 1 1 1 Flash compensation Sequential shooting Self timer 1 1 1 1 1 Metering mode Face priority Accessory 1 1 1 1 1 1 1 1 Reset Assign Custom Modes R R R R R R R R AF Area R R R R R 1 R R Intrvl Sh Time Lapse Focus BKT Focus Stacking Settings R R R R R R R R Date Stamp R R R R R Movie R R R R R R Recording Volume R R R R R Video Frame Rate R R R R R R R R Video Bit Rate R R R R R ...

Page 140: ...de E w f mode 45 o p n k mode Other modes AUTO Sequential shooting Self timer o 42 Live Control Function Default 1 2 3 g Picture mode Natural 50 ISO AUTO 52 White balance AUTO 53 AF mode AF 55 Aspect ratio 4 3 55 K Still image quality YN 56 n Movie quality 1920 1080 Fine 30p 57 K Image stabilizer ON 59 n Image stabilizer ON 59 Flash m k mode E w f mode 45 o p n k mode Other modes AUTO Flash compen...

Page 141: ...ting Time 00 00 01 Interval Length 00 00 01 Time Lapse Movie Off Movie Settings Movie Resolution FullHD Frame Rate 10fps Focus BKT Off 85 Start Waiting Time 0 sec Set number of shots 30 Set focus differential Normal Focus Stacking Settings Start Waiting Time 0 sec 86 Set number of shots 8 Date Stamp Off 86 n Video Menu Tab Function Default 1 2 3 g n Movie R On 87 Recording Volume 0 87 Video Frame ...

Page 142: ...rder 75 Reset Protect 93 Connection to Smartphone 107 G Custom Menu Tab Function Default 1 2 3 g G AF MF a AF Illuminator Off 96 101 MF Assist Magnify Off 96 101 Peaking Off Disp 8 PC M G Info Settings q Info Image Only Overall 96 102 LV Info Custom1 u Custom2 Level Gauge G Settings 25 Calendar Live View Boost Off 96 Flicker Reduction Auto 96 Displayed Grid Off 96 Peaking Color White 96 101 8 3 97...

Page 143: ...W 98 K WB Color b K Set K1 YF K2 YN K3 XN K4 WN 98 105 WB Auto A 0 G 0 53 98 W Keep Warm Color On 98 Color Space sRGB 98 Record W File Name Reset 99 Edit Filename 99 Copyright Settings Copyright Info Off 99 Artist Name Copyright Name Field Sensor X Record GPS location Off 100 GPS Priority GPS accuracy 100 Elevation Temperature Calibrate Elevation 100 m ft m C F C K Utility c Pixel Mapping 100 122 ...

Page 144: ...tup Menu Tab Function Default 1 2 3 g e Card Setup 21 95 X Settings 19 W English 95 s 0 94 Rec View 0 5 sec 94 Wi Fi Settings Wi Fi Connect Settings Private 109 Private Password 110 Reset share Order 110 Reset Wi Fi Settings 109 ...

Page 145: ...ickup device 1 2 3 CMOS primary color filter Lens Olympus lens 4 5 mm to 18 0 mm f2 0 to f4 9 Equivalent to 25 mm to 100 mm on a 35 mm film Photometric system Digital ESP metering spot metering system Shutter speed 1 2 1 2000 sec slowest shutter speed available increases to 4 sec in A mode or when G is selected in SCN mode and to 15 sec when d is selected in SCN mode Shooting range Normal 0 1 m 0 ...

Page 146: ...eception frequency 1575 42 MHz GPS Quasi Zenith Satellites System 1598 0625 MHz to 1605 3750 MHz GLONASS Geodetic system WGS84 Operating environment Temperature 10 C to 40 C 14 F to 104 F operation 20 C to 60 C 4 F to 140 F storage Humidity 30 90 operation 10 90 storage Power supply One Olympus lithium ion battery LI 92B or USB AC adapter F 5AC Dimensions 113 0 mm W 66 0 mm H 32 4 mm D 4 5 2 6 1 3...

Page 147: ... F 5AC 2 Power requirements AC 100 to 240 V 50 60 Hz Output DC 5 V 1500 mA Operating environment Temperature 0 C to 40 C 32 F to 104 F operation 20 C to 60 C 4 F to 140 F storage SPECIFICATIONS ARE SUBJECT TO CHANGE WITHOUT ANY NOTICE OR OBLIGATION ON THE PART OF THE MANUFACTURER Visit our website for the latest specifications The terms HDMI and HDMI High Definition Multimedia Interface and the HD...

Page 148: ... Before you use the product read all operating instructions Store all manuals and documentation for future reference Water and Moisture For precautions on products with weatherproof designs read the weatherproofing sections Power Source Connect this product only to the power source described on the product label Foreign Objects To avoid personal injury never insert a metal object into the product ...

Page 149: ...rn When the camera contains metal parts overheating can result in a low temperature burn Pay attention to the following When used for a long period the camera will get hot If you hold on to the camera in this state a low temperature burn may be caused In places subject to extremely cold temperatures the temperature of the camera s body may be lower than the environmental temperature If possible we...

Page 150: ...a Do not use the battery to other devices Do not allow children or animals pets to handle or transport batteries prevent dangerous behaviour such as licking putting in mouth or chewing Use Only Dedicated Rechargeable Battery Battery Charger and USB AC adapter We strongly recommend that you use only the genuine Olympus dedicated rechargeable battery battery charger and USB AC adapter with this came...

Page 151: ...nitor unit TV radio tower or transmission towers In such cases turn the camera off and on again before further operation Always observe the operating environment restrictions described in the camera s manual Insert the battery carefully as described in the operating instructions Before loading always inspect the battery carefully for leaks discoloration warping or any other abnormality Always unlo...

Page 152: ...he monitor A strip of light may appear on the top bottom of the monitor but this is not a malfunction When a subject is viewed diagonally in the camera the edges may appear zigzagged on the monitor This is not a malfunction it will be less noticeable in playback mode In places subject to low temperatures the monitor may take a long time to turn on or its color may change temporarily When using the...

Page 153: ...o try to correct the interference by one or more of the following measures Reorient or relocate the receiving antenna Increase the separation between the equipment and receiver Connect the equipment into an outlet on a circuit different from that to which the receiver is connected Consult the dealer or an experienced radio TV technician for help Only the OLYMPUS supplied USB cable should be used t...

Page 154: ...ll not extend the warranty period provided herein unless required by law Except where prohibited by law the customer is liable and shall pay for shipment of the Products to the designated Olympus Repair Service Center Olympus shall not be obligated to perform preventive maintenance installation deinstallation or maintenance Olympus reserves the right to i use reconditioned refurbished and or servi...

Page 155: ...USTOMER MAY INCUR FROM DELAYED SHIPMENT PRODUCT FAILURE PRODUCT DESIGN SELECTION OR PRODUCTION IMAGE OR DATA LOSS OR IMPAIRMENT OR FROM ANY OTHER CAUSE WHETHER LIABILITY IS ASSERTED IN CONTRACT TORT INCLUDING NEGLIGENCE AND STRICT PRODUCT LIABILITY OR OTHERWISE IN NO EVENT SHALL OLYMPUS BE LIABLE FOR ANY INDIRECT INCIDENTAL CONSEQUENTIAL OR SPECIAL DAMAGES OF ANY KIND INCLUDING WITHOUT LIMITATION ...

Page 156: ...rints or files on disk if available and related to the problem KEEP COPIES OF ALL DOCUMENTS Neither Olympus nor an Olympus Authorized Repair Service Center will be responsible for documents that are lost or destroyed in transit When service is completed the Product will be returned to you postage prepaid PRIVACY Any information provided by you to process your warranty claim shall be kept confident...

Page 157: ...ificate 3 Since this Warranty Certificate will not be re issued keep it in a safe place 4 Please note that Olympus will not assume any risks or bear any costs incurred in transporting the product to the dealer or Olympus authorized service station 5 This Warranty does not cover the following and you will be required to pay a repair charge even for defects occurring within the warranty period refer...

Page 158: ...rthquake flood damage thunderbolt other natural disasters environmental pollution and irregular voltage sources e Any defect that occurs due to careless or improper storage such as keeping the product under conditions of high temperature and humidity near insect repellents such as naphthalene or harmful drugs etc improper maintenance etc f Any defect that occurs due to exhausted batteries etc g An...

Page 159: ...thorized international Olympus service network Disclaimer of Warranty Olympus makes no representations or warranties either expressed or implied by or concerning any content if these written materials or software and in no event shall be liable for any implied warranty of merchantability or fitness for any particular purpose or for any consequential incidental or indirect damages including but not...

Page 160: ...Y BE OBTAINED FROM MPEG LA L L C SEE HTTP WWW MPEGLA COM The software in this camera may include third party software Any third party software is subject to the terms and conditions imposed by the owners or licensors of that software under which software is provided to you Those terms and other third party software notices if any may be found in the software notice PDF file stored at http www olym...

Page 161: ... A A Aperture priority mode 36 AdobeRGB 98 AF Area 82 AF illuminator 25 101 AF mode 55 Aspect ratio 55 Audio recording Still image 72 AUTO mode B 25 B Backlight HDR 29 Battery charge 16 Computer 116 Battery level 17 Beep sound 97 BGM 73 C Calendar display 65 103 Card 13 15 Card Setup 21 95 Certification 100 Close up playback 65 Close ups 33 55 Color Space 98 Compression rate 56 105 119 Connection ...

Page 162: ...mage stabilizer 59 Image transfer to smartphone 108 Index display 65 103 INFO button 24 63 78 Information display 22 Playback 62 In Movie Image Capture 69 92 Installation 117 Intrvl Sh Time Lapse 84 ISO Auto Set 97 ISO sensitivity 52 J JPEG Edit 68 88 90 L Language setting W 94 LED illuminator 47 LED light guide 127 Lens barrier 128 Level Adjust 100 Level Gauge 24 102 Lighten blending 31 List of s...

Page 163: ...tion 100 Recording Volume 87 Rec View 94 Remote shooting 108 Reset Assign Custom Modes 80 Reset Protect 93 Rotate 72 S Scene mode 28 SCN Scene mode 28 SD card 15 Formatting the card 21 Self timer 42 Sequential shooting 42 Setup Menu 94 144 Share Order 71 Shooting Movie 38 Still image 27 Shooting Menu 80 141 Shooting Menu 1 80 Shooting Menu 2 80 Shooting modes 27 Silicone jacket 125 Sleep 17 100 Sl...

Page 164: ...164 EN Volume adjustment 66 W WB 98 White balance 53 White balance compensation 98 Wide Zoom 26 Wi Fi Settings 94 109 110 Wireless LAN 106 Wireless Remote Control Flash 125 Z Zoom 26 ...

Page 165: ......

Page 166: ...WD639600 date of issue 2019 05 ...

Reviews: