background image

6

OmniScan MX2 — Getting Started Guide

Front Panel

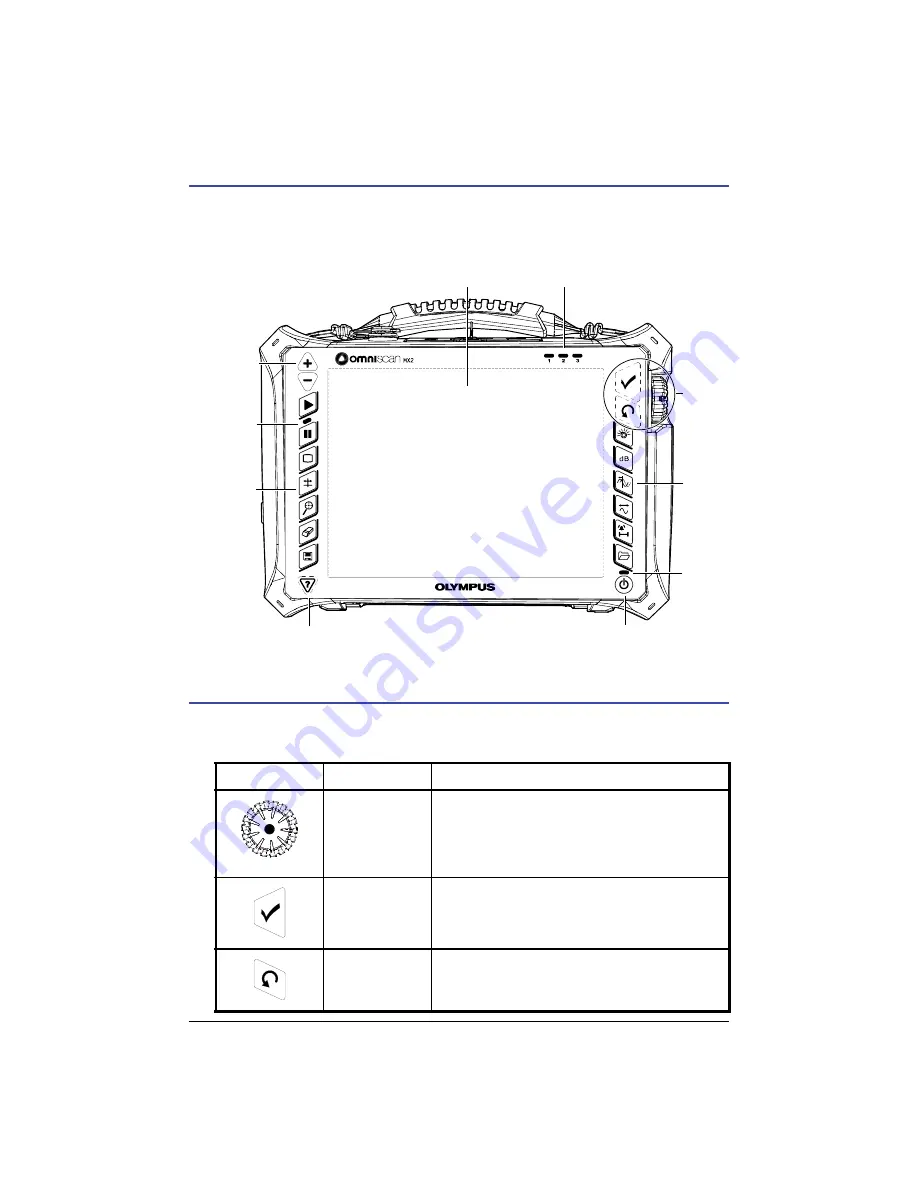
The front panel of the OmniScan MX2 contains all the main controls and indicators. This panel is 
divided into seven areas: the touch-screen display, the main control area, the function keys, the power 
button, the increment keys, the Help key, and the indicator lights.

Main Control Area

You can control the OmniScan MX2 using the main control area alone.

Element

Name

Description

Scroll knob

Used to navigate through selections without the 
need for a keyboard, mouse, or touch screen. 
Turning the scroll knob in a clockwise direction 
shifts a selection to the left (horizontal list) or 
upward (vertical list). 

Accept key

Used to confirm a selection.

Cancel key

Used to cancel the current selection, or to go back 
one level in the menu hierarchy.

Display touch 

screen

Increment

keys

Power 
indicator 
light

Acquisition

indicator light

Help key

Alarm indicator 

lights

Function keys

Power button

Function 
keys

Main 
control 
area

Summary of Contents for OmniScan MX2

Page 1: ...also available on the documentation USB drive that is shipped with the OmniScan MX2 or can be downloaded at www olympus ims com Safety Signal Words Indicates an imminently hazardous situation calling...

Page 2: ...15 V can be present on the PA connector The warning symbol near the PA and UT connectors signals this electric shock risk Alarm and I O connector Scanner interface SVGA video output Ethernet RJ 45 por...

Page 3: ...n MX2 or an external charger approved by Olympus to charge the battery Do not recharge a battery unless the indicators light up when the capacity check button on the battery is pressed Doing so could...

Page 4: ...y requiring charging starting with the weakest battery if the recharge conditions are met The indicator for the battery being recharged flashes yellow Once the weakest battery has reached the same lev...

Page 5: ...n both batteries are used simultaneously they will both appear highlighted The OmniScan MX2 software keeps the user informed of the battery status The table below describes some of the battery status...

Page 6: ...control area alone Element Name Description Scroll knob Used to navigate through selections without the need for a keyboard mouse or touch screen Turning the scroll knob in a clockwise direction shift...

Page 7: ...message appears 2 Select Shut Down A message asking you if you want to save your setup appears 3 To save your setup select Yes You can also turn off the OmniScan MX2 by pressing and holding the Power...

Page 8: ...olland Hitech50 which contains 50 post consumer fiber DMTA 20019 01EN Rev B February 2013 DMTA 20019 01EN 50 OmniScan MX2 Getting Started Guide Adaptors The figure below shows how the OmniScan MX2 can...

Reviews: