background image

Table of Contents 

Quick task index 

1.

Preparation 

2.

Shooting 

3.

Playback 

4.

Menu functions 

5.

Connecting the camera to a 
smartphone 

6.

Connecting the camera to a 
computer and a printer 

7.

Battery, battery charger, and card 

8.

Interchangeable lenses 

9.

Using separately sold accessories 

10.

Information 

11.

SAFETY PRECAUTIONS 

  Thank you for purchasing an Olympus digital camera. Before you start to use your new camera, 

please read these instructions carefully to enjoy optimum performance and a longer service life. 
Keep this manual in a safe place for future reference.

  We recommend that you take test shots to get accustomed to your camera before taking important 

photographs.

  The screen and camera illustrations shown in this manual were produced during the development 

stages and may differ from the actual product.

  If there are additions and/or modifications of functions due to firmware update for the camera, the 

contents will differ. For the latest information, please visit the Olympus website.

Instruction Manual

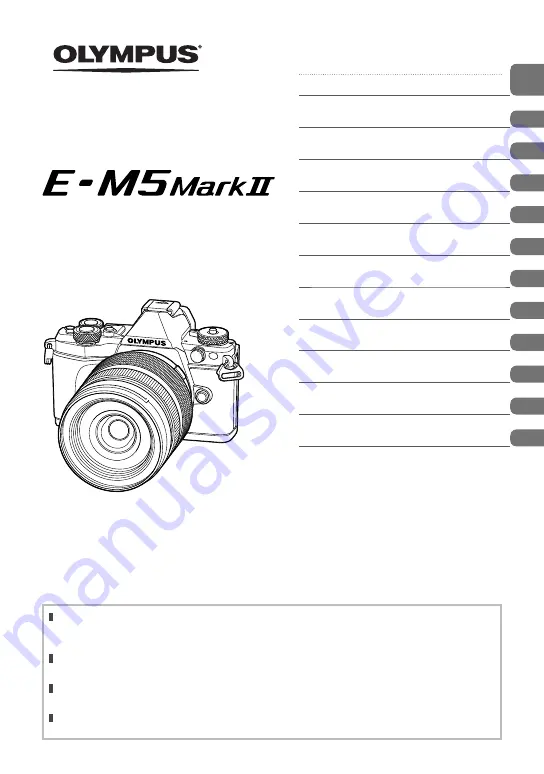
DIGITAL CAMERA

Model No. :  E-M5 II

Summary of Contents for E-M5Mark II

Page 1: ...these instructions carefully to enjoy optimum performance and a longer service life Keep this manual in a safe place for future reference We recommend that you take test shots to get accustomed to you...

Page 2: ...lectric shock do not immerse this flash in water or other liquids To reduce the risk of electric shock do not disassemble this flash but take it to qualified service personnel when service or repair w...

Page 3: ...aperture A aperture priority mode 35 Choosing shutter speed S shutter priority mode 36 Choosing aperture and shutter speed M manual mode 37 Shooting with long exposure time BULB 37 Live composite phot...

Page 4: ...g options picture mode 70 Making fine adjustments to sharpness sharpness 71 Making fine adjustments to contrast contrast 71 Making fine adjustments to saturation saturation 71 Making fine adjustments...

Page 5: ...etting 99 W Changing the display language 99 i Monitor brightness adjustment 99 Rec View 99 Wi Fi Settings 99 c Menu Display 99 Firmware 99 Using the custom menus 100 R AF MF 100 S Button Dial Lever 1...

Page 6: ...your charger abroad 131 Usable cards 132 Record mode and file size number of storable still pictures 133 Interchangeable lenses 134 M ZUIKO DIGITAL lens specifications 135 Using separately sold access...

Page 7: ...ing pictures with the correct color White balance 55 One touch white balance 56 Processing pictures to match the subject Taking monotone pictures Picture Mode 70 Art filter ART 30 When the camera will...

Page 8: ...View Boost 99 102 Checking set effect before taking a picture Preview function 67 Test Picture 67 Checking horizontal or vertical orientation before shooting Level gauge 22 Shooting with deliberate c...

Page 9: ...ing made easy Direct printing 127 Commercial prints Creating a print order 129 Transferring images to a smartphone Transferring images to a smartphone 120 Adding location data to images Adding locatio...

Page 10: ...P 67 a Mount Remove the body cap before attaching the lens b Stereo microphone P 74 82 98 c ON OFF lever P 17 d Mode dial lock P 23 e Mode dial P 23 f External flash connector P 143 g Self timer lamp...

Page 11: ...141 7 Fn1 button P 66 8 Lever P 34 37 111 9 MENU button P 84 0 Speaker a INFO button P 22 77 b Q button P 46 47 84 c Arrow pad P 78 d q Playback button P 78 e Erase button P 81 f Tripod socket g PBH c...

Page 12: ...r from whom you purchased the camera Camera Body cap Strap USB cable CB USB6 Flash case Computer software CD ROM Instruction manual Warranty card Flash FL LM3 Lithium ion battery BLN 1 Lithium ion cha...

Page 13: ...he battery compartment cover Battery compartment lock Battery compartment cover 2 1 3 Loading the battery Direction indicating mark Removing the battery Turn off the camera before opening or closing t...

Page 14: ...P 132 3 2 1 Terminal area Cautions Turn off the camera before loading or removing the battery or card Do not forcibly insert a damaged or deformed card Doing so may damage the card slot 2 Closing the...

Page 15: ...lens clockwise until you hear it click direction indicated by arrow 3 Cautions Make sure the camera is turned off when attaching or removing the lens Do not press the lens release button Do not touch...

Page 16: ...ngle Upper angle Self portrait When the monitor is in the selfie position the display on the monitor will flip vertically If you are using a power zoom lens it will automatically move to the wide angl...

Page 17: ...he camera is turned on green Low battery blinks red Charge the battery Monitor 250 250 F5 6 01 02 03 01 02 03 38 38 ISO A 200 Wi Fi Camera sleep operation If no operations are performed for a minute t...

Page 18: ...Use FG on the arrow pad to select d and press I Select X and press I X W j 0 k 0 2 1 Setup Menu English 0 5sec Wi Fi Settings c Menu Display Firmware Rec View Back Set d tab 3 Set the date and time Us...

Page 19: ...rning m P 137 P 149 c Flash P 63 blinks charging in progress lights up charging completed d AF confirmation mark P 24 e Image stabilizer P 57 f Art filter P 30 Scene mode P 28 Picture mode P 70 g Whit...

Page 20: ...de Wi Fi 28mm K J I G n P P FHD F 60p H M IS M IS 1 L R L R TC 00 00 00 00 DF 01 02 03 01 02 03 WMUTX ISO ISO AUTO AUTO C AF C AF G Recording level meter P 74 107 H Silent shooting tab P 41 I Shooting...

Page 21: ...n the viewfinder is lit up the monitor turns off Shooting using live view Monitor 250 250 F5 6 01 02 03 01 02 03 38 38 L N ISO A 200 Wi Fi j 0 0 0 0 FullHD F S ISAUTO S ISAUTO Live view display Q Curs...

Page 22: ...P 0 0 0 0 L N S ISAUTO S ISAUTO ISO A 200 Wi Fi F FHD 60p Histogram display Display a histogram showing the distribution of brightness in the image The horizontal axis gives the brightness the vertic...

Page 23: ...2 P P 34 A P 35 S P 36 M P 37 n P 39 1 Press the mode dial lock to unlock it and then turn to set the mode you wish to use When the mode dial lock has been pressed down the mode dial is locked Each ti...

Page 24: ...ve been set automatically by the camera are displayed If the AF confirmation mark blinks the subject is not in focus P 146 4 Release the shutter Press the shutter button all the way fully The shutter...

Page 25: ...t will be displayed Use the slider to choose the size of the frame Touch S to turn off the display of the AF target 14 14 10 10 7 7 5 5 3x 3x 250 250 F5 6 ISO A 200 S ISAUTO S ISAUTO Off 2 Use the sli...

Page 26: ...Color Saturation Guide item 3 Use your finger to position the sliders Tap a to enter the setting To cancel the live guide setting tap k on the screen When Shooting Tips is selected select an item and...

Page 27: ...settings are not applied to the RAW copy Pictures may appear grainy at some live guide setting levels Changes to live guide setting levels may not be visible in the monitor Frame rates drop when Blurr...

Page 28: ...Scene R Sunset J Panning U Night Portrait T Documents G Children s Panorama P 29 2 Shoot To choose a different setting press Q to display the scene menu Cautions To maximize the benefits of the scene...

Page 29: ...have installed the supplied computer software you can use it to join pictures together to form a panorama g Connecting the camera to a computer P 124 1 Select Panorama in SCN and press Q 2 Use FGHI to...

Page 30: ...urring unfocused areas t Cross Process Creates an image that expresses a surreal atmosphere Cross Process II creates an image that emphasizes magenta u Gentle Sepia Creates a high quality image by dra...

Page 31: ...fect The effects available vary with the selected filter Cautions To maximize the benefits of the art filters some of the shooting function settings are disabled If RAW is currently selected for image...

Page 32: ...TO STORY The number of images and arrangement of image regions can be altered for each theme of the PHOTO STORY You can change the frame color and frame surrounding effect in each variation Every them...

Page 33: ...RY image is saved as JPEG and the images in the frames as RAW RAW images are saved in 4 3 From among the AF Mode S AF MF and S AF MF can be set Also the AF target is fixed to a single central point Th...

Page 34: ...e correct exposure Warning display example blinking Status Action 60 60 F2 8 F2 8 The subject is too dark Use the flash 8000 8000 F22 F22 The subject is too bright The metered range of the camera is e...

Page 35: ...r 1 2 r Exposure compensation ISO o Aperture value White balance Setting the aperture value Decreasing aperture value Increasing aperture value F2 8 F4 0 F5 6 F8 0 F11 The shutter speed display will b...

Page 36: ...compensation ISO o Shutter speed White balance Setting the shutter speed Slower shutter speed Faster shutter speed 60 15 30 60 125 250 8000 The aperture value display will blink if the camera is unab...

Page 37: ...t Noise Reduct noise and or light spots may still be noticeable in the image displayed on the monitor and shot images under certain environmental conditions temperature etc and camera settings Noise i...

Page 38: ...e time to be the reference in Composite Settings P 104 2 In M mode set the shutter speed to LIVECOMP When the shutter speed is set to LIVECOMP you can display the Composite Settings by pressing the ME...

Page 39: ...will be split automatically When recording movies use an SD card that supports an SD speed class of 10 or higher To continuously record a movie of 4 GB or larger do not set the image quality mode to A...

Page 40: ...transition between scenes M Old Film Randomly apply damage and dust like noise similar to old movies U Multi Echo Apply an after image effect After images will appear behind moving objects T One Shot...

Page 41: ...than Movie Tele converter Taking photographs during movie recording Movie Photo Mode Press the shutter button during movie recording to record one of the frames of the movie as a photograph To end mov...

Page 42: ...f you press the R button again during shooting the shooting will continue while the button is held down up to a maximum of 16 seconds 5 Press the R button to shoot the next clip The confirmation scree...

Page 43: ...lect an item using FG and press the Q button Play My Clips Plays back the files in My Clips in order starting from the beginning Play Movie When a movie file has been selected you can control playback...

Page 44: ...e the mode dial to n 2 Press Q to display the live control and select movie image quality mode using the rear dial n P P WB AUTO WB WB WB AUTO AUTO AUTO n P P C AF C AF j 1 M IS M IS FHD F 30p FHD SF...

Page 45: ...4 3 0 0 0 0 01 02 03 01 02 03 1023 1023 U AEL AFL Settings that can be modified using LV super control panel 1 Currently selected option 2 ISO sensitivity P 54 3 Flash mode P 63 4 Flash intensity con...

Page 46: ...1023 WB U AEL AFL Live control In movie mode and PHOTO STORY mode you can use live control to select the shooting function while checking the effect on the screen When the controls in KControl Setting...

Page 47: ...se positive values to make pictures brighter negative values to make pictures darker Exposure can be adjusted by 5 0EV Negative No compensation 0 Positive Cautions Exposure compensation is not availab...

Page 48: ...tal Tele converter Image Aspect and group target settings Using small target and group target Setting AF target You can change the target selection method and target size You can also select Face prio...

Page 49: ...ected it will be indicated by a white border 5 Press the shutter button halfway to focus When the camera focuses on the face in the white border the border will turn green If the camera is able to det...

Page 50: ...autofocus just before the button was pressed the zoom frame will be displayed at the current focus position Use FGHI to position the zoom frame Press the INFO button and use FG to choose the zoom rat...

Page 51: ...monitor and the beep sounds when the focus is locked at the first time Even if the subject moves or you change the composition of the picture the camera continues trying to focus When using a Four Thi...

Page 52: ...button is assigned to Fn2 in the initial settings Assigning the color function to the multi function button 1 Press and hold the Fn2 button and rotate the front dial The multi function menu is displa...

Page 53: ...nsitivity is fixed to 200 Also the slowest available shutter speed is 1 second and the longest available exposure is 4 seconds HDR2 3F 2 0EV HDR bracketing is performed Select the number of images and...

Page 54: ...ill be adjusted according to the brightness at the metered point IHI Spot metering highlight Increases spot metering exposure Ensures bright subjects appear bright ISH Spot metering shadow Lowers spot...

Page 55: ...framed on the monitor Use this mode for general use Preset white balance 5 5300K For shooting outdoors on a clear day or to capture the reds in a sunset or the colors in a fireworks display N 7500K Fo...

Page 56: ...isibly tinted the message WB NG Retry will be displayed and no value will be recorded Correct the problem and repeat the process from Step 1 Making fine adjustments to white balance white balance comp...

Page 57: ...n and applies the appropriate image stabilization Movie OFF Movie I S Off Image stabilizer is off M IS1 All Direction Shake I S The camera uses both sensor shift VCM and electronic correction M IS2 Al...

Page 58: ...n is pressed all the way down Focus and exposure are fixed according to the options selected for AF Mode P 51 and AEL AFL P 110 Y12s Self timer 12 SEC Press the shutter button halfway to focus the res...

Page 59: ...ton is pressed all the way down and the shutter is released in Anti Shockz in X Shooting menu 2 Set to Off to hide this setting item P 95 1 Press the Q button to select j Y sequential shooting self ti...

Page 60: ...ill blink Wait for the blinking to stop before shooting Cautions Image quality is fixed to LF When image quality is set to RAW JPEG the camera saves a single RAW image extension ORI before combining i...

Page 61: ...JPEG YF YN XN and WN and RAW modes Choose a JPEG RAW option to record both a JPEG and a RAW image with each shot JPEG modes combine image size Y X and W and compression ratio SF F N and B When you wa...

Page 62: ...rate MOVnFHD 60p SF Full HD Super Fine 60p 1 Setting 2 Frame rate MOVnFHD 30p F Full HD Fine 30p 1 Setting 3 Frame rate MOVnFHD 30p N Full HD Normal 30p 1 3 Setting 4 Frame rate MOVnFHD 30p F Full HD...

Page 63: ...he shoe and is securely in place Hot shoe cover Changing orientation of the flash You can change the vertical and horizontal orientation of the flash unit Bounce shooting is also possible Cautions Ple...

Page 64: ...ronization 1st curtain Slow shutter speeds are used to brighten dimly lit backgrounds SLOW Slow synchronization 1st curtain Red eye reduction flash Combines slow synchronization with red eye reduction...

Page 65: ...M Fill in flash 1st curtain Always fires 60sec 1 250sec Fill in flash red eye reduction Flash off k k k 2nd C Fill in flash Slow synchronization 2nd curtain 2nd curtain Always fires 60sec 1 250sec AU...

Page 66: ...the camera Assigning functions to buttons Button Function Store the button allocated options This option is equivalent to the cCustom Menu S See the table below for the functions that can be assigned...

Page 67: ...on to select manual focus mode Press the button again to restore the previously selected AF mode RAWK Press the button to toggle between JPEG and RAW JPEG record modes K TEST Test Picture Pictures tak...

Page 68: ...ad for zooming operations u Monitor switching Press this button to switch between displaying hiding the preview If the eye sensor is disabled it switches between monitor display and EVF display V Leve...

Page 69: ...1023 AUTO AUTO AUTO AUTO WB AUTO AUTO WB Auto AUTO AUTO 250 F5 6 0 0 LOW LOW 200 200 250 250 320 320 400 400 500 500 Recommend P ISO sensitivity white balance options Color Creator option Fn2 Other op...

Page 70: ...ults suited to the scene i Vivid Produces vivid colors j Natural Produces natural colors Z Muted Produces flat tones a Portrait Produces beautiful skin tones J Monotone Produces black and white tone K...

Page 71: ...de P 70 settings you can make fine adjustments to contrast alone and store the changes 1 Press Q and select contrast 2 Adjust the contrast using the front dial 250 250 F5 6 P i Contrast NORM ISO AUTO...

Page 72: ...LOW Low Key Gradation for a dark subject Applying filter effects to monotone pictures B W Filter In the monotone setting in Picture Mode P 70 settings you can add and store a filter effect in advance...

Page 73: ...e You can select a format to ensure that colors are correctly reproduced when shot images are regenerated on a monitor or using a printer This option is equivalent to the Color Space in c Custom Menu...

Page 74: ...till photography mode Set the mode dial to n to enable the settings 1 Set the mode dial to n press the Q button and use the rear dial to select a shooting mode P P P P WB AUTO WB WB WB AUTO AUTO AUTO...

Page 75: ...e image quality Stabilization is not possible when the camera shake is excessive When the inside of the camera becomes hot shooting is automatically stopped to protect the camera With some art filters...

Page 76: ...2 30 15 100 0015 10 10 4 3 L N 3D 3D Wi Fi e 0 a 4 1 5 7 89 b c d 2 3 6 Overall display F5 6 F5 6 1 0 1 0 G 4 G 4 A 4 A 4 Adobe Adobe Natural Natural ISO 400 ISO 400 250 250 2 0 2 0 45mm 45mm 1 8 4608...

Page 77: ...hutter speed P 34 37 k Aperture value P 34 37 l Focal length P 137 m Flash intensity control P 66 n White balance compensation P 56 o Color space P 106 p Picture mode P 70 q Compression rate P 116 r P...

Page 78: ...al o Zoom in p Index q Front dial r Previous t Next s Operation also available during close up playback Arrow pad FGHI Single frame playback Next I previous H playback volume FG Close up playback Scro...

Page 79: ...5 6 7 c 11 24 MOV FHD 30p c 12 12 MOV FHD 30p 2015 01 01 c 11 23 MOV FHD 30p 12 30 q p q p q p My Clips playback 1 1 If one or more My Clips have been created it will be displayed here P 42 Viewing st...

Page 80: ...include only the opening portion of each clip 3 Select Start and press Q The slideshow will start Press Q to stop the slideshow Volume Press FG during the slideshow to adjust the overall volume of the...

Page 81: ...les separately Cautions We recommend using the supplied PC software to play movies on a computer Before launching the software for the first time connect the camera to the computer Protecting images P...

Page 82: ...You can select multiple images for Share Order Selected 0 or Erase Selected Press the H button in the index display screen P 79 to select an image a v icon will appear on the image Press the H button...

Page 83: ...up to view the next page down to view the previous page Use Q or R to choose the number of images displayed Tap R several times to return to single frame playback S Viewing images Tap an image to view...

Page 84: ...peration guide Press the MENU button to go back one screen Tab A guide is displayed for about 2 seconds after you select an option Press the INFO button to view or hide guides 2 Use FG to select a tab...

Page 85: ...card Card Setup Cards must be formatted with this camera before first use or after being used with other cameras or computers All data stored on the card including protected images is erased when the...

Page 86: ...lect Reset Myset in W Shooting Menu 1 3 Select the desired destination Myset1 Myset4 and press I Set appears next to destinations Myset1 Myset4 to which settings have already been saved Selecting Set...

Page 87: ...Pict Tone Monotone k k P 73 Tips You can reduce the number of picture mode options displayed in the menu g Picture Mode Settings P 102 Cautions Changes to contrast have no effect at settings other tha...

Page 88: ...en a RAW image is displayed the area visible in the monitor is indicated by a frame AF target drops Setting the self timer j Y You can customize the self timer operation 1 Select j Y i in W Shooting M...

Page 89: ...ither of the time before shooting or shooting interval is set to 1 minute 31 seconds or longer the monitor and camera power will turn off after 1 minute 10 seconds before shooting the power will autom...

Page 90: ...eting 2 After selecting On press I and select a bracket shooting type When you select bracket shooting t appears on the screen AE BKT WB BKT FL BKT ISO BKT ART BKT A G Bracketing Back Set 3 Press I se...

Page 91: ...2f 1 0EV 3f 0 3EV 3f 0 7EV 3f 1 0EV Off Bracketing Back Set WB BKT WB bracketing Three images with different white balances adjusted in specified color directions are automatically created from one s...

Page 92: ...The size of the bracketing increment does not change with the value selected for ISO Step g Using the custom menus P 100 Bracketing is performed regardless of the upper limit set with ISO Auto Set g U...

Page 93: ...ng the next shot Tips To overlay 3 or more frames Select RAW for K and use the Overlay option to make repeated multiple exposures For more information on overlaying RAW images g Image overlay P 98 Cau...

Page 94: ...Keystone Comp in X Shooting Menu 2 Notes When D Keystone compensation P 67 is assigned to a button using Button Function press and hold the selected button to end keystone correction Cautions Photos a...

Page 95: ...marked with in sequential shooting self timer mode When not using silent shooting set to Off Noise Reduction Set to AUTO to reduce noise in long exposure shots when using silent shooting mode During n...

Page 96: ...se FG to select Sel Image and press Q 3 Use HI to select the image to be edited and press Q RAW Data Edit is displayed if the picture is a RAW image JPEG Edit if it is a JPEG image If the image was re...

Page 97: ...ther than 4 3 standard are converted to the closest image file size e Portrait Makes skin look smooth and translucent You may not be able to compensate depending on the image if face detection fails 5...

Page 98: ...d in Step 3 the overlay will be displayed RAW RAW RAW RAW RAW RAW RAW Image Overlay Back Set 5 Adjust gain Use HI to select an image and use FG to adjust gain Gain can be adjusted in the range 0 1 2 0...

Page 99: ...Vivid Natural Back Set Rec View Choose whether pictures are displayed immediately after shooting and for how long This is useful for making a brief check of the picture you have just taken Pressing t...

Page 100: ...AE lock 110 Reset Lens When set to Off the focus position of the lens is not reset even when the power is turned off When set to On the focus of power zoom lenses is also reset Bulb Time Focusing You...

Page 101: ...n g Rls Priority S If On is selected the shutter can be released even when the camera is not in focus This option can be set separately for S AF P 51 and C AF P 51 modes Rls Priority C j L fps Choose...

Page 102: ...played in index and calendar playback 114 115 Displayed Grid Select w x y X or x to display a grid on the monitor Picture Mode Settings Display only the selected picture mode when a picture mode is se...

Page 103: ...l not dim if Hold is selected Sleep The camera will enter sleep energy saving mode if no operations are performed for the selected period The camera can be reactivated by pressing the shutter button h...

Page 104: ...it and default value used for ISO sensitivity when Auto is selected for ISO High Limit Choose the upper limit for auto ISO sensitivity selection Default Choose the default value for auto ISO sensitivi...

Page 105: ...Count Back Set Compression rate Image size 61 Pixel Count Choose the pixel count for X and W size images 1 Select Xiddle or Wmall and press I 2 Choose a pixel count and press Q Xiddle Wmall 2560 1920...

Page 106: ...are erased Both the RAW and JPEG copies are deleted when selected images are deleted or when All Erase P 85 is selected 61 File Name Auto Even when a new card is inserted the file numbers are retaine...

Page 107: ...use of Copyright Settings Use at your own risk Z Movie Option Description g nMode Choose a movie record mode This option can also be selected using the live control 40 Movie R Choose Off to record si...

Page 108: ...Settings You can set combinations of movie image size and compression format bit rate in SET1 to SET4 After performing these settings you can select them in movie image quality mode P 62 Image Size Se...

Page 109: ...feature allows the camera to check and adjust the image pickup device and image processing functions 151 Exposure Shift Adjust correct exposure separately for each metering mode This reduces the numbe...

Page 110: ...s setting is not available when Release Lag Time is set to Short AEL AFL MENU c R AEL AFL Autofocus and metering can be performed by pressing the button to which AEL AFL has been assigned Choose a mod...

Page 111: ...all subjects tend to be enhanced more strongly This is no guarantee of accurate focusing t Lever Function MENU c S t Lever Function You can use the positioning of the lever to change the function of t...

Page 112: ...ss and hold the INFO button The camera monitor turns off when an AV cable is connected Press the q button when connecting via an AV cable Cautions For details on changing the input source of the TV re...

Page 113: ...Q button while the control panel is displayed then press the INFO button to switch the display Live guide INFO Art filter menu Q Q Q Change Color Saturation A P A S M ART SCN INFO INFO Scene menu Pop...

Page 114: ...information displays The added displays are displayed by repeatedly pressing the INFO button during playback You can also choose to not show displays that appear at the default setting Highlight Shado...

Page 115: ...15 1 Sun Mon Tue Wed Thu Fri Sat 28 29 30 31 1 2 3 4 5 6 7 8 9 10 11 12 13 14 15 16 17 18 19 20 21 22 23 24 25 26 27 28 29 30 31 1 2 3 4 5 6 7 28 29 30 31 1 2 3 4 5 6 7 8 9 10 11 12 13 14 15 16 17 18...

Page 116: ...using the selfie assist menu MENU c k Selfie Assist When the monitor is in the selfie position you can display a convenient touch menu 1 Select On for Selfie Assist in c Custom Menu tab k 2 Turn the...

Page 117: ...ayed in the monitor or by pressing the shutter button Selecting the display style of the viewfinder MENU c b Built in EVF Style Style 1 2 Displays only main items such as shutter speed and aperture va...

Page 118: ...the wireless LAN function read Using the wireless LAN function P 163 If using the wireless LAN function in a country outside the region where the camera was purchased there is a risk that the camera w...

Page 119: ...necting to your smartphone Read QR code by OLYMPUS Image Share End Wi Fi SSID E M5II P 00000001 Password 11223344 3 3 3 Start OI Share on your smartphone and read the QR code displayed on the camera m...

Page 120: ...nd tap the Image Transfer button The images in the camera are displayed in a list 3 Select the pictures you want to transfer and tap the Save button When saving is completed you can turn off the camer...

Page 121: ...chronize the time You can use the phone or other apps while the GPS log is saving Do not terminate OI Share 2 When shooting is complete turn off the switch on the Add Location button Saving the GPS lo...

Page 122: ...t the wireless LAN connection method and press Q Private Connect to one smartphone connects automatically using the settings after the initial connection All OI Share functions are available One Time...

Page 123: ...1 Select Wi Fi Settings in the d Setup Menu and press Q 2 Select Reset share Order and press I 3 Select Yes and press Q Initializing wireless LAN settings Initializes content of Wi Fi Settings 1 Selec...

Page 124: ...mpting you to choose a host If it is not select Auto for USB Mode P 103 in the camera custom menus Copying pictures to a computer The following operating systems are compatible with the USB connection...

Page 125: ...vies you have shot on your camera You can also download OLYMPUS Viewer 3 from http support olympus imaging com ov3download You must enter the product s serial number to download OLYMPUS Viewer 3 Windo...

Page 126: ...sh 1 Insert the supplied CD in a CD ROM drive The disk contents should automatically be displayed in the Finder If they are not double click the CD icon on the desktop Double click the Setup icon to d...

Page 127: ...menus 2 Use FG to select Print One Moment will be displayed followed by a print mode selection dialog If the screen is not displayed after a few minutes disconnect the USB cable and start again from...

Page 128: ...tting varies with the type of printer If only the printer s STANDARD setting is available you cannot change the setting Size Sets the paper size that the printer supports Borderless Selects whether th...

Page 129: ...ancel and press Q Note that any changes to the print order will be lost to cancel printing and return to the previous step where you can make changes to the current print order press MENU Print reserv...

Page 130: ...es Print orders cannot include 3D photos RAW images or movies Removing all or selected pictures from the print order You can reset all print reservation data or just the data for selected pictures 1 P...

Page 131: ...using the provided charger before use The normal charging time using the provided charger is approximately 4 hours estimated Do not attempt to use chargers not specifically designated for use with the...

Page 132: ...rased completely even after formatting the card or deleting the data When discarding destroy the card to prevent leakage of personal information Use the Eye Fi card in compliance with the laws and reg...

Page 133: ...N 1 8 Approx 0 6 1356 XB 1 12 Approx 0 4 1968 XSF 1600 1200 1 2 7 Approx 1 3 678 XF 1 4 Approx 0 9 984 XN 1 8 Approx 0 5 1907 XB 1 12 Approx 0 4 2653 WSF 1280 960 1 2 7 Approx 0 9 1034 WF 1 4 Approx 0...

Page 134: ...ens in dusty places Do not point the lens attached to the camera toward the sun This may cause the camera to malfunction or even ignite due to the magnifying effect of sunlight focusing through the le...

Page 135: ...a Focus ring Zoom ring Wide side Focus on nearby subject Tele side Focus on far away subject When the camera is turned off When the camera is turned on You can use the camera custom menu to increase o...

Page 136: ...e l button can be selected in the camera custom menu MF manual focus control 17mm f1 8 ED12mm f2 0 Snapshot focus ED12 40mm f2 8PRO MF clutch focus Slide the focus ring in the direction of the arrow t...

Page 137: ...5 5 6 EZ ED12 40mm f2 8PRO ED14 150mm f4 0 5 6 II Mount Micro Four Thirds mount Focal length 14 42 mm 12 40mm 14 150mm Max aperture f 3 5 5 6 f 2 8 f 4 0 5 6 Image angle 75 29 84 1 30 3 75 8 2 Lens co...

Page 138: ...10 lenses 4 groups 5 lenses Iris control f 1 8 22 f 3 5 22 Fixed to f 8 Shooting range Focal length 0 25 m 0 35m 0 2 0 5m macro mode 0 2 m Focus adjustment AF MF switching MF Weight excluding hood an...

Page 139: ...era s power when attaching or removing the power battery holder Names of parts Shutter button Front dial Release wheel Vertical operation lock knob B Fn2 button B Fn1 button Rear dial AC connector cov...

Page 140: ...2 9 2 3 HLD 6P Approx 117 8 31 3 56 4mm 4 6 1 2 2 2 Weight excluding the battery and connector cap HLD 8G Approx 108g 0 24 b HLD 6P Approx 126 2g 0 28 b Splash resistance when attached to a camera Typ...

Page 141: ...e FL 600R TTL AUTO AUTO MANUAL FP TTL AUTO FP MANUAL GN36 85mm 1 GN20 24mm 1 FL 300R TTL AUTO MANUAL GN20 28mm 1 FL 14 TTL AUTO AUTO MANUAL GN14 28mm 1 RF 11 TTL AUTO MANUAL GN11 TF 22 GN22 1 The foca...

Page 142: ...r confirming that the built in and remote flash units have charged take a test shot Wireless flash control range Position the wireless flash units with their remote sensors facing the camera The follo...

Page 143: ...o the ISO sensitivity and aperture values selected with the camera Flash brightness can be adjusted by adjusting either ISO sensitivity or aperture Use a flash with an angle of illumination suited to...

Page 144: ...ued 2 For compatible lens refer to the Olympus Official Web Site Viewfinder BCN 1 Li ion Battery Charger BLN 1 Li ion Battery HLD 8 Power Battery Holder AC 3 AC Adapter Flash EP 16 Eyecup Power Supply...

Page 145: ...Z M ZUIKO DIGITAL 14 42mm f3 5 5 6 II R M ZUIKO DIGITAL ED14 150mmf4 0 5 6 II M ZUIKO DIGITAL ED 40 150mm f4 0 5 6 R M ZUIKO DIGITAL ED40 150mmf2 8 PRO M ZUIKO DIGITAL 75 300mm f4 8 6 7 II Teleconvert...

Page 146: ...ff automatically The flash is charging On the monitor the mark blinks when charging is in progress Wait for the blinking to stop then press the shutter button Unable to focus The camera cannot focus o...

Page 147: ...re correct Set functions are restored to their factory default settings When you rotate the mode dial or turn off the power in a shooting mode other than P A S or M functions with changes made to thei...

Page 148: ...efore erasing download important images to a PC Clean the contact area of the card with a dry cloth Clean Card Format Card Setup Set Card cannot be read Card may not have been formatted Select Clean C...

Page 149: ...The printer has run out of ink Replace the ink cartridge in the printer Jammed The paper is jammed Remove the jammed paper Settings Changed The printer s paper cassette has been removed or the printe...

Page 150: ...ace the front and rear lens caps before putting the lens away Clean the camera after use Do not store with insect repellent Cleaning and checking the image pickup device This camera incorporates a dus...

Page 151: ...or or taking continuous shots wait for at least one minute before using the pixel mapping function to ensure that it operates correctly 1 Select Pixel Mapping in c Custom Menu P 109 tab k 2 Press I th...

Page 152: ...60p 62 Image Aspect 4 3 60 Digital Tele converter Off 88 j Y i 88 j Y o Time Lapse Settings Off 89 Frame 99 Start Waiting Time 00 00 01 Interval Time 00 00 01 Time Lapse Movie Off X Bracketing Off 90...

Page 153: ...ab Function Default 1 2 3 g d X 18 W 99 i j 0 k 0 Natural 99 Rec View 0 5sec 99 Wi Fi Settings Wi Fi Connect Settings Private 122 Private Password Reset share Order Reset Wi Fi Settings c Menu Display...

Page 154: ...nction AEL AFL nFunction P lFunction AF Stop Dial Function P Ps F 101 A FNo F S Shutter F M Shutter FNo Menu FG HI q Prev Next G U Dial Direction Exposure Dial1 Ps Dial1 Mode Dial Function Off t Lever...

Page 155: ...Clips playback Displayed Grid Off Picture Mode Settings All On Histogram Settings Highlight 255 Shadow 0 Mode Guide On Live View Boost M On1 BULB TIME On2 COMP Off Others Off Frame Rate Normal Art LV...

Page 156: ...SO Auto P A S Metering p AEL Metering Auto Bulb Time Timer 8min Bulb Time Monitor 7 Live Bulb Off Live Time 0 5 sec Composite Settings 1 sec W Custom X Sync 1 250 105 Slow Limit 1 60 w F Off X K Color...

Page 157: ...n Wind Noise Reduction Off KPlug in Power On PCM Recorder K Link Off Headphone Volume 8 Time Code Settings Time Code Mode DF Drop Frame 108 Count Up RR Rec Run Starting Time n Info Settings All On Mov...

Page 158: ...y Pixel Mapping 109 Exposure Shift p 0 J 5 Warning Level 0 Battery Priority PBH Battery Level Adjust Touch Screen Settings On Eye Fi On Electronic Zoom Speed Still Picture Normal 110 Movie Normal Self...

Page 159: ...Product type 3 0 TFT color LCD Vari angle touch screen Total no of pixels Approx 1 040 000 dots aspect ratio 3 2 Shutter Product type Computerized focal plane shutter Shutter speed 1 8000 60 sec bulb...

Page 160: ...nction Switch to sleep mode 1 minute Power OFF 4 hours This function can be customized Flash Flash control mode TTL AUTO TTL pre flash mode MANUAL Sync speed 1 250 s or slower Wireless LAN Compatible...

Page 161: ...th usage conditions Ambient temperature 0 C 40 C 32 F 104 F charging Dimensions Approx 36 0 mm W 15 4 mm H 50 2 mm D 1 4 0 6 2 0 Weight Approx 52 g 0 1 b Lithium ion charger MODEL NO BCN 1 Rated input...

Page 162: ...wall outlet before cleaning Use only a damp cloth for cleaning Never use any type of liquid or aerosol cleaner or any type of organic solvent to clean this product Attachments For your safety and to a...

Page 163: ...identally swallowing the battery cards or other small parts Accidentally firing the flash into their own eyes or those of another child Accidentally being injured by the moving parts of the camera Use...

Page 164: ...e shocks or vibrations When attaching the camera to or removing it from a tripod rotate the tripod screw not the camera Before transporting the camera remove a tripod and all other non OLYMPUS accesso...

Page 165: ...resulting in a playback mode failure or damage to the monitor A strip of light may appear on the top bottom of the monitor but this is not a malfunction When a subject is viewed diagonally in the came...

Page 166: ...installed and used in accordance with the instructions may cause harmful interference to radio communications However there is no guarantee that interference will not occur in a particular installatio...

Page 167: ...stomer s sole remedy hereunder Repair or replacement of a Product shall not extend the warranty period provided herein unless required by law Except where prohibited by law the customer is liable and...

Page 168: ...NTRACT TORT INCLUDING NEGLIGENCE AND STRICT PRODUCT LIABILITY OR OTHERWISE IN NO EVENT SHALL OLYMPUS BE LIABLE FOR ANY INDIRECT INCIDENTAL CONSEQUENTIAL OR SPECIAL DAMAGES OF ANY KIND INCLUDING WITHOU...

Page 169: ...ts that are lost or destroyed in transit When service is completed the Product will be returned to you postage prepaid PRIVACY Any information provided by you to process your warranty claim shall be k...

Page 170: ...Olympus authorized service station 5 This Warranty does not cover the following and you will be required to pay a repair charge even for defects occurring within the warranty period referred to above...

Page 171: ...Association JEITA All other company and product names are registered trademarks and or trademarks of their respective owners THIS PRODUCT IS LICENSED UNDER THE AVC PATENT PORTFOLIO LICENSE FOR THE PE...

Page 172: ...ty mode 35 AdobeRGB 106 AEL AFL 110 AEL Metering 104 AE Lock 19 67 110 AF Area P 48 AF Illuminat AF illuminator 100 AF Mode 51 100 AF Tracking 51 All 105 Anti Shock 95 ART Art filter 23 30 Art Effects...

Page 173: ...F mode 51 Focus Ring 100 Format Card setup 85 Full time AF 100 H Half Way Rls With IS 101 HDMI 102 HDR 53 High Dynamic Range HDR 53 Highlight Shadow Control 52 High Res Shot 60 Histogram Display 22 Hi...

Page 174: ...8 Movie Playback 78 81 Still Image Playback 78 79 Playback Menu 96 Preview 67 Preview Lock 103 Print 127 Print reservation 129 Priority Set 106 Program shift 34 Pupil Detection AF 49 Q Quick Erase 106...

Page 175: ...ot AF Zoom frame AF 50 T Test Picture 67 Time Lapse Movie 89 Time Lapse Shooting 89 Time Photography 37 Touch AF 25 Touch Screen Settings 109 TV 112 U USB Mode 103 V Video Out 102 Volume Adjustment 80...

Page 176: ...E mail service oml olympus ap com OLYMPUS Thailand CO LTD 23 112 Sorachai Building 27th Floor Soi Sukhumvit 63 Ekamai Sukhumvit road Klongton Nua Wattana Bangkok 10110 Thailand Tel 662 787 8200...

Page 177: ...WC796101 Unit A301 Mingyuan Business Center No 1199 Middle Fuxing Road Shanghai E mail cs olympus ap com date of issue 2014 12...

Reviews: