background image

9

3

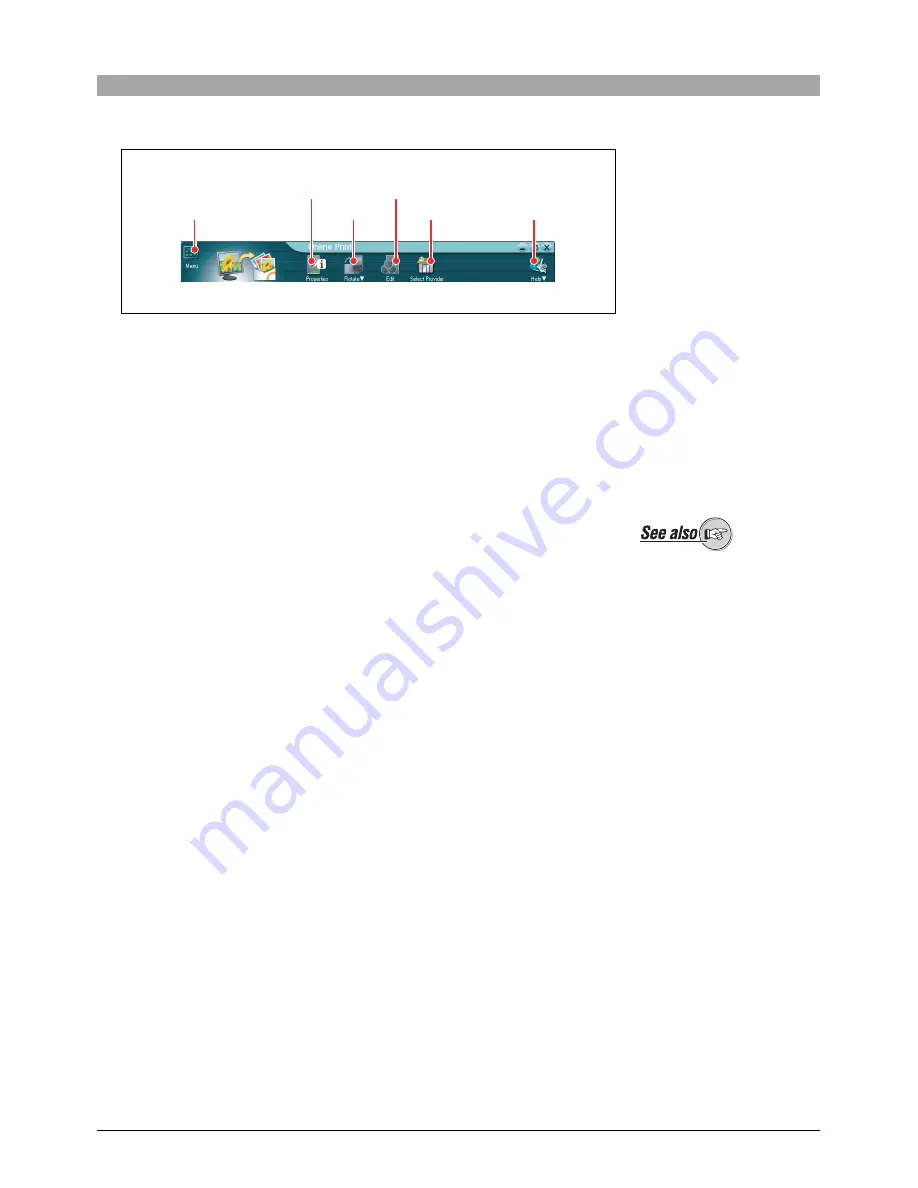
Tool buttons

The following tool buttons are provided.

Menu/Back

Returns to the main menu or album window.

Properties

Displays the properties information for the image file selected in the 
image display area.

Rotate

Rotates the image selected in the preview display area.

Edit

Displays an image editing window for editing the image selected in 
the preview display area.

Select Provider

Displays the print service selection window.

Help

Displays Help information for the Online Print window.

4

Online service information area

This shows the online print service information (e.g. the name of the 
service, Logo) being selected.

5

Add button

This adds the images selected in the image display area into the preview 
display area.

6

Preview display area

Drag the image you want to print online to the window. When the connection 
is established, the online print service’s print order window is displayed.

7

Remove button

This removes the selected image from the preview display area.

8

Online Print button

This uploads the images you selected and the print order window appears.

Menu/Back

Properties

Rotate

Edit

Select Provider

Help

For details on the image 
editing window, see also 
“Image Editing Window” in the 
CAMEDIA Master/Pro (4.2SE 
or later) operating 
instructions.

Summary of Contents for CAMEDIA Master 4.3/Pro

Page 1: ...Functions for Online Printing and Photo Sharing CAMEDIA Master 4 3 Pro Plugin Functions Operating Instructions...

Page 2: ...ion 5 Photo sharing function 5 System Requirements 6 Main Menu 7 Online Printing 8 Online Print Window 8 Using Online Printing 10 Selecting other services 12 Photo Sharing 13 Photo Share Window 13 Usi...

Page 3: ...act an authorized Olympus service center This software is only guaranteed to operate in the specified operating environment The software specifications and the content of this manual are subject to ch...

Page 4: ...functions Once you are familiar with the functions you can use the help information for extra explanations while using the functions Terminology The following terms appear throughout this manual File...

Page 5: ...in the order Photo sharing function This function is for making personal online albums of digital photo collections These are stored on the Olympus Digital Print Service powered by Ofoto server Your p...

Page 6: ...Olympus web site http www olympus com This software only operates on a computer with preinstalled CAMEDIA Master 4 2SE or later To use this function your computer must already be set up with an Intern...

Page 7: ...recognizable icons on the main menu Click the icons to start the respective functions as illustrated below 1 Online Print button This displays the Online Print window page 8 2 Photo Share button This...

Page 8: ...election tab This switches between the album display and the folder tree display For details on the album window see also Browsing Images in the CAMEDIA Master Pro 4 2SE or later operating instruction...

Page 9: ...is shows the online print service information e g the name of the service Logo being selected 5 Add button This adds the images selected in the image display area into the preview display area 6 Previ...

Page 10: ...ith your computer or Internet service provider For details on the album window see also Browsing Images in the CAMEDIA Master Pro 4 2SE or later operating instructions If you access the Online Print w...

Page 11: ...ine service information area press the Select Provider tool button Refer to Selecting other services page 12 5 Click the Online Print button The JPEG format conversion progress dialog box appears Afte...

Page 12: ...service or Show all services Selecting Show only integrated service The integrated online print services e g Olympus Digital Print Service powered by Ofoto that allow you to purchase prints through th...

Page 13: ...tab This switches between the album display and the folder tree display For details on the album window see also Browsing Images in the CAMEDIA Master Pro 4 2SE or later operating instructions 1 Imag...

Page 14: ...r entering the subject greeting title etc of the e mail 7 Online Album Name For entering the online album name The online album name is also used as the album name on the server 8 Add button This adds...

Page 15: ...ce provider To use this function your computer must already be set up to send and receive e mails You will need an Internet service provider network software etc For more details refer to the operatin...

Page 16: ...a Select the image you want to remove and click the Remove button 5 Enter the online album name 6 Set the addressee 1 Click the Address button This opens the Address Book dialog box 2 Select the addre...

Page 17: ...x Image files start uploading Recipients will receive an e mail with the access information and online album names Now your friends and family can enjoy sharing the album you created Refer to Overview...

Page 18: ...cannot enter the e mail address you have already registered Password Re type your Password Type your password again User name Fill in the First Name area 1 When the Log In to Your Olympus Ofoto accoun...

Page 19: ...n e mail to for sharing your album can use depending on the user status Registered user own album When a registered user is viewing their own album Registered user other album When a registered user i...

Page 20: ...Two Corporate Center Drive Melville NY 11747 3157 U S A Tel 631 844 5000 Technical Support USA 24 7 online automated help http www olympusamerica com support Phone customer support Tel 1 888 553 4448...

Page 21: ...d operations Images Exif JPEG jpg Display and saving Exif TIFF tif Display and saving JFIF JPEG jpg Display and saving TIFF tif Display and saving Bitmap bmp Display and saving Windows version only RA...

Page 22: ...VT900401 OLYMPUS CORPORATION...

Reviews: