background image

Before using your camera, read this manual carefully to ensure correct use.

We recommend that you take test shots to get accustomed to your camera before taking
important photographs.

These instructions are only a basic manual. For more details on the functions described here,
refer to the software CD’s reference manual on CD-ROM.

Avant d’utiliser votre appareil photo, veuillez lire attentivement ce mode d’emploi, de manière
à obtenir les meilleurs résultats possibles.

Avant d’effectuer des prises de vues importantes, nous vous conseillons par ailleurs de faire
quelques essais afin de vous familiariser avec le maniement de l’appareil photo.

Ces instructions ne sont qu’un manuel de base. Pour plus de détails sur les fonctions
décrites ici, se référer au manuel de référence sur le CD-ROM.

Bitte lesen Sie vor dem Gebrauch dieser Kamera sorgfältig diese Bedienungsanleitung, um
optimale Ergebnisse beim Fotografieren zu erzielen.

Wir empfehlen, vor wichtigen Aufnahmen Probeaufnahmen durchzuführen, um sich mit der
Bedienung und den Funktionen der Kamera vertraut zu machen.

Die vorliegende Broschüre stellt nur eine einfache Anleitung dar. Falls Sie ausführlichere
Angaben zu den hier beschriebenen Funktionen benötigen, steht Ihnen die
KURZANLEITUNG auf der CD-ROM zur Verfügung.

Antes de usar su cámara lea este manual detalladamente para asegurar el uso correcto.

Nosotros le recomendamos que tome fotografías de prueba para familiarizarse con su
cámara antes de tomar fotografías importantes.

Estas instrucciones constituyen sólo un manual básico. Para más detalles de las funciones
descritas aquí, refiérase a las manual de consultas del software CD en el CD-ROM.

在使用本相機之前,請仔細閱讀本手冊以掌握正確之用法。

在進行重要的拍攝之前,最好先試拍數次以熟悉本相機之性能。

本手冊僅為基本手冊。本手冊中所提到的功能之詳細說明,請參閱

 CD-ROM 

上的軟體

 CD 

參考手冊。

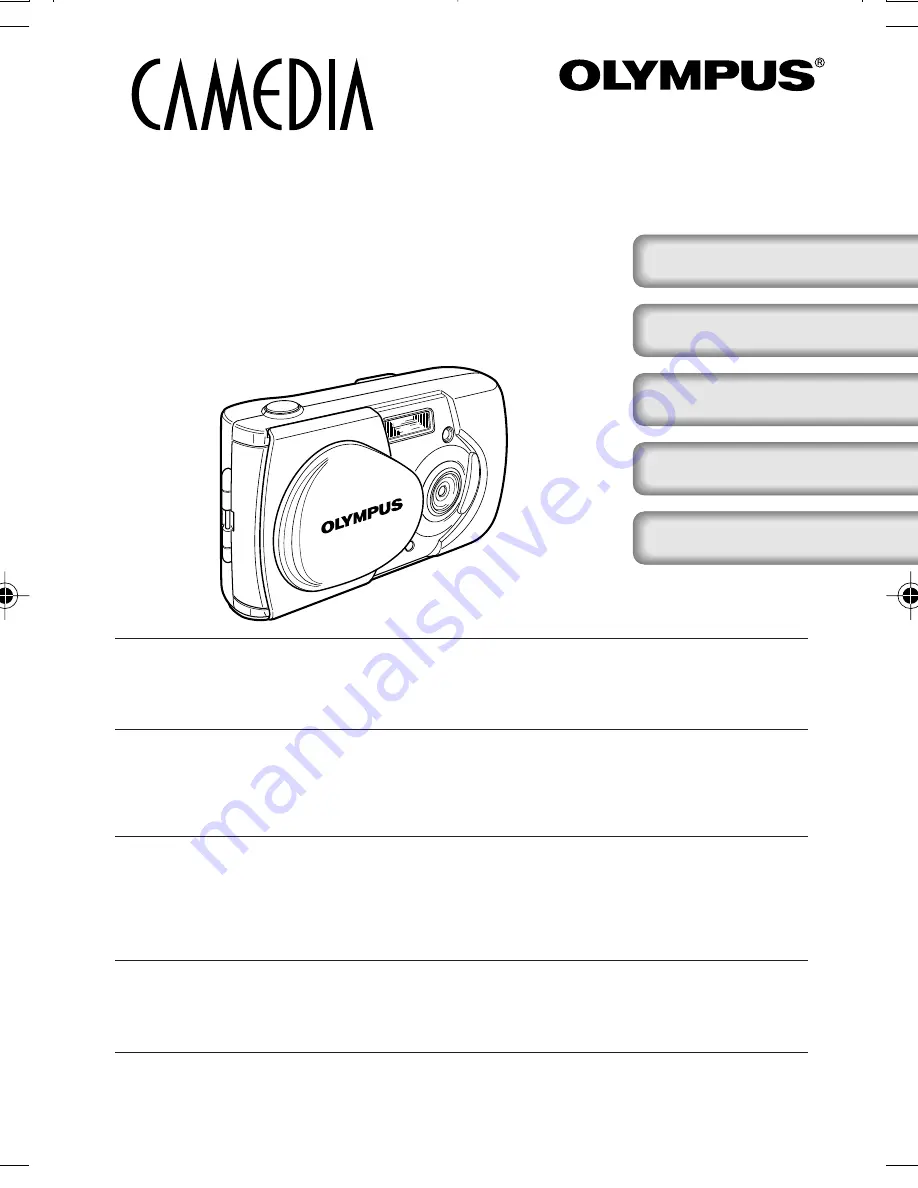
DIGITAL CAMERA/APPAREIL PHOTO NUMÉRIQUE
DIGITALKAMERA/CÁMERA DIGITAL/

數碼相機

C-2/D-230

BASIC MANUAL/MANUEL DE BASE
EINFACHE ANLEITUNG/MANUAL BÁSICO/

基本說明書

ENGLISH 

(Pages 2 to 33)

FRANÇAIS 

(Pages 34 to 65)

DEUTSCH 

(Seite 66 bis 97)

ESPAÑOL 

(Páginas 98 a 129)

中文

(第

 130 

頁至

 161 

頁)

0/Basic_C2_HYO1-E~Ct.65Ct

8/17/01, 12:08 PM

1

Summary of Contents for C-2/D-230

Page 1: ...n zu erzielen Wir empfehlen vor wichtigen Aufnahmen Probeaufnahmen durchzuführen um sich mit der Bedienung und den Funktionen der Kamera vertraut zu machen Die vorliegende Broschüre stellt nur eine einfache Anleitung dar Falls Sie ausführlichere Angaben zu den hier beschriebenen Funktionen benötigen steht Ihnen die KURZANLEITUNG auf der CD ROM zur Verfügung Antes de usar su cámara lea este manual ...

Page 2: ...n is subject to the following two conditions 1 This device may not cause harmful interference 2 This device must accept any interference received including interference that may cause undesired operation For customers in Canada This Class B digital apparatus meets all requirements of the Canadian Interference Causing Equipment Regulations For customers in Europe CE mark indicates that this product...

Page 3: ...ting the SmartMedia card 8 Turning the camera ON OFF 9 When taking pictures 9 When playing back pictures 10 Menu screen flow Setting the date and time 10 TAKING PICTURES 11 Holding the camera Taking pictures 11 Taking pictures using the viewfinder 11 Taking pictures using the monitor 11 When to use the viewfinder and the monitor The function of the memory gauge The function of the green lamp and t...

Page 4: ...rpness Contrast PLAYBACK FUNCTIONS 21 Index playback 21 Close up playback 21 Auto playback 22 Erasing all images 22 OTHER FUNCTIONS 23 Recording and playing back movies 23 Panorama mode Composite images Editing images Monochrome black and white images Sepia images Resizing Rotating Muting the beep tones 25 Formatting a new card 26 Rec view 27 Clear settings 27 Displaying image information 28 Monit...

Page 5: ... TROUBLESHOOTING 29 Error messages 29 Problems Specifications 30 Index CONNECTING THE CAMERA TO A PC Flow For Windows 98 Me 2000 users For Macintosh OS9 users Finding PC connection method for other OS users 32 ...

Page 6: ...barrier Turns the camera ON OFF Arrow pad Menu navigation OK Menu button Monitor button Turns the monitor ON OFF Battery compartment cover Tripod socket USB connector DC IN jack Connector cover Lens Card cover Strap eyelet Viewfinder Orange lamp Green lamp AF target mark Monitor ...

Page 7: ... Insert the batteries as shown making sure that they are correctly oriented 4 Push down the battery compartment cover in the direction of C and close firmly by pressing the mark in the direction of D until it clicks Note If the camera is left for about 1 hour with the batteries removed all the settings will revert to the default settings When powering the camera by batteries if the batteries start...

Page 8: ...R The optional Olympus CAMEDIA AC adapter enables you to power the camera from a household electrical outlet Caution If the batteries run out while the camera is connected to another device such as a computer the data may be damaged Olympus recommends that you use an AC adapter when the camera will be turned on for long periods of time However do not disconnect or plug in the AC adapter while the ...

Page 9: ...pen the card cover or remove the SmartMedia card or batteries while the camera power is on Otherwise the image data on the card may be destroyed Remember that it is impossible to restore image data once it has been destroyed A SmartMedia card is a precision device Do not apply excessive force or shock to it Hold the card by the edges Do not touch the gold colored metallic parts Some of the camera ...

Page 10: ...ton 4 Select using the buttons and press the button 5 Select the date format Y M D Year Month Day M D Y Month Day Year or D M Y Day Month Year using the buttons and press the button The monitor shows date setting screen 6 Set the first figure using the buttons and press the button The cursor moves to the next figure 7 Repeat until the date and time settings are set 8 Press the button when the cloc...

Page 11: ...ressed halfway You will hear an operation sound but no picture is being taken If the green lamp blinks focus may be incorrect Release your finger from the shutter button hold the camera securely and half press the button again See Focus lock 4 Press the shutter button fully This condition is called full pressed The picture is taken TAKING PICTURES USING THE MONITOR 1 Open the lens barrier 2 Press ...

Page 12: ...r off whenever you are not taking pictures or when you are using the viewfinder to compose your shot PLAYING BACK PICTURES CHECKING RECORDED IMAGES PLAYBACK You can play back images one by one on the monitor 1 Press the button with the lens barrier closed The monitor turns on in the Play mode and shows the last picture you took Single image playback 2 Press the buttons Press the button to play bac...

Page 13: ...ens barrier and press the button The camera turns on in the Play mode 2 Press the buttons to display the image you want to protect See Checking recorded images p 12 3 Press the button for more than 1 second The selected image is protected and the symbol is displayed at the top right of the image To cancel protection display the image with the symbol and press the button for more than 1 second Note...

Page 14: ...istance is approximately 0 2 m 3 5 m 0 7 ft 11 5 ft All the flash settings returns to AUTO mode default setting when the clear settings value is RESET and the lens barrier is closed See Clear settings p 27 Caution The orange lamp blinks while the flash is charging You can take a picture at this time but the flash will not fire To use the flash wait until the orange lamp goes off before pressing th...

Page 15: ...ty p 20 1 Open the lens barrier The camera turns on in the Record mode 2 Press the button The monitor automatically turns on and the image is displayed in size of 1 6 3 Press the buttons looking at the monitor The image can be magnified in the sequence 1 6 2 0 2 5 3 2 4 0 5 0 each time the button is pressed and the image is zoomed out in the sequence 4 0 3 2 2 5 2 0 1 6 No display 1 0 each time th...

Page 16: ...t exposure is satisfactory Caution If the flash is used the image brightness exposure may differ from the intended brightness exposure The exposure compensation can not correct the image brightness if the surroundings of the subject are extremely bright or dark SELF TIMER You can shoot images using the self timer function Fix the camera securely on a tripod etc before shooting The self timer is us...

Page 17: ...keep it pressed Recording will stop when the shutter button is released Note The sequence mode is canceled when the clear settings value is RESET and the lens barrier is closed See Clear settings p 27 The flash can not be used in this mode To prevent camera shake the maximum shutter speed is limited to 1 30 second As a result dark subjects may appear darker than in other shooting modes After seque...

Page 18: ...ut it being affected by the background light Note Metering settings ESP The light in the center of the viewfinder and in the surrounding area are measured separately to obtain the optimum exposure No mark is displayed on the LCD monitor SPOT Only the light in the center of the viewfinder is measured to obtain the correct exposure for the subject 1 Open the lens barrier The camera turns on in the R...

Page 19: ...tton 5 Select AUTO or using the buttons and press the button The white balance setting is now completed Press the button again to exit the menu 6 Take a picture Note The white balance setting returns to AUTO default setting when the clear settings value is RESET and the lens barrier is closed See Clear settings p 27 Under a combination of artificial and natural lighting or under fluorescent lighti...

Page 20: ...The monitor shows the Camera menu 3 Select PICTURE using the buttons and press the button 4 Select using the buttons and press the button 5 Select SHQ HQ SQ1 or SQ2 using the buttons and press the button The image quality setting is now completed Press the button again to exit the menu 6 Take a picture Note The image quality setting returns to HQ default setting when the clear settings value is RE...

Page 21: ...nification 1 5 2 2 5 and 3 This function is convenient when you want to check details in the picture taken 1 Close the lens barrier and press the button The camera turns on in the Play mode 2 Press the button The image will be magnified in the sequence 1 5 2 0 2 5 3 0 each time the button is pressed 3 Press the button on the close up playback screen to enable scroll mode Scroll up down left or rig...

Page 22: ...s instead of Auto playback can only be started when a still picture is displayed If the camera is powered by the batteries on the Auto Playback mode it will turn off automatically if left unoperated for about 30 minutes ERASING ALL IMAGES 1 Close the lens barrier and press the button The camera turns on in the Play mode 2 Press the button The monitor shows the Play menu 3 Select SETUP using the bu...

Page 23: ...utomatically turns on Press the button again to exit the menu 6 Record movies by looking at the monitor Press the shutter button to start recording Press the shutter button again to stop recording The remaining recordable time is displayed in seconds on the monitor Note The flash and Digital tele can not be used in the Movie mode It takes longer to save movies The recordable time varies depending ...

Page 24: ...gs p 27 PLAYING BACK MOVIES 1 Close the lens barrier and press the button The camera turns on in the Play mode 2 Press the buttons to display the movie you want to see indicated by a symbol and press the button The monitor shows the Play menu 3 Select PLAY using the buttons and press the button 4 Select using the buttons and press the button 5 Select START using the buttons and press the button Wh...

Page 25: ...OF SEPARATE MOVIE FRAMES The Movie index mode allows 9 image frames to be selected automatically and saved as a separate still image 1 Close the lens barrier and press the button The camera turns on in the Play mode 2 Press the buttons to display the movie you want to see indicated by a symbol and press the button The monitor shows the Play menu 3 Select EDIT using the buttons and press the button...

Page 26: ...rtMedia cards do not require formatting 1 Close the lens barrier and press the button The camera turns on in the Play mode 2 Press the button The monitor shows the Play menu 3 Select SETUP using the buttons and press the button 4 Select using the buttons and press the button 5 Select FORMAT using the buttons and press the button 6 Select FORMAT using the buttons and press the button The card is fo...

Page 27: ...GS You can choose to keep the shooting related settings such as the flash mode and image quality settings as they are for the next picture or return to the default settings when the camera is turned off If you do not want to change the settings to suit the weather or subject select HOLD to keep current settings This conveniently avoids having to re enter settings each time the camera is used as wo...

Page 28: ...play setting returns to OFF default setting when the clear settings value is RESET and the camera is turned off See Clear settings p 27 Only and are displayed after 3 seconds regardless of whether image information display setting is set to ON or OFF MONITOR BRIGHTNESS If the monitor is hard to see you can adjust it to suit the surrounding brightness 1 Close the lens barrier and press the button T...

Page 29: ... or if it is already inserted remove and insert it again Clean the card s connector with a piece of cleaning paper and format the card again A card that can not be formatted is unusable If you want to save images on the card remove the write protect seal See the instructions provided with the SmartMedia card Replace the card or erase unwanted images You are trying to play back a card on which no i...

Page 30: ...s gross No of Recording pixels 1 600 1 208 pixels SHQ mode 1 600 1 200 pixels HQ mode 1 024 768 pixels SQ1 mode 640 480 pixels SQ2 mode White balance Full auto TTL with preset Clear Sky Cloudy Sky Incandescent Lamp Flourescent Lamp Lens Olympus lens 5 5mm f2 8 5 elements in 4 groups equivalent to 36mm lens with 35mm camera Photometric system Digital ESP metering system with imager Spot Metering Ex...

Page 31: ... 1981 to 2031 Calendar power source Backup by a built in capacitor Card function DPOF compatible print reservation Panorama assembly Olympus CAMEDIA brand only Operating environment Temperature 0 C to 40 C 32 F to 104 F operating 20 C to 60 C 4 F to 140 F storage Humidity 30 to 90 operating 10 to 90 storage Power supply Two AA alkaline batteries AA nickel metal hydride batteries or AA NiCd batteri...

Page 32: ...nterface is there a USB port marked on your PC Use the USB cable supplied Use the optional PC card adapter Cannot be used with Windows NT Use the optional FlashPath floppy disk adapter Is your OS one of the following Windows 98 Windows Me Windows 2000 Mac OS9 Does your PC have a built in PC card slot Does your PC have a built in floppy disk drive No Yes No Yes Yes No Consult your local Olympus rep...

Page 33: ...33 En En MEMO ...

Page 34: ...atisfait aux termes de la partie 15 des directives FCC Son utilisation est soumise aux deux conditions suivantes 1 Cet appareil ne doit pas causer de brouillage radioélectrique 2 Cet appareil doit pouvoir résister à toutes les interférences y compris celles susceptibles d entraver son bon fonctionnement Pour les utilisateurs au Canada Cet appareil numérique de la catégorie B est conforme à la légi...

Page 35: ...rte SmartMedia 40 Mise sous hors tension de l appareil 41 Lors de la prise de vue 41 Lors de la lecture d images 42 Organigramme des menus de l écran ACL Réglage de la date et de l heure 42 PRISE DE VUE 43 Prise en main de l appareil Prise de vue 43 Prise de vue en utilisant le viseur 43 Prise de vue en utilisant l écran ACL 43 Utilisation du viseur et de l écran ACL Fonction du niveau de la mémoi...

Page 36: ...Lecture d index 53 Lecture avec gros plan 53 Lecture automatique 54 Effacement de toutes les images 54 AUTRES FONCTIONS 55 Enregistrement et lecture d une image animée 55 Mode panoramique Image recomposées Édition d images Création d images monochromes noir et blanc Création d images sépia Redimensionnement Rotation Bip sonore 57 Formatage d une nouvelle carte 58 Vérification immédiate 59 Réglages...

Page 37: ...E 61 Messages d erreur 61 Problèmes Caractéristiques 62 Index CONNEXION DE L APPAREIL À UN ORDINATEUR Organigramme Pour les utilisateurs de Windows 98 Me 2000 Pour les utilisateurs de OS9 Recherche de la methode de connexion 64 ...

Page 38: ...Couvercle du compartiment des piles Embase filetée de trépied Connecteur USB Prise d entrée CC DC IN Couvercle de connecteur Écran ACL Déclencheur Flash Objectif Voyant retardateur Capot de protection de l objectif Met l appareil sous hors tension Couvercle du logement de la carte Œillet de bandoulière Viseur Voyant orange Voyant vert Marque de cible ...

Page 39: ...nsérez les piles de la façon montrée sur l illustration en vous assurant qu elles sont orientées correctement 4 Poussez le couvercle du compartiment à piles dans la direction de la flèche C et fermez le à fond en poussant la marque dans la direction D jusqu à ce que vous entendiez un déclic Si l appareil est laissé sans piles pendant environ une heure tous les réglages sont réinitialisés aux régla...

Page 40: ... pour alimenter l appareil quand celui ci doit rester sous tension pendant une longue période de temps comme lors du transfert d image sur un ordinateur les piles peuvent s épuiser et entraîner une perte des données d image Olympus recommande que vous utilisiez un adaptateur secteur quand l appareil doit rester sous tension pendant une longue période de temps Cependant ne déconnectez pas ni ne con...

Page 41: ...ou les piles quand l appareil est sous tension Les données sur la carte risqueraient d être perdues Et une fois perdues elles ne peuvent pas être récupérées La carte SmartMedia est un matériel de précision Ne la soumettez pas à une force non raisonnable ni à des chocs Ne touchez pas les contacts en métal doré sur la carte Certaines des fonctions de l appareil sont ignorées si l autocollant de prot...

Page 42: ... sur la touche 4 Choisissez en utilisant les touches et appuyez sur la touche 5 Choisissez le format de la date Y M D Année Mois Jour M D Y Mois Jour Année ou D M Y Jour Mois Année en utilisant les touches et appuyez sur la touche L écran d ajustement de la date et de l heure est affiché 6 Réglez le premier nombre en utilisant les touches et appuyez sur la touche Passez au nombre suivant 7 Répétez...

Page 43: ...uit de fonctionnement mais aucune photo ne sera prise Si le voyant vert clignote c est que le sujet n est pas au point Retirez votre doigt du déclencheur recadrez la photo et appuyez de nouveau à mi course sur le déclencheur Reportez vous à Verrouillage de la mise au point 4 Appuyez à fond sur le déclencheur Cela s appelle une pression à fond La photo est prise PRISE DE VUE EN UTILISANT L ÉCRAN AC...

Page 44: ...piles peut apparaître extrêmement faible Ce n est pas un mauvais fonctionnement Il est possible de continuer à prendre des photos en regardant à travers le viseur avec l écran ACL hors service LECTURE DES IMAGES VÉRIFICATION DES IMAGES ENREGISTRÉES LECTURE Vous pouvez visualiser les images une par une sur l écran ACL 1 Appuyez sur la touche quand le capot de protection de l objectif est fermé L éc...

Page 45: ...ction de l objectif et appuyez sur la touche L écran ACL se met en service 2 Appuyez sur la touche pour afficher l image que vous souhaitez protéger Reportez vous à Vérification des images enregistrées Lecture p 44 3 Appuyez sur la touche pendant plus d une seconde Le symbole est affiché et l image est protégée Pour annuler la protection affichez une image avec le symbole et appuyez sur la touche ...

Page 46: ...s du mode flash retournent en mode automatique réglage par défaut quand la valeur des réglages d effacement est RESET et que le capot de protection de l objectif est fermé Reportez vous à Réglages d effacement p 59 Attention Le voyant orange clignote pendant la charge du flash Vous pouvez quand même prendre la photo à ce point mais le flash ne se déclenche pas Pour utiliser le flash attendez jusqu...

Page 47: ...otection de l objectif L appareil se met sous tension en mode d enregistrement 2 Appuyez sur la touche L écran ACL se met automatiquement en service et l image est affichée avec un agrandissement de 1 6 3 Appuyez sur les touches en regardant sur l écran ACL Le rapport d agrandissement change dans l ordre 1 6 2 0 2 5 3 2 4 0 5 0 chaque fois que vous appuyez sur la touche et dans l ordre 4 0 3 2 2 5...

Page 48: ...trée pour vous assurer que l exposition est correcte Attention La luminosité souhaitée compensation d exposition peut ne pas être obtenue si le flash est utilisé La compensation correcte peut ne pas être obtenue avec la compensation d exposition quand le sujet est extrêmement sombre ou avec un environnement trop lumineux RETARDATEUR Vous pouvez utiliser le retardateur pour prendre des photos Utili...

Page 49: ...e pour quitter le menu 6 renez la photo Appuyez sur le déclencheur et maintenez le pressé L enregistrement s arrête quand le déclencheur est relâché Le mode de prise de vue en rafale est annulé quand la valeur des réglages d effacement est RESET et que le capot de protection de l objectif est fermé Reportez vous à Réglages d effacement p 59 Le flash ne peut pas être utilisé dans ce mode Comme la v...

Page 50: ...re du fond n affecte la mesure Réglages de la mesure ESP La lumière au centre du viseur et dans la zone environnante sont mesurées séparément pour obtenir la meilleure exposition possible Il n y a pas de marque affichée sur l écran ACL SPOT Seule la lumière au centre du viseur est mesurée pour obtenir une exposition correcte du sujet 1 Ouvrez le capot de protection de l objectif L appareil se met ...

Page 51: ...URE en utilisant les touches et appuyez sur la touche 4 Choisissez en utilisant les touches et appuyez sur la touche 5 Choisissez AUTO ou en utilisant les touches et appuyez sur la touche Le réglage de la balance des blancs est terminé Appuyez de nouveau sur la touche pour quitter le menu 6 Prenez la photo Le réglage de la balance des blancs retourne sur AUTO réglage par défaut quand la valeur des...

Page 52: ...uyez sur la touche 4 Choisissez en utilisant les touches et appuyez sur la touche 5 Choisissez SHQ HQ SQ1 ou SQ2 en utilisant les touches et appuyez sur la touche Le réglage de la qualité de l image est terminé Appuyez de nouveau sur la touche pour quitter le menu 6 Prenez la photo Le réglage de qualité de l image retourne sur HQ réglage par défaut quand la valeur des réglages d effacement est RES...

Page 53: ...tails d une image 1 Fermez le capot de protection de l objectif et appuyez sur la touche L appareil se met sous tension en mode de lecture 2 Appuyez sur la touche L image est agrandie dans l ordre 1 5 2 0 2 5 3 0 chaque fois que vous appuyez sur la touche 3 Appuyez sur la touche sur l écran de lecture avec gros plan pour mettre en service le mode de défilement Faites défiler la zone agrandie vers ...

Page 54: ...mmencer uniquement quand une image fixe est affichée Si l appareil est alimenté par des piles et se trouve en mode de lecture il se mettra hors tension automatiquement si aucune opération n est effectuée pendant environ 30 minutes EFFACEMENT DE TOUTES LES IMAGES 1 Fermez le capot de protection de l objectif et appuyez sur la touche L appareil se met sous tension en mode de lecture 2 Appuyez sur la...

Page 55: ...écran ACL Appuyez sur le déclencheur pour démarrer l enregistrement d images animées L enregistrement s arrête quand le déclencheur est relâché La durée enregistrable est affichée sur l écran ACL Le flash et le zoom numérique ne peuvent pas être utilisés en mode d images animées Il faut un certain temps pour enregistrer les images prises dans ce mode La durée d enregistrement varie en fonction du ...

Page 56: ...haitée avec le symbole indiqué et appuyez sur la touche L écran de menu de lecture est affiché 3 Choisissez PLAY en utilisant les touches et appuyez sur la touche 4 Choisissez en utilisant les touches et appuyez sur la touche 5 Choisissez START en utilisant les touches et appuyez sur la touche Quand la fin d une séquence d images animées est atteinte l appareil retourne automatiquement au début et...

Page 57: ...strées comme images fixes séparées 1 Fermez le capot de protection de l objectif et appuyez sur la touche L appareil se met sous tension en mode de lecture 2 Appuyez sur la touche pour afficher les images animées souhaitées indiquées par le symbole et appuyez sur la touche Le menu de lecture est affiché 3 Appuyez sur la touche pour choisir EDIT et appuyez sur la touche 4 Appuyez sur la touche pour...

Page 58: ...cture 2 Appuyez sur la touche L écran de menu de lecture est affiché 3 Choisissez SETUP en utilisant les touches et appuyez sur la touche 4 Pour formater une carte choisissez en utilisant les touches et appuyez sur la touche 5 Choisissez FORMAT en utilisant les touches et appuyez sur la touche 6 Choisissez FORMAT en utilisant les touches et appuyez sur la touche La carte est formatée Vous ne pouve...

Page 59: ...t la prise de vue tels que le mode flash et les réglages de la qualité de l image pour être utilisés avec l image suivante ou bien de retourner aux réglages par défaut quand l appareil est mis hors tension Si vous ne souhaitez pas changer les réglages déjà effectués pour un ensoleillement ou un sujet particulier choisissez HOLD pour qu ils soient conservés C est très pratique pour éviter d avoir à...

Page 60: ...e l appareil est mis hors tension OFF le réglage des données de l image affichée est réinitialisé sur OFF réglage par défaut Reportez vous à Réglages d effacement p 59 Seul et sont affichés si réglés après 3 secondes que les informations de l image affichée soient réglées sur ON ou OFF AJUSTEMENT DE LA LUMINOSITÉ DE L ÉCRAN ACL Si l écran ACL est difficile à voir vous pouvez l ajuster pour qu il c...

Page 61: ...jà en place retirez la puis réinsérez la Nettoyez les connecteurs de la carte avec un morceau de papier nettoyant et formatez de nouveau la carte Un carte qui ne peut pas être formatée ne peut pas être utilisée Si vous souhaitez enregistrer des images sur la carte retirez l autocollant de protection en écriture Reportez vous aux instructions fournies avec la carte SmartMedia Remplacez la carte ou ...

Page 62: ...mage CCD à l état solide Env 2 140 000 pixels brut Enregistrement des images 1 600 1 208 pixels mode SHQ 1 600 1 200 pixels mode HQ 1 024 768 pixels mode SQ1 640 480 pixels mode SQ2 Balance des blancs TTL complètement automatique Préréglage lumière du jour nuageux éclairage tungstène éclairage fluorescent Objectif Objectif Olympus 5 5mm f2 8 5 éléments 4 groupes équivalent à un objectif 36mm sur u...

Page 63: ...onnées d image Fonction de calendrier automatique Ajustement automatique dans la plage de 1981 à 2031 Alimentation du calendrier Capaciteur intégré de sauvegarde Fonction de carte Services d impression compatibles DPOF Fusion en images panoramiques Marque Olympus CAMEDIA uniquement Environnement de fonctionnement Température 0 C 40 C fonctionnement 20 C 60 C stockage Humidité 30 90 fonctionnement ...

Page 64: ... il une interface USB y a t il un port USB marqué sur votre ordinateur Utilisez l adaptateur de carte PC optionnel Ne peut pas être utilisé avec Windows NT Utilisez l adaptateur de disquette FlashPath optionnel Contactez votre représentant local Olympus Votre ordinateur possède t il une fente pour carte PC Votre ordinateur possède t il un lecteur de disquette Non Oui Non Oui Non Oui Oui Non Utilis...

Page 65: ...65 Fr Fr MEMO ...

Page 66: ... dürfen keine schädlichen Störeinstreuungen ausgehen 2 Dieses Gerät muss die Einwirkung von Störeinstreuungen zulassen Dies schließt Störeinstreuungen ein welche Beeinträchtigungen der Funktionsweise oder Betriebsstörungen verursachen können In Canada Dieses Gerät wurde als Digitalgerät der Klasse B in Übereinstimmung mit den Bestimmungen der Canadian Interference Causing Equipment Regulations kla...

Page 67: ...gerätes 72 Einsetzen der SmartMedia Karte 72 Ein Ausschalten der kamera 73 Zur Aufnahme von Bildern 73 Zur Wiedergabe von Bildern 74 Menübildschirm Konfiguration Einstellen von Datum und Uhrzeit 74 FOTOGRAFIEREN 75 Kamerahaltung Fotografieren 75 Fotografieren mit dem Sucher 75 Fotografieren mit dem LCD Monitor 75 Vor und Nachteile von Sucher und LCD Monitor Funktion der Speicheranzeige Funktion de...

Page 68: ...UNKTIONEN 85 Indexanzeige 85 Zoomwiedergabe 85 Automatische Bildvorführung 86 Löschen aller Bilder 86 SONSTIGE FUNKTIONEN 87 Aufnahme und Wiedergabe von bewegten Bildern 87 Panoramamodus Verbundbilder zwei Bilder in einem Bilder editieren Erzeugen von Schwarzweißbildern monochrom Sepiabilder Skalieren Rotieren Signalton 89 Formatieren einer neuen Karte 90 Aufnahmekontrolle 91 Einstellungslöschung ...

Page 69: ...eldungen 93 Störungen Technische Daten 94 Index ANSCHLIESSEN DER KAMERA AN EINEN PC Ablauf Für Windows Anwender 98 Me 2000 Für Macintosh Anwender OS9 Die Richtige PC Anschlussmethode Auswählen Für Anwender anderer Betriebssysteme 96 ...

Page 70: ...kung Schlaufenöse Pfeiltaste Menünavigation Taste OK Menü Taste Monitor Schaltet den LCD Monitor ein aus Batteriefachdeckel Stativgewinde USB Buchse DC IN Gleichspannungseingang Anschlussbuchsenabdeckung Objektiv Sucher Orangefarbene LED Grüne LED AF Markierung LCD Monitor VORBEREITUNGEN BEZEICHNUNG DER TEILE ...

Page 71: ...en Sie ihn in Richtung B hoch 3 Legen Sie die Batterien mit korrekter Ausrichtung ein wie in der Abbildung gezeigt 4 Drücken Sie den Batteriefachdeckel in Richtung C und schließen Sie ihn einwandfrei indem Sie die Marke in Richtung D schieben bis der Deckel einrastet Hinweis Bleibt die Kamera etwa 1 Stunde lang ohne Batteriestromversorgung werden alle Einstellungen auf die Vorgaben zurückgesetzt F...

Page 72: ...r eine Netzsteckdose Vorsicht Wenn die Kamera bei Batteriebetrieb längere Zeit eingeschaltet bleibt z B beim Übertragen von Bildern zu einem Computer können die Batterien erschöpft werden was zu einem Verlust von Bilddaten führen kann Für ununterbrochenen Betrieb der Kamera empfiehlt Olympus die Verwendung eines Netzgerätes Unterlassen Sie jedoch das Abtrennen oder Anschließen des Netzadapters wäh...

Page 73: ...nderen Geräten wie z B einem PC formatiert wurden werden eventuell nicht von der Kamera akzeptiert Die auf der Karte gespeicherten Daten können sonst unwiederbringlich verloren gehen Die SmartMedia Karte ist ein Präzisionsteil Setzen Sie die Karte keinem übermäßigen Druck oder Stoßeinwirkung aus Vermeiden Sie eine Berührung des goldfarbenen Metallteils der Karte Bestimmte Kamerafunktionen werden i...

Page 74: ... drücken Sie die Taste 5 Wählen Sie das Datumsformat Y M D Jahr Monat Tag M D Y Monat Tag Jahr oder D M Y Tag Monat Jahr mit den Tasten und drücken Sie die Taste Die Datumseinstellanzeige erscheint 6 Stellen Sie den ersten Posten mit den Tasten ein und drücken Sie die Taste Gehen Sie zum nächsten Posten weiter 7 Wiederholen Sie den Vorgang bis alle Datums und Uhrzeiteinstellungen komplett sind 8 D...

Page 75: ...ild aufgenommen Falls die grüne LED blinkt bedeutet dies dass das Motiv unscharf ist Nehmen Sie den Finger vom Auslöser und richten Sie die Kamera erneut aus bevor Sie den Auslöser halb niederdrücken Siehe Entfernungsspeicherung 4 Drücken Sie den Auslöser ganz durch Dieser Zustand wird ganz gedrückt genannt Das Bild wird aufgenommen FOTOGRAFIEREN MIT DEM LCD MONITOR 1 Öffnen Sie den Objektivschutz...

Page 76: ...men dass eine sehr niedrige Batterierestspannung angezeigt wird Dies ist keine Funktionsstörung Durch Ausschalten des LCD Monitors ist es möglich weitere Bilder mit Hilfe des Suchers aufzunehmen BILDWIEDERGABE ÜBERPRÜFEN AUFGENOMMENER BILDER WIEDERGABE Sie können Bilder einzeln auf dem LCD Monitor wiedergeben 1 Drücken Sie die Taste bei geschlossenem Objektivschutzschieber Der LCD Monitor schaltet...

Page 77: ...ige Bilder können vor versehentlichem Löschen geschützt werden 1 Schließen Sie den Objektivschutzschieber und drücken Sie die Taste Der LCD Monitor schaltet sich ein 2 Drücken Sie die Taste um das zu schützende Bild anzuzeigen Siehe Überprüfen aufgenommener Bilder S 76 3 Halten Sie die Taste länger als 1 Sekunde gedrückt Das Symbol wird angezeigt und das Bild wird geschützt Um den Schutz aufzuhebe...

Page 78: ...e 0 2 m 3 5 m Durch Schließen des Objektivschutzschiebers werden alle Blitzmodus Einstellungen auf den Automatikmodus Vorgabe zurückgestellt Die Vorgabe für die Einstellungslöschung ist RESET Siehe Einstellungslöschung S 91 Vorsicht Die orangefarbene LED blinkt während der Blitz geladen wird Sie können dabei zwar fotografieren aber der Blitz wird nicht ausgelöst Um den Blitz zu benutzen warten Sie...

Page 79: ...Öffnen Sie den Objektivschutzschieber Die Kamera wird im Aufnahmemodus eingeschaltet 2 Drücken Sie die Taste Der LCD Monitor schaltet sich automatisch ein und das Bild wird mit 1 6 facher Vergrößerung angezeigt 3 Drücken Sie die Tasten während Sie den LCD Monitor betrachten Mit jedem Drücken der Taste ändert sich die Vergrößerung in der Reihenfolge 1 6 2 0 2 5 3 2 4 0 5 0 Mit jedem Drücken der Tas...

Page 80: ... schwer feststellbar ist weil das Motiv dunkel ist zeigen Sie das aufgenommene Bild auf dem LCD Monitor an um die Helligkeit zu überprüfen Vorsicht Bei Blitzbenutzung wird die gewünschte Helligkeit Belichtungskorrektur eventuell nicht erzielt Die erzielte Belichtungskorrektur ist eventuell unzureichend wenn sich das Motiv in einer sehr hellen oder dunklen Umgebung befindet SELBSTAUSLÖSER Der Selbs...

Page 81: ...ieren Sie Halten Sie den Auslöser gedrückt Die Aufnahme stoppt sobald der Auslöser losgelassen wird Hinweis Durch Schließen des Objektivschutzschiebers wird der Serienaufnahmemodus aufgehoben Die Vorgabe für die Einstellungslöschung ist RESET Siehe Einstellungslöschung S 91 Der Blitz kann in diesem Modus nicht benutzt werden Da die Verschlusszeit zur Kompensierung von Handzittern auf den Maximalwe...

Page 82: ...den Hinweis Messeinstellungen ESP Die Lichtwerte in Suchermitte und im umliegenden Bereich werden getrennt gemessen um die optimale Belichtung zu erhalten Es wird kein Symbol auf dem LCD Monitor angezeigt SPOT Nur das Licht in der Suchermitte wird gemessen um die korrekte Belichtung für das Motiv zu erhalten 1 Öffnen Sie den Objektivschutzschieber Die Kamera wird im Aufnahmemodus eingeschaltet 2 D...

Page 83: ...en Sie die Taste 5 Wählen Sie AUTO oder mit den Tasten und drücken Sie die Taste Damit ist die Weißabgleich Einstellung beendet Drücken Sie die Taste erneut um das Menü zu verlassen 6 Fotografieren Sie Hinweis Durch Schließen des Objektivschutzschiebers wird der Weißabgleichmodus wieder auf AUTO Vorgabe zurückgestellt Die Vorgabe für die Einstellungslöschung ist RESET Siehe Einstellungslöschung S ...

Page 84: ...ste 5 Wählen Sie SHQ HQ SQ1 oder SQ2 mit den Tasten und drücken Sie die Taste Damit ist die Einstellung der Bildqualität beendet Drücken Sie die Taste erneut um das Menü zu verlassen 6 Fotografieren Sie Hinweis Die Bildqualitätseinstellung wird auf HQ Vorgabe zurückgesetzt wenn der Einstellungs Löschungswert auf RESET eingestellt und der Objektivschutzschieber geschlossen wird Siehe Einstellungslö...

Page 85: ...Bilder zu überprüfen 1 Schließen Sie den Objektivschutzschieber und drücken Sie die Taste Der LCD Monitor schaltet sich ein 2 Drücken Sie die Taste Mit jedem Drücken der Taste ändert sich der Vergrößerungsfaktor in der Reihenfolge 1 5 2 0 2 5 3 0 3 Drücken Sie die Taste auf dem Zoomwiedergabe Bildschirm um den Scrollmodus bei der angegebenen Vergrößerung zu aktivieren Mit Hilfe der Tasten können S...

Page 86: ...t werden wenn ein Standbild angezeigt wird Um auf automatische Wiedergabe zurückzuschalten zeigen Sie ein Standbild an Wird bei Batteriebetrieb der Kamera der automatische Wiedergabemodus aktiviert schaltet sich die Kamera automatisch aus wenn etwa 30 Minuten lang keine Bedienung erfolgt LÖSCHEN ALLER BILDER 1 Schließen Sie den Objektivschutzschieber und drücken Sie die Taste Der LCD Monitor schal...

Page 87: ...aste erneut um das Menü zu verlassen 6 Blicken Sie bei der Aufnahme von bewegten Bildern auf den LCD Monitor Drücken Sie den Auslöser zum Starten der Aufnahme von bewegten Bildern Durch erneutes Drücken des Auslösers wird die Aufnahme gestoppt Die verfügbare Aufnahmezeit wird auf dem LCD Monitor angezeigt Hinweis Blitz und Digital Tele können nicht im Modus für bewegten Bilder verwendet werden Die...

Page 88: ...schung S 91 WIEDERGABE VON BEWEGTEN BILDERN 1 Schließen Sie den Objektivschutzschieber und drücken Sie die Taste Der LCD Monitor schaltet sich ein 2 Drücken Sie die Tasten um das mit dem Symbol gekennzeichnete gewünschte Bild anzuzeigen und drücken Sie die Taste Der Wiedergabe Menübildschirm wird angezeigt 3 Wählen Sie PLAY mit den Tasten und drücken Sie die Taste 4 Wählen Sie mit den Tasten und d...

Page 89: ...TRENNTEN BEWEGTEN BILDERN Im Indexmodus von bewegten Bildern können bis zu 9 Bilder gleichzeitig angezeigt werden Die ausgewählten Bilder können als getrennte Standbilder gespeichert werden 1 Schließen Sie den Objektivschutzschieber und drücken Sie die Taste Der LCD Monitor schaltet sich ein 2 Drücken Sie die Taste um den gewünschten Filmclip mit dem Symbol gekennzeichnet anzuzeigen und drücken Si...

Page 90: ...edia Karten der Marke Olympus CAMEDIA bedürfen keiner Formatierung 1 Schließen Sie den Objektivschutzschieber und drücken Sie die Taste Der LCD Monitor schaltet sich ein 2 Drücken Sie die Taste Der Wiedergabe Menübildschirm wird angezeigt 3 Wählen Sie SETUP mit den Tasten und drücken Sie die Taste 4 Um die Karte zu formatieren wählen Sie mit den Tasten und drücken Sie die Taste 5 Wählen Sie FORMAT...

Page 91: ...gen wie Blitzmodus und Bildqualität unverändert erhalten bleiben oder auf ihre Vorgaben zurückgestellt werden sollen wenn die Kamera ausgeschaltet wird Wenn Sie die für die Lichtverhältnisse oder das Motiv geeigneten Einstellungen nicht ändern wollen wählen Sie HOLD so dass die Einstellungen erhalten bleiben Diese Funktion ist praktisch weil sie die erneute Eingabe der Einstellungen bei jeder Benu...

Page 92: ... Vorgabe zurückgestellt Die Vorgabe für die Einstellungslöschung ist RESET Siehe Einstellungslöschung S 91 Nur und werden für 3 Sekunden angezeigt ohne Rücksicht darauf ob Bilddatenanzeige auf ON oder OFF eingestellt ist LCD MONITOR HELLIGKEIT Falls der LCD Monitor schlecht ablesbar ist kann er der Umgebungshelligkeit angepasst werden 1 Schließen Sie den Objektivschutzschieber und drücken Sie die ...

Page 93: ...men Sie die Karte und setzen Sie sie erneut ein Reinigen Sie die Kontakte der Karte mit einem Stück Reinigungspapier und formatieren Sie die Karte erneut Eine Karte die nicht formatiert werden kann ist unbrauchbar Wenn Sie Bilder auf der Karte speichern wollen müssen Sie den Schreibschutzaufkleber entfernen Siehe die beiliegende SmartMedia Anleitung Wechseln Sie die Karte aus oder löschen Sie unnö...

Page 94: ...t ca 2 140 000 Pixel brutto Bildauflösung 1 600 1 208 Pixel Modus SHQ 1 600 1 200 Pixel Modus HQ 1 024 768 Pixel Modus SQ1 640 480 Pixel Modus SQ2 Weißabgleich Vollautomatische TTL Messung Vorgabe Tageslicht Bewölkung Leuchtstofflampenlicht Glühlampenlicht Objektiv Olympus Objektiv 5 5 mm f2 8 5 Elemente in 4 Gruppen entspricht 36 mm Objektiv einer Kleinbildkamera Belichtungsmessung Digitale ESP M...

Page 95: ...ichzeitige Aufzeichnung mit Bilddaten Automatische Automatische Einstellung im Bereich von Kalenderfunktion 1981 2031 Kalender Stromversorgung Puffer durch eingebauten Kondensator Kartenfunktionen DPOF kompatibler Druckservice Panoramamontage Nur Marke Olympus CAMEDIA Betriebsumgebung Temperatur 0 C 40 C Betrieb 20 C 60 C Lagerung Luftfeuchtigkeit 30 90 Betrieb 10 90 Lagerung Stromversorgung Zwei ...

Page 96: ...hluss befindet sich ein Anschluss mit dem Symbol an der Rückseite oder einer anderen Stelle des PC Benutzen Sie den gesonderten PC Kartenadapter Kann nicht für Windows NT verwendet werden Benutzen Sie den gesonderten Diskettenadapter Benutzen Sie eines der folgenden Betriebssysteme Windows 98 Windows Me Windows 2000 Mac OS9 Wenden Sie sich an die Kundendienstzentrale Besitzt Ihr PC einen PC Karten...

Page 97: ...97 De De MEMO ...

Page 98: ...operación está sujeta a las siguientes dos condiciones 1 Este dispositivo puede no causar interferencia perjudicial 2 Este dispositivo puede recibir cualquier interferencia incluyendo interferencias que pueden causar un funcionamento indeseado Para usuarios en Canadá Este aparato digital Clase B cumple con todos los requisitos de la Reglamentación Canadiense para Equipos que Producen Interferencia...

Page 99: ...de la tarjeta SmartMedia 104 Encendido apagado de la cámara 105 Para realizar las tomas 105 Para reproducir las imágenes 106 Pantallas de menús Ajuste de fecha y hora 106 TOMA DE FOTOGRAFÍAS 107 Sujeción de la cámara Toma de fotografías 107 Toma de fotografías utilizando el visor 107 Toma de fotografías utilizando el monitor 107 Cuándo utilizar el visor y el monitor Función del indicador de memori...

Page 100: ...ucción de índice 117 Reproducción de primeros planos 117 Reproducción automática 118 Borrado de todas las imágenes 118 OTRAS FUNCIONES 119 Grabación y reproducción de vídeos 119 Modo panorama Imágenes compuestas Edición de imágenes Creación de imágenes monocromas blanco y negro Creación de imágenes sepia Redimensionado Rotación Silenciar los tonos de pitidos 121 Formatear una tarjeta nueva 122 Rec...

Page 101: ...ERÍAS 125 Mensajes de error 125 Problemas Especificaciones 126 Índice CONEXIÓN DE LA CÁMARA A UN PC Flujo de operaciones Para usuarios de Windows 98 Me 2000 Para usuarios de Macintosh OS9 Determinar el método de conexión a PC 128 ...

Page 102: ...n por menú Botón OK Menú Botón Monitor Enciende apaga el monitor Tapa del compartimiento de las pilas Rosca para el trípode Conector USB Jack DC IN Tapa del conector Objetivo Tapa de la tarjeta Enganche para correa Visor Lámpara naranja Lámpara verde Marca de referencia de AF Monitor PREPARATIVOS NOMBRE DE LAS PARTES ...

Page 103: ... las pilas tal como se indica en la ilustración asegurándose de que estén correctamente orientadas 4 Empuje hacia abajo la tapa del compartimiento de las pilas en la dirección de C y ciérrela firmemente presionando la marca en la dirección de D hasta que encaje con un chasquido Nota Si deja la cámara con las pilas retiradas durante aproximadamente 1 hora todos los ajustes volverán a sus valores de...

Page 104: ...te alimentar la cámara desde una toma de corriente eléctrica del hogar Precaución Si se descargaran las pilas estando la cámara conectada a otro dispositivo como un ordenador se podrían dañar los datos Olympus recomienda utilizar un adaptador de CA cuando deba utilizar la cámara durante un período prolongado Asimismo no apague ni desenchufe el adaptador de CA mientras la cámara se encuentre conect...

Page 105: ... la tapa de la tarjeta ni retire la tarjeta SmartMedia o las pilas mientras la cámara se encuentre activada Los datos de la tarjeta se podrían perder y no las podrá recuperar La tarjeta SmartMedia es un elemento de precisión No la someta a golpes ni fuerzas indebidas No toque el área de metal de color dorado de la tarjeta Si la tarjeta SmartMedia lleva el sello de protección contra escritura algun...

Page 106: ...los botones seleccione el formato de fecha Y M D Año Mes Día M D Y Mes Día Año o D M Y Día Mes Año y presione el botón Aparecerá la pantalla de ajuste de la fecha 6 Ajuste la primera cifra utilizando los botones y presione el botón Avance a la cifra siguiente 7 Repita el proceso hasta que la fecha y la hora queden ajustadas 8 Presione el botón cuando el reloj marque 00 segundo El ajuste de fecha y...

Page 107: ...pero la imagen no será capturada Si la lámpara verde parpadea significa que el motivo no está enfocado Retire su dedo del botón disparador y vuelva a apuntar la cámara antes de presionar a medias el botón disparador Consulte Bloqueo del enfoque 4 Presione a fondo el botón disparador Esta condición se denomina presionado a fondo La imagen será fotografiada TOMA DE FOTOGRAFÍAS UTILIZANDO EL MONITOR ...

Page 108: ...e grabar variará considerablemente dependiendo de la marca y del entorno operativo Apague el monitor cuando no esté tomandˆ las fotos o cuando esté usando el visor para componer la toma REPRODUCCIÓN DE IMÁGENES COMPROBACIÓN DE LAS IMÁGENES GRABADAS REPRODUCCIÓN Las imágenes se pueden reproducir una por una en el monitor 1 Presione el botón con el cubreobjetivo cerrado El monitor se enciende y se v...

Page 109: ...ea conservar PROTECCIÓN DE IMÁGENES IMPORTANTES Podrá proteger sus imágenes importantes contra el borrado accidental 1 Cierre el cubreobjetivo y presione el botón El monitor se encenderá en el modo de reproducción 2 Presione el botón para visualizar la imagen que desea borrar Consulte Comprobación de las imágenes grabadas reproducción pág 108 3 Presione el botón durante más de 1 segundo Se visuali...

Page 110: ...Camera Alcance del flash aproximado 0 2 m 3 5 m 0 7 11 5 pies Todos los ajustes del flash volverán al modo AUTO ajuste por omisión cuando el valor de borrado de los ajustes sea RESET y se cierre el cubreobjetivo Véase Borrado de los ajustes pág 123 Precaución Mientras se está cargando el flash la lámpara naranja parpadea Es posible tomar la imagen durante este intervalo pero el flash no se dispara...

Page 111: ...6 1 Abra el cubreobjetivo La cámara se encenderá en el modo de grabación 2 Presione el botón El monitor se encenderá automáticamente y la imagen se visualizará con un aumento de 1 6 3 Presione los botones mientras mira el monitor Cada vez que presiona el botón la imagen podrá ampliarse en la secuencia de 1 6 2 0 2 5 3 2 4 0 5 0 Cada vez que presiona el botón se efectuará el zoom de salida sobre la...

Page 112: ...magen que ha grabado para verificar su brillo Precaución Si se utiliza el flash el brillo exposición de la imagen podría ser diferente del brillo deseado exposición Es posible que no se obtenga una compensación correcta mediante compensación de exposición cuando el motivo se encuentre en lugares extremadamente brillantes u oscuros AUTODISPARADOR El autodisparador permite al fotógrafo salir también...

Page 113: ...el botón 6 Tome las fotos Presione el botón disparador y manténgalo presionado La grabación se parará al soltar el botón disparador Nota El modo secuencial se cancela al cerrar el cubreobjetivo El ajuste por omisión de borrado de los ajustes es RESET Consulte Borrado de los ajustes pág 123 No se podrá usar el flash en este modo Debido a que la velocidad del obturador se ajusta al máximo de 1 30 se...

Page 114: ...ro del visor sin ser afectado por la luz de fondo Nota Ajustes de medición ESP La luz del centro del visor y la del área circundante se miden separadamente para obtener una exposición óptima No hay ninguna marca visualizada en el monitor LCD SPOT Sólo se mide la luz del centro del visor para obtener la exposición correcta para el motivo 1 Abra el cubreobjetivo La cámara se encenderá en el modo de ...

Page 115: ...ne utilizando los botones y presione el botón 5 Seleccione AUTO o utilizando los botones y presione el botón El balance de blancos ha quedado ajustado Para salir del menú presione de nuevo el botón 6 Realice la toma Nota El ajuste del balance de blancos volverá a AUTO ajuste por omisión cuando el valor de borrado de los ajustes sea RESET y se cierre el cubreobjetivo Véase Borrado de los ajustes pá...

Page 116: ...cione PICTURE utilizando los botones y presione el botón 4 Seleccione utilizando los botones y presione el botón 5 Seleccione SHQ HQ SQ1 o SQ2 utilizando los botones y presione el botón La calidad de la imagen ha quedado ajustada Para salir del menú pulse de nuevo el botón 6 Realice la toma Nota El ajuste de la calidad de imagen vuelve a HQ ajuste por omisión cuando el valor de borrado de los ajus...

Page 117: ...la imagen capturada 1 Cierre el cubreobjetivo y presione el botón La cámara se encenderá en el modo de reproducción 2 Presione el botón Cada vez que presiona el botón la imagen será ampliada en la secuencia de 1 5 2 0 2 5 3 0 3 En la pantalla de reproducción de primeros planos presione el botón para activar el modo de desplazamiento Efectúe el desplazamiento hacia arriba o abajo la izquierda o la ...

Page 118: ...de La reproducción automática sólo se podrá iniciar cuando haya una imagen fija visualizada Si alimenta la cámara mediante las pilas en el modo de reproducción automática se apagará automáticamente tras un período de inactividad de aproximadamente 30 minutos BORRADO DE TODAS LAS IMÁGENES 1 Cierre el cubreobjetivo y presione el botón La cámara se encenderá en el modo de reproducción 2 Presione el b...

Page 119: ... salir del menú presione de nuevo el botón 6 Grabe los vídeos mientras mira el monitor Presione el botón disparador para iniciar la grabación La grabación se detiene al soltar el botón disparador El tiempo de grabación disponible será indicado en el monitor Nota El flash y tele digital no se pueden usar en el modo de vídeo Se tarda un poco en grabar los vídeos El tiempo de grabación disponible var...

Page 120: ...EPRODUCCIÓN DE VÍDEOS 1 Cierre el cubreobjetivo y presione el botón La cámara se enciende en el modo de reproducción 2 Presione los botones para visualizar el vídeo que desea ver indicado mediante el símbolo y presione el botón En el monitor aparece el menú Play reproducción 3 Seleccione PLAY utilizando los botones y presione el botón 4 Seleccione utilizando los botones y presione el botón 5 Selec...

Page 121: ...l menú CREACIÓN DE UN ÍNDICE DE CUADROS DE VÍDEO SEPARADOS En el modo de índice de vídeo se pueden visualizar hasta 9 cuadros a la vez Los cuadros seleccionados se pueden almacenar posteriormente como las imágenes fijas separadas 1 Cierre el cubreobjetivo y presione el botón La cámara se enciende en el modo de reproducción 2 Presione el botón para que se visualice el vídeo que desea ver indicado p...

Page 122: ...eadas 1 Cierre el cubreobjetivo y presione el botón El monitor se encenderá 2 Presione el botón Aparecerá el menú de reproducción 3 Seleccione SETUP utilizando los botones y presione el botón 4 Seleccione utilizando los botones y presione el botón 5 Seleccione FORMAT utilizando los botones y presione el botón 6 Seleccione FORMAT utilizando los botones y presione el botón La tarjeta será formateada...

Page 123: ...tre retener para la siguiente toma los ajustes relacionados con el disparo como los ajustes del modo de flash y de calidad de imagen o reposicionarlos a los ajustes por omisión Si no desea cambiar los ajustes para adecuarlos a las condiciones ambientales o al motivo seleccione HOLD para retener los ajustes actuales Esto le evitará volver a realizar los ajustes cada vez que utilice la cámara como p...

Page 124: ...ormación sobre la imagen volverá a OFF ajuste por omisión cuando el valor de borrado de los ajustes sea RESET y se apague la cámara Véase Borrado de los ajustes pág 123 Sólo se visualizará y de estar ajustado después de 3 segundos independientemente de que la visualización de información sobre la imagen esté ajustada a ON o a OFF BRILLO DEL MONITOR Si el monitor es difícil de ver podrá ajustarlo p...

Page 125: ...una tarjeta o si ya está insertada sacarla y volverla a insertar Limpiar el conector de la tarjeta con un trozo de papel limpiador y formatee la tarjeta otra vez Una tarjeta que no se puede formatear es una tarjeta inutilizable Si desea guardar las imágenes o la tarjeta retire el sello de protección contra escritura Consulte las instrucciones de la SmartMedia entregados Reemplace la tarjeta o borr...

Page 126: ...nes Aprox 2 140 000 píxeles total Imagen grabada 1 600 1 208 píxeles Modo SHQ 1 600 1 200 píxeles Modo HQ 1 024 768 píxeles Modo SQ1 640 480 píxeles Modo SQ2 Balance de blancos TTL totalmente automático Preajustado día soleado día nublado lámpara incandescente lámpara fluorescente Objetivo Objetivo Olympus 5 5mm f2 8 5 elementos en 4 grupos equivalente a un objetivo de 36 de una cámara de 35 mm Si...

Page 127: ...ultáneamente con los datos de imagen Calendario automático Autoajustable en el margen de 1981 2031 Alimentación del calendario Capacitor interno para respaldo Función de la tarjeta Servicios de impresión que soporten DPOF Composición panorámica Sólo marca Olympus CAMEDIA Entorno de funcionamiento Temperatura 0 C 40 C funcionamiento 20 C 60 C almacenamiento Humedad 30 90 funcionamiento 10 90 almace...

Page 128: ...one de un interfaz USB hay un puerto USB marcado en su PC Utilice el Adaptador de tarjeta para PC opcional No se puede utilizar con Windows NT Utilice el Adaptador de disco flexible Flash Path opcional Póngase en contacto con su representante Olympus local Su PC dispone de una ranura para tarjeta PC incorporada Su PC dispone de una unidad de disquetes incorporada No Sí No Sí No Sí No Utilice el ca...

Page 129: ...129 Sp Sp MEMO ...

Page 130: ...Inc 地址 2 Corporate Center Drive Melville New York 11747 3157 U S A 電話號碼 631 844 5000 經測試符合家庭或辦公室使用的 FCC 標準 該設備符合 FCC 規程第 15 章 操作須服從以下兩種情況 1 該設備不會引起有害干擾 2 該設備必須接納收到的任何干擾 包括會引發不合意操作的干擾 對於加拿大用戶 B 級數碼設備符合加拿大干擾引發設備規程的全部要求 對於歐洲用戶 CE 標記表示本產品符合歐洲安全 衛生 環境和用戶保護要 求 商標 Windows 是微軟公司在美國和其他國家的註冊商標或商標 Macintosh 是蘋果電腦公司的註冊商標 本說明書中所提到的其他品牌名稱和產品名稱為其相應公司的商標或注冊商 標 ...

Page 131: ...帶 標誌的章節僅在 CD ROM 中說明 相機操作篇 使用準備 134 部件名稱 134 顯示器的顯示 安裝肩帶 135 安裝電池 135 選擇市售電池或交流電源轉接器 136 插入 SmartMedia 卡 136 打開和關閉相機 137 攝影時 137 放影時 138 選單結構 設定日期和時間 138 攝影功能 139 練習相機的正確使用方法 拍照 139 使用取景器拍照 139 使用顯示器拍照 139 使用取景器和顯示器的差異 記憶體指示的功能 綠色指示燈和橙色指示燈的功能 焦點鎖定 ...

Page 132: ...檢查拍攝的影像 放影 140 快速觀看 在攝影模式下雙擊放影 刪除一幅影像 140 保護重要影像 141 使用各種攝影功能 142 使用箭頭鍵 142 閃光燈 142 近攝模式 142 數碼遠攝模式 143 曝光補正 143 自拍 144 連拍模式 145 固定焦點 145 點測光 146 白平衡 147 影像質量 148 銳度 對比度 使用各種放影功能 149 索引放影 149 特寫放影 149 自動放影 150 刪除所有影像 150 ...

Page 133: ...151 全景模式 合成影像 編輯影像 製作單色 黑白 影像 製作棕褐色影像 改變影像尺寸 改變影像方向 嗶聲 153 新卡格式化 154 影像回顧 155 清除設定 155 在顯示器上顯示影像數據 156 調整顯示器亮度 156 列印預約 故障檢修 157 錯誤代碼 157 故障 規格 158 索引 電腦連接篇 流程 Windows 98 Me 2000 的用戶 Macintosh Mac OS 9 的用戶 尋找電腦連接方法 其他操作系統的用戶 160 ...

Page 134: ...134 Ch 中 使用準備 部件名稱 快門鍵 閃光燈 自拍指示燈 鏡頭蓋 用於開啟和關閉相機 箭頭鍵 選單指南 OK 選單鍵 顯示器鍵 打開 關閉顯示器 電池室蓋 三腳架孔 USB 接口 DC IN 插孔 接口蓋 鏡頭 插卡蓋 肩帶安裝孔 取景器 橙色指示燈 綠色指示燈 AF 定位標誌 顯示器 ...

Page 135: ...害等概不負責 安裝電池 1 請檢查以下事項 鏡頭蓋關閉 橙色指示燈熄滅 顯示器關閉 2 朝 A 方向推開電池室蓋並朝 B 方向打開 3 如圖所示按正確的極性方向安裝電池 4 朝方向 C 按下電池室蓋並朝方向 D 用力推 標誌直至發出喀嗒聲 如果相機在未安裝電池的情況下放置約 1 小時 所有設定將恢復到預先設定 當相機用電池供電時 如果電池開始減少 則出現紅色電池狀態標誌 當電池接 近耗盡時 顯示器熄滅 綠色指示燈和橙色指示燈同時閃爍 電池狀態 點亮 綠色 閃爍 紅色 電池剩餘量少 請更換新電池 電池完全耗盡 請更換新 電池 綠色和橙色指示燈閃爍 無圖標 D C A B 還有足夠的 電池剩餘量 ...

Page 136: ...行等情況下也到處可以買到 根據廠家 和使用條件 可以拍攝的影像數有很大的變化 使用時請務必關閉顯示器以節 省電池電力 交流電源轉接器 選購的 Olympus CAMEDIA 交流電源轉接器供您從家用電源插座對相機供電 如果在用電池供電時相機長時間打開 例如下載影像至電腦 電池可能耗盡 導致影像數據丟失 Olympus 建議您在長時間打開相機時使用交流電源轉接器 在相機與個人電腦連接時 請勿拔下或插入交流電源轉接器 請勿在相機電源打開時裝入或取出電池和插上或拔下交流電源轉接器 否則可能 會影響相機的設定 請勿使用錳電池或市售的鋰電池 插入 SmartMedia 卡 本相機拍攝的影像儲存在 SmartMedia 卡上 1 請檢查以下事項 鏡頭蓋關閉 橙色指示燈熄滅 顯示器關閉 2 打開插卡蓋 3 將插卡按圖上所指方向插入到底 插卡蓋的內側有表示卡插入方向的標誌 4 關上插卡蓋直至發出喀嗒聲 ...

Page 137: ...4 362 128MB 92 257 469 725 本相機可能無法偵測非 Olympus 插卡或經電腦等其他裝置格式化的插卡 因此請在 使用之前先在相機上進行格式化 請參見 新卡格式化 第 154 頁 在相機電源打開時切勿打開插卡蓋或取出插卡或電池 否則可能會破壞插卡上的 數據 而且數據無法恢複 插卡是精密儀器 請勿對其施加過大的力或衝擊 請勿直接用手觸摸插卡的金色 金屬部位 如果 SmartMedia 上貼有寫保護封條 則相機的某些功能不起作用 當您使用這 些功能時 請從插卡上揭下封條 有關使用 SmartMedia 卡的詳情 請參見附帶的 SmartMedia 卡的說明書 打開和關閉相機 攝影時 打開電源 打開鏡頭蓋 相機於攝影模式打開電源 插卡的 記憶容量 放影模式 卡插入方向標誌 ...

Page 138: ...需要重新打開相 機的電源 設定日期和時間 1 按 鍵 顯示器點亮 2 按 鍵 顯示放影選單 3 用 鍵選擇 SETUP 並按 鍵 4 用 鍵選擇 並按 鍵 5 按 鍵從 Y M D 年月日 M D Y 月日年 D M Y 日月 年 中選擇日期的顯示順序並按 鍵 顯示日期輸入畫面 6 用 鍵輸入最初的項目 並按 鍵進到下一個項目 移動到下一個項目 7 反覆進行相同的操作 一直到設定結束 8 當時鐘顯示 00 秒時按 鍵 日期和時間被設定 9 按 鍵 顯示器熄滅 如果在取出電池或電池耗盡時擱置 1 小時左右 日期和時間設定會被刪除或變成不 正確 在拍攝重要影像之前 請確認日期和時間設定正確 在攝影模式和放影模式均可以相同的步驟設定 ...

Page 139: ... 3 半按下快門鍵 此狀態稱為半按 取景器旁邊的綠色指示燈點亮 半按下快門鍵時曝光被鎖定 如果綠色指示燈閃爍 則被攝對象未聚焦 您會聽到操作聲 但還不拍照 將手 指從快門鍵上移開並重新對準相機後再半按下快門鍵 參見 焦點鎖定 4 完全按下快門鍵 此狀態稱為全按 拍攝影像 使用顯示器拍照 1 打開鏡頭蓋 2 按 鍵 顯示器點亮 再按一下 鍵關閉顯示器 3 看著顯示器中的被攝對象構圖 4 與使用取景器時相同的方法拍照 參見 使用取景器拍照 第 139 頁 在拍照前後或半按下快門鍵時取景器旁邊的綠色指示燈或橙色指示燈可能亮起或 閃爍 有關詳情 請參見 綠色指示燈和橙色指示燈的功能 記憶體標誌存滿時無法再攝影 請等待數秒鐘使記憶體標誌熄滅後再拍攝 參見 記憶體指示的功能 ...

Page 140: ...好的影像也可能損壞 通過觀看顯示器拍照時 顯示的電池剩餘時間可能會很短 這並非是故障 或許 還可以關閉顯示器通過觀看取景器繼續拍照 播放影像 檢查拍攝的影像 放影 可以在顯示器上逐幅播放影像 1 在鏡頭蓋關上時按 鍵 顯示器點亮 並在顯示器上顯示最後拍攝的影像 播放影像 2 按 鍵 按 鍵播放前一幅影像 按 鍵播放後一幅影像 3 要停止播放時 按 鍵 顯示器熄滅 電源關閉 打開相機後 顯示器可能即刻點亮並顯示影像片刻 這並非是故障 刪除一幅影像 1 在鏡頭蓋關上時按 鍵 相機於放影模式打開電源 2 按 鍵並播放所要刪除的影像 參見 檢查拍攝的影像 放影 第 140 頁 3 按 鍵 1 秒鐘以上 顯示單影像刪除選單 4 用 鍵選擇 ERASE 並按 鍵 影像被刪除 ...

Page 141: ...操作後再刪除 刪除的影像無法恢復 在刪除影像之前 請務必確認不要刪除重要數據 保護重要影像 可以保護重要影像以防被意外刪除 1 在鏡頭蓋關上時按 鍵 相機於放影模式打開電源 2 按 鍵顯示所要保護的影像 參見 檢查拍攝的影像 放影 第 140 頁 3 按 鍵 1 秒鐘以上 顯示 標誌 影像受保護 要取消保護時 顯示帶 標誌的影像並按 鍵 1 秒鐘以上 此操作也可以在顯示所要保護的影像時按 鍵並在放影選單中選擇 來 進行 即使關閉相機 保護設定仍然保存 受保護的影像無法通過刪除一幅影像或刪除所有影像刪除 但進行格式化將刪除 所有影像 貼有寫保護封條的插卡無法進行影像保護操作 ...

Page 142: ...模式 3 確定要改變模式設定後再按一下 鍵 每按一下 鍵模式按以下順序改變 4 拍照 可以在攝影選單中選擇 設定閃光模式 閃光燈範圍為 至 0 2 3 5 m 關閉鏡頭蓋時 所有閃光模式設定恢復到自動模式 預先設定 清除設定的預 先設定值為 RESET 參見 清除設定 第 155 頁 閃光燈充電時橙色指示燈閃爍 這時可以拍照 但閃光燈不閃光 要使用閃光燈 時 請等橙色指示燈熄滅後再按快門鍵 在近距離用閃光燈拍照時 可能無法獲得適當的亮度 並出現明顯的陰影 在連拍模式 全景模式和動畫模式中無法使用閃光燈 近攝模式 在 10 至 50cm 的距離攝影時使用近攝模式 1 打開鏡頭蓋 相機於攝影模式打開電源 2 按 鍵 顯示當前的近攝模式 OFF ...

Page 143: ...法獲得正確的曝光 近攝後請在顯示器上查 看影像 數碼遠攝模式 此模式可將影像放大寫 1 6 倍 2 倍 2 5 倍 3 2 倍 4 倍和 5 倍 放大 3 2 倍 4 倍或 5 倍時需要將影像質量設定為 SQ2 參見 影像質量 第 148 頁 1 打開鏡頭蓋 相機於攝影模式打開電源 2 按 鍵 顯示器自動點亮 影像以 1 6 倍放大倍數顯示 3 看著顯示器按 鍵 每按一下 鍵設定以 1 6 2 0 2 5 3 2 4 0 5 0 的順序改變 每按一下 鍵設定以 4 0 3 2 2 5 2 0 1 6 無圖標 1 0 的順序改變 4 看著顯示器拍照 按 鍵將關閉顯示器並取消數碼遠攝模式 以數碼遠攝模式拍攝的影像可能出現顆粒狀 數碼望遠模式無法用於動畫模式 曝光補正 除自動曝光以外 還可以 0 5 的間隔在 2 的範圍中進行調整 此模式在被攝對象和背景之間的對比度很大時使用 以獲得適當的亮度 ...

Page 144: ...清除設定的預先設定值為 RESET 參見 清除設定 第 155 頁 調整曝光補正時 顯示器上所顯示的影像之亮度也改變 在被攝對象較暗難以看 出變化時 請在顯示器上顯示所拍攝的影像來查看亮度 如果使用閃光燈 可能無法獲得所需的亮度 曝光補正 當被攝對象處於極暗或極亮的環境下時曝光補正可能無法獲得正確的補正 自拍 可以用自拍來拍攝包括攝影者的影像 請將相機固定在三腳架上 自拍可用於 拍攝包括攝影者在內的紀念照片 1 打開鏡頭蓋 相機於攝影模式打開電源 2 按 鍵 顯示攝影選單 3 用 鍵選擇 CAMERA 並按 鍵 4 用 鍵選擇 DRIVE 並按 鍵 5 用 鍵選擇 SELF TIMER 並按 鍵 自拍被設定 再按一下 鍵選單顯示結束 6 拍照 按快門鍵時 自拍指示燈點亮 10 秒鐘 然後閃爍 2 秒鐘後拍照 ...

Page 145: ...源 2 按 鍵 顯示攝影選單 3 用 鍵選擇 CAMERA 並按 鍵 4 用 鍵選擇 DRIVE 並按 鍵 5 用 鍵選擇 SEQUENCE 並按 鍵 連拍模式被設定 再按一下 鍵選單顯示結束 6 拍照 持續按下快門鍵 鬆開快門鍵時攝影停止 清除設定值為 RESET 和關上鏡頭蓋時將取消連拍模式 參見 清除設定 第 155 頁 閃光燈無法使用 為防止手的抖動 快門速度最大設定為 1 30 秒 因此影像可能會比通常暗 在此模式拍照時記錄影像所化的時間略長 可連續拍攝的影像數和攝影速度根據影像質量和 SmartMedia 卡上所剩的影像數 等而異 拍攝後保存影像時橙色指示燈閃爍 這時 請勿打開插卡蓋或取出電池 固定焦點 此功能用於拍攝難以聚焦的遠處風景 如拍攝大型焰火場面 在夜間攝影時請 將閃光模式設定為夜景模式 參見 閃光燈 第 142 頁 ...

Page 146: ... 預先設定 點測光 當被攝對象處於明亮的背景光前時它可能會顯得太暗 這時 將設定改變為點 測光 相機僅用取景器中央的照明資訊計算曝光而不受背景光的影響 測光設定 ESP 分別測量取景器中央和周圍區域的亮度以獲得最佳曝光 液晶顯示器中無標誌 SPOT 僅測量取景器中央的亮度以獲得被攝對象的正確曝光 1 打開鏡頭蓋 相機於攝影模式打開電源 2 按 鍵 顯示攝影選單 3 用 鍵選擇 CAMERA 並按 鍵 4 用 鍵選擇 並按 鍵 5 用 鍵選擇 SPOT 並按 鍵 點測光設定結束 再按一下 鍵選單顯示結束 6 在取景器中將 AF 定位標誌置於被攝對象之上並拍照 關上鏡頭蓋後測光模式恢復到 ESP 模式 預先設定 清除設定的預先設定值為 RESET 參見 清除設定 第 155 頁 ...

Page 147: ...燈 確保在鎢燈照明下的自然色彩 熒光燈 確保在熒光燈照明下的自然色彩 1 打開鏡頭蓋 相機於攝影模式打開電源 2 按 鍵 顯示攝影選單 3 用 鍵選擇 PICTURE 並按 鍵 4 用 鍵選擇 並按 鍵 5 用 鍵選擇 AUTO 或 並按 鍵 白平衡的設定完成 再按一下 鍵選單顯示結束 6 拍照 關上鏡頭蓋白平衡恢復為 AUTO 預先設定 清除設定的預先設定值為 RESET 參見 清除設定 第 155 頁 在人工和自然照明混合的情況下或在熒光燈照明下難以獲得自然的色彩 選擇 獲得接近鎢燈下的色彩 在特殊照明下白平衡可能無法按照需要起作用 如果以自動以外的白平衡設定拍照 請務必重播影像以檢查色彩 如果以自動以外的白平衡設定拍攝時使用閃光燈 照片的色彩可能於顯示器上看 到的色彩不同 ...

Page 148: ... 影像質量較差 但可拍攝影像數增加 SQ1 1 024 768 像素 SQ2 640 480 像素 1 打開鏡頭蓋 相機於攝影模式打開電源 2 按 鍵 顯示攝影選單 3 用 鍵選擇 PICTURE 並按 鍵 4 用 鍵選擇 並按 鍵 5 用 鍵選擇 SHQ HQ SQ1 或 SQ2 並按 鍵 影像質量被設定 再按一下 鍵選單顯示結束 6 拍照 當清除設定值為 RESET 和關上鏡頭蓋時 影像質量設定恢復至 HQ 預先設 定 參見 清除設定 第 155 頁 可拍攝影像數根據影像質量設定而異 HQ 和 SHQ 的像素數目相同 但 SHQ 的壓縮率低 因此放大後的影像清晰 SHQ 記錄和播放影像的時間也比 HQ 長 當您將影像質量改變為高質量而剩餘的可拍攝影像數較少時 可能顯示 SmartMedia 卡警告標誌 有足夠的記憶體空間 如果遇此情形 請選擇其他影 像質量 SHQ 超高質量 HQ 高質...

Page 149: ... 鍵將邊框移到上一幅影像 上 4 按 鍵 顯示器恢復到單影像放影模式 特寫放影 從單影像播放轉換為以 1 5 倍 2 倍 2 5 倍和 3 倍的 4 級放大倍率放大顯 示 便於確認所拍攝影像的細節部分 1 在鏡頭蓋關上時按 鍵 相機於放影模式打開電源 2 按 鍵 每按一下 鍵 影像依次放大 1 5 2 0 2 5 3 0 3 若在特寫放影中按 鍵 滾動模式啟動 用 鍵向上或向下 向左或向右滾動以顯示所要觀看的區域 再按一下 鍵選單顯示結束 4 退出滾動模式後按 鍵返回普通的單影像播放畫面 1 倍 在顯示帶動畫標誌的影像過程中無法進行上述操作 請先顯示靜像 在特寫放影中按 鍵時不顯示選單 要顯示選單時 請先恢復普通的單影像放 影畫面 1 倍 ...

Page 150: ...START 並按 鍵 自動放影開始 每幅影像播放 3 秒鐘 按 鍵取消自動放影 再按一下 鍵選單顯示結束 如果在顯示動畫時顯示放影選單 將代替 顯示出來 祇能在顯示靜 像時開始自動放影 如果在自動放影模式中相機由電池供電 當 30 分鐘左右不操作相機時 它將自動 關閉 刪除所有影像 1 在鏡頭蓋關上時按 鍵 相機於放影模式打開電源 2 按 鍵 顯示放影選單 3 用 鍵選擇 SETUP 並按 鍵 4 用 鍵選擇 並按 鍵 5 按 鍵選擇 ALL ERASE 並按 鍵 6 按 鍵選擇 ALL ERASE 並按 鍵 所有影像被刪除 無法刪除受保護的影像 插卡上貼有寫保護封條時無法刪除影像 刪除的影像無法恢復 在刪除影像之前 請務必確認不要刪除重要數據 ...

Page 151: ...用 鍵選擇 CAMERA 並按 鍵 4 用 鍵選擇 DRIVE 並按 鍵 5 用 鍵選擇 MOVIE 並按 鍵 動畫模式被設定 顯示器自動打開 再按一下 鍵選單顯示結束 6 看著顯示器攝影 按下快門鍵時動畫攝影開始 再按一下快門鍵動畫攝影 結束 顯示器上顯示出可拍攝時間 閃光燈和數碼遠攝無法用於動畫模式 拍攝動畫後影像的保存需要一定的時間 可拍攝時間根據 SmartMedia 卡的記憶容量而異 聲音無法記錄 所拍攝的影像可能比攝影中出現的影像略小 取消動畫模式 1 按 鍵 顯示器關閉 動畫模式被取消 關上鏡頭蓋時動畫模式被取消 清除設定的預先設定值為 RESET 參見 清除設 定 第 155 頁 ...

Page 152: ...的影像質量仍然保持不變 當清除設定值為 RESET 和關上鏡頭蓋時 動畫的影像質量設定恢復至 HQ 預 先設定 參見 清除設定 第 155 頁 播放動畫 1 在鏡頭蓋關上時按 鍵 相機於放影模式打開電源 2 按 鍵顯示帶 標誌的所要影像並按 鍵 顯示放影選單 3 用 鍵選擇 PLAY 並按 鍵 4 用 鍵選擇 並按 鍵 5 用 鍵選擇 START 並按 鍵 當動畫到達結尾處時 相機自動回到開頭並停止 要重播動畫時 按 鍵 要停止重播並取消播放動畫時 按 鍵 SQ 標準質量 HQ 高質量 1 動畫的攝影時間根據插卡的剩餘記憶容量而異 2 像素 一詞表示 影像元素 攝影時間 秒 縮短 一段動畫的最長攝影時間為 15 秒 1 320 240 像素 2 攝影時間 秒 增長 一段動畫的最長攝影時間為 60 秒 1 160 120 像素 2 ...

Page 153: ... 要重播另一段動畫時 按兩下 鍵取消播放動畫模式 然後 顯示所要觀看的帶 標誌的動畫 並從選單中重新選擇 建立分離動畫影像的索引 在動畫索引模式下最多可以顯示 9 幀影像 然後 可以將所選的幀以分離的靜 像保存 1 在鏡頭蓋關上時按 鍵 相機於放影模式打開電源 2 按 鍵顯示所要觀看的動畫 以 標誌表示 並按 鍵 顯示放影選單 3 用 鍵選擇 EDIT 並按 鍵 4 用 鍵選擇 INDEX 並按 鍵 5 用 鍵選擇 INDEX 並按 鍵 動畫以靜像索引顯示的形式顯示 索引影像從原來的動畫被保存為分離的影像數據 您無法選擇第一幅和最後一幅動畫 自動挑選的影像之間的間隔根據動畫的攝影時間而異 動畫索引模式只能用 9 幅影像顯示來建立 嗶聲 此功能可以消除嗶聲 1 打開鏡頭蓋 相機於攝影模式打開電源 ...

Page 154: ...s 插卡或經過個人電腦格式化的插卡之前 務必先在本相機上格 式化 Olympus CAMEDIA 牌 SmartMedia 卡不需要格式化 1 在鏡頭蓋關上時按 鍵 相機於放影模式打開電源 2 按 鍵 顯示放影選單 3 用 鍵選擇 SETUP 並按 鍵 4 如果對插卡格式化 用 鍵選擇 並按 鍵 5 用 鍵選擇 FORMAT 並按 鍵 6 用 鍵選擇 FORMAT 並按 鍵 插卡被格式化 在進行過程中 無法取消或停止格式化 也可以從攝影選單對插卡格式化 格式化會刪除 SmartMedia 卡上包括受保護的影像在內的所有影像 在對以前用 過的卡進行格式化時 注意不要刪除您想要保留的影像數據 一旦格式化 以前 存儲在卡內的影像則無法復原 請勿在格式化期間打開插卡蓋或取出電池 否則可能會導致插卡故障 貼有寫保護封條的插卡無法格式化 請在格式化之前揭下封條 請勿再次使用揭 下來的封條 ...

Page 155: ...拍攝的影像 OFF 拍攝結束後立即顯示拍攝下一幅影像的畫面 影像回顧的設定結束 再按一下 鍵選單顯示結束 即使關上鏡頭蓋 影像回顧設定仍然保留 清除設定 您可以選擇是否保存閃光模式和影像質量等攝影相關設定用於下一幅影像或在 相機電源關閉時將其恢復到預先設定 如果不想改變設定以適應天氣或被攝對 象 選擇 HOLD 以保存現在的設定 這避免了每次使用相機時不得不重新輸 入設定 有關各種設定的詳情 請參見 清除設定值 1 打開鏡頭蓋 相機以攝影模式打開電源 2 按 鍵 顯示攝影選單畫面 3 用 鍵選擇 SETUP 並按 鍵 4 用 鍵選擇 並按 鍵 5 用 鍵選擇 HOLD 並按 鍵 可通過選擇 HOLD 來保存現 在的設定 再按一下 鍵選單顯示結束 即使關上鏡頭蓋 清除設定仍然保留 ...

Page 156: ...用 鍵選擇 INFO 並按 鍵 5 用 鍵選擇 ON 並按 鍵 在放影畫面上顯示影像數據 再按一下 鍵選單顯示結束 電源切換至 OFF 時 顯示影像數據的設定恢復到 OFF 預先設定 清除設定 的預先設定值為 RESET 參見 清除設定 第 155 頁 3 秒鐘後僅顯示 和 若有設定 而與顯示影像數據設定為 ON 或 OFF 無關 調整顯示器亮度 如果顯示器難以看清 可以進行調整以適應環境亮度 1 關上鏡頭蓋並按 鍵 相機於放影模式打開電源 2 按 鍵 顯示放影選單 3 用 鍵選擇 SETUP 並按 鍵 4 用 鍵選擇 並按 鍵 5 用 鍵調整顯示器的亮度並按 鍵 使顯示器變亮 使顯示器變暗 6 按 鍵 顯示器的亮度設定結束 再按一下 鍵選單顯示結束 相機關閉電源時 顯示器亮度設定仍然保持 ...

Page 157: ... 插卡禁止寫入數據 無法再記錄影像 因為插 卡的可拍攝影像數已為 0 無法放影 無法觀看影像 插入卡 若已插入 則將其 取出後重新插入 用清潔紙擦拭插卡的連接部 位 不能格式化的插卡無法 使用 如果要將影像保存在插卡 上 請解除保護封條 參 閱 SmartMedia 的使用說明 書 更換插卡或刪除不要的影 像 您試圖播放未記錄影像的插 卡 所使用的影像檔案與本相機 不兼容 NO CARD CARD ERROR WRITE PROTECT CARD FULL NO PICTURE PICTURE ERROR ...

Page 158: ... 成像元件 1 2 7 英寸 CCD 固態成像元件 約 214 000 像素 總像素數 記錄像素數 1 600 1 208 像素 SHQ 模式 1 600 1 200 像素 HQ 模式 1 024 768 像素 SQ1 模式 640 480 像素 SQ2 模式 白平衡 全自動 TTL 預設 日光 多雲 鎢燈 熒光燈 鏡頭 Olympus 鏡頭 5 5 mm f2 8 4 組 5 塊 相當於 36 mm 相機上的 35 mm 鏡頭 測光模式 成像元件的數碼 ESP 測光模式 點測光 曝光控制模式 程式自動曝光 光圈 f2 8 f5 6 f9 1 快門 2 至 1 800 秒 與機械快門並用 無法手動設定 攝影範圍 0 5 m 標準模式 0 1 m 0 5 m 近攝模式 取景器 光學實像取景器 帶 AF 定位標誌 顯示器 顯示器 1 5 英寸 TFT 彩色液晶顯示器 顯示器像素數 約 114 ...

Page 159: ...接口 儲存級 自動連接 日期和時刻 與影像數據同時記錄 自動日歷系統 1981 至 2031 年範圍中自動修正 自動日歷系統用電源 用內部電容器備用 插卡功能 DPOF 對應的列印預約 全景影像合成 僅限於 Olympus CAMEDIA 牌 使用環境 溫度 0 C 40 C 動作時 20 C 60 C 保存時 濕度 30 90 動作時 10 90 保存時 電源 2 節 AA 號鹼性電池 氫化鎳電池或鎳鎘充電池 或 2 節 CR V3 Olympus 跟 LB 01 鋰電池組或另 售的交流電源轉接器 無法使用 AA 尺寸錳電池或市售的 AA 尺寸鋰電池 尺寸 110 寬 62 高 35 深 mm 不包括突出部分 重量 165 克 不包括電池 插卡 外觀和規格如有變更 恕不另行通知 ...

Page 160: ...tMedia 卡和磁片轉接器或 PC 卡轉接器 選購 可以 將影像數據傳送至電腦 您的電腦上有 USB 接口嗎 電腦上是否有帶 標誌的 USB 接口 請使用附帶的 USB 電纜 請使用另售的 PC 卡 轉接器 無法用於 Windows NT 請使用另售的 FlashPath 是否使用以下的 操作系統 Windows 98 Windows Me Windows 2000 Mac OS9 有內藏的 PC 卡插槽嗎 有內藏的磁片驅動器嗎 沒有 有 沒有 有 有 沒有 請與當地的 Olympus 代理店聯絡 尋找電腦連接方法 沒有 有 請使用另售的 SmartMedia 讀 寫器 ...

Page 161: ...161 中 Ch MEMO ...

Page 162: ...162 MEMO ...

Page 163: ...163 MEMO ...

Page 164: ...dates can be obtained at http olympus com digital OLYMPUS OPTICAL CO EUROPA GMBH Premises Goods delivery Wendenstraße 14 18 20097 Hamburg Germany Tel 040 237730 Letters Postfach 10 49 08 20034 Hamburg Germany Hotline Numbers for customers in Europe Tel 01805 67 10 83 for Germany Tel 00800 67 10 83 00 for Austria Belgium Denmark France Netherlands Norway Sweden Switzerland United Kingdom Tel 49 180...

Reviews: