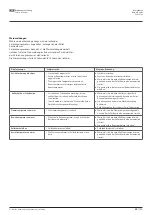


Königshütte
Lima 2.0 6 kW
Pellet stove
GB
Installation instructions
for the specialist company
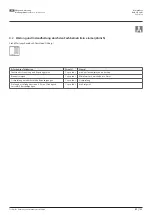
2.8 Electrical connection
Plug the enclosed connector into the socket on the rear of the pellet
fireplace. If the pellet fireplace should be operated with accessories
(external room thermostat), connect the connections to the connec-
tor as described in the accessory instructions first.
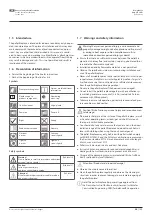
8 pole
Grate
(accessory)
Convection
air blower
(accessory)
Display
Ignition
Power supply
Pump (boiler)
Auger
External
room thermostat
Supply air damper
(accessory)
Display
Flame temperature
Room temperature
Water temperature (stove)
Hall sensor
Safety-
temperature-
limiter
Underpressure
Supply air
dampe
(accessory)
Grate (accessory)
Induced
draught
Pellet tank cover
Buffer1 (boiler)
Buffer2 (boiler)
STB
100°C
Tilt switch (if available)
Safetytemperaturelimiter
6 pole
Import device
GSM
Data transmission
Display
Extension
white
green
Pt1000
Pt1000
Pt1000
Pt1000
NiCrNi
+18V
GND
Signal
yellow
black
red
green
brown
white
Display
green
brown
white
+5V
GND
Signal
white
black
red
Fig. 2.18 Electrical connection diagram
Note!
The connector must be plugged in even without acces-
sories, otherwise the pellet fireplace is not ready for operation.
We reserve the right to make technical changes
43
| 100
Summary of Contents for Lima 2.0
Page 15: ...K nigsh tte Lima 2 0 6 kW Pelletofen DE Technische nderungen und Irrt mer vorbehalten 15 100...
Page 33: ...K nigsh tte Lima 2 0 6 kW Pelletofen DE Technische nderungen und Irrt mer vorbehalten 33 100...
Page 98: ...K nigsh tte Lima 2 0 6 kW Pelletofen Pellet stove Po le pellets...
Page 99: ...K nigsh tte Lima 2 0 6 kW Pelletofen Pellet stove Po le pellets...