background image

Problem

Solution

P

ROBLEM

S

OLVING

77..16

Solving Print Quality Problems

General print quality problems can be solved by following the checklist below.

• Check the printer properties to make sure that you are using the best available print quality

option (see page 5.18).

• Redistribute the toner in the toner cartridge (see page 6.2).
• Clean the inside of the printer (see page 6.4).
• Adjust the print resolution from the printer properties (see page 5.19).
• Check to make sure that Toner Save Mode is off (see page 5.6).
• Troubleshoot general printing problems (see page 7.2).
• Install a new toner cartridge, then check print quality again (see page 2.2). 

Print Quality Checklist

Solving Print Quality Problems

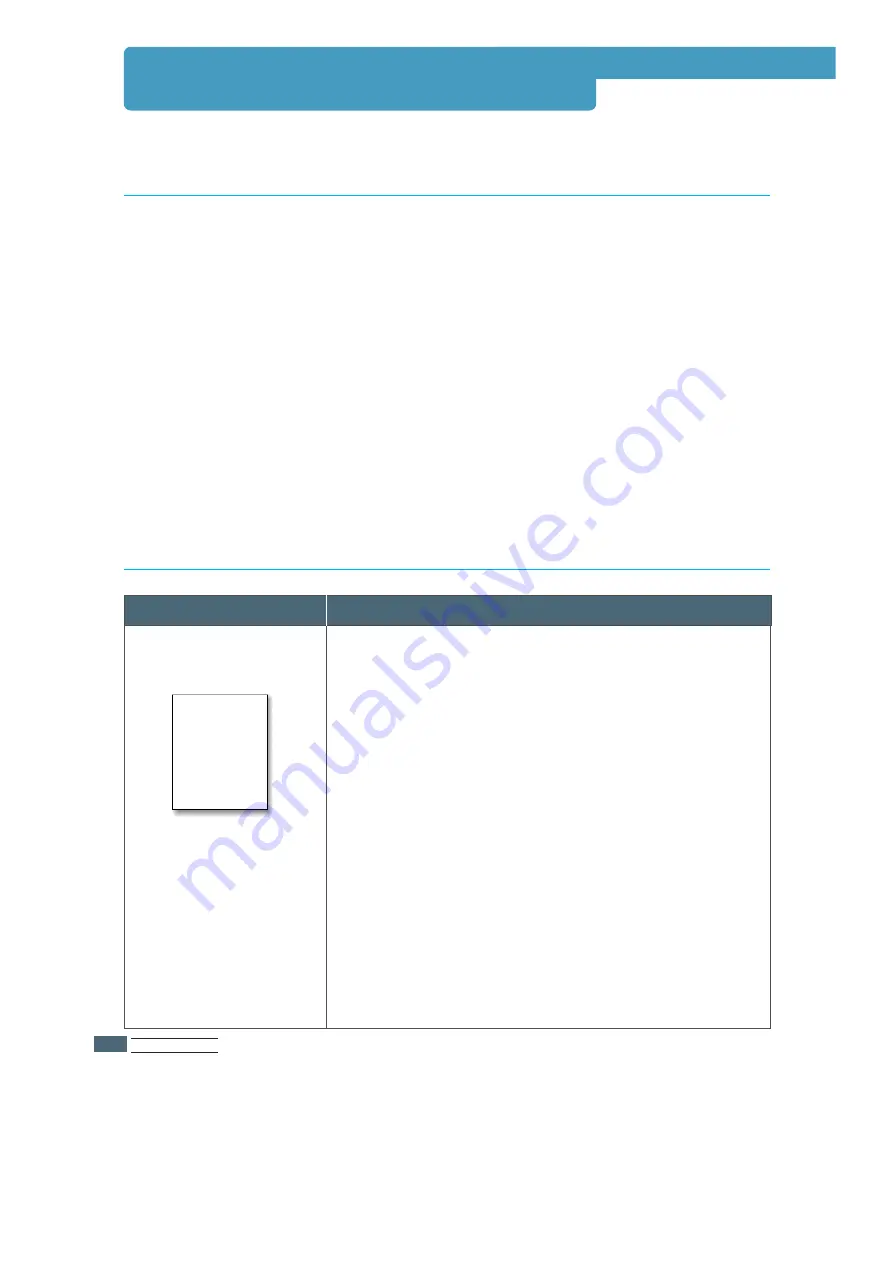
If a vertical white streak or faded area appears on the page:

• The toner supply is low. You may be able to temporarily

extend the toner cartridge life. See “Redistributing Toner” on

page 6.2. If this does not improve the print quality, install a

new toner cartridge.

• The paper may not meet paper specifications (for example,

the paper is too moist or too rough). See “Paper

Specifications” on page A.2.

• If the whole page is light, the print resolution setting is too

light or Toner Save Mode may be on. Adjust the print

resolution and Toner Save Mode within the printer

properties. See page 5.18.

• A combination of faded and smeared defects may indicate

that the toner cartridge needs cleaning. See “Cleaning the

Printer” on page 6.4.

• The surface of LSU part inside the printer may be dirty.

Clean the LSU (see page 6.5).

Light or feded print

Aa

Bb

Cc

Aa

Bb

Cc

Aa

Bb

Cc

Aa

Bb

Cc

Aa

Bb

Cc

AaBbCc
AaBbCc
AaBbCc

AaBbCc
AaBbCc

Summary of Contents for PGL 12EN

Page 1: ...LASER PRINTER PGL 12en Reference Manual p n 506519W...

Page 2: ...ics Data Computer Corporation PCL and PCL6 are trademarks of Hewlett Packard Company IBM and IBM PC are trademarks of International Business Machines Corporation Apple AppleTalk TrueType Laser Writer...

Page 3: ...r 2 8 STEP 6 Print a Demo Page 2 8 STEP 7 Install the Printer Software 2 9 Choosing Paper and Other Media 4 1 Selecting the Output Tray 4 4 Loading Paper 4 6 Using Tray 1 or the Optional Tray 2 4 6 Us...

Page 4: ...rs 5 16 Setting Graphic Properties 5 18 Printing Watermarks 5 21 Using Page Overlay 5 24 Printing Tasks 5 Maintaining Toner Cartridge 6 1 Cleaning the Printer 6 4 Maintaining Your Printer 6 Troublesho...

Page 5: ...iver C 5 Using PS Driver C 10 About Remote Control Panel for DOS D 1 Installing the Remote Control Panel for DOS Users D 2 Selecting Print Settings D 2 Setting Your Printer with the PS Option E 1 Inst...

Page 6: ...e Printer on a Network F 1 Setting Up a Locally Shared Printer F 2 Setting Up a Network Connected Printer F 3 Precautions H 1 Memory and PostScript SIMMs H 2 Network Interface Card H 5 Paper Tray 2 H...

Page 7: ...le can damage your eyes CAUTION INVISIBLE LASER RADIATION WHEN THIS COVER OPEN DO NOT OPEN THIS COVER VORSICHT UNSICHTBARE LASERSTRAHLUNG WENN ABDECKUNG GE FFNET NICHT DEM STRAHL AUSSETZEN ATTENTION R...

Page 8: ...ormation about ozone please request your nearest Olivetti dealer OZONE Power Saver Environmental and Safety Consideration This printer contains advanced energy conservation technology that reduces pow...

Page 9: ...chapter Congratulations on the purchase of your PGL 12en printer This chapter provides information on the following topics Special Features Printer Components 1 1...

Page 10: ...s of each page of your document are magnified and printed across the selected sheet of paper After the document has printed trim off the white edges of each sheet Tape the sheets together to form a po...

Page 11: ...ally conserves electricity by substantially reducing power consumption when not printing This printer meets Energy Star guidelines for energy efficiency The PGL 12en printer has 4 MB of memory which c...

Page 12: ...ol board to install printer options Paper level indicators Inside Face down output Face up output Top cover Tray 1 550 sheet paper feeder Multi Purpose Tray Tray 2 Optional 550 sheet paper feeder Rear...

Page 13: ...ur printer Topics included in this chapter are STEP 1 Unpack Your Printer STEP 2 Install the Toner Cartridge STEP 3 Load Paper STEP 4 Connect to the Computer with a Parallel Cable STEP 5 Turn on the P...

Page 14: ...Make sure that your printer has been packed with the following items Notes If any items are missing or damaged notify your dealer immediately Components may differ from one country to another Toner c...

Page 15: ...pull the tape completely out of the cartridge Discard the tape 4 Gently shake the cartridge from side to side to distribute the toner evenly inside the cartridge CAUTION To prevent damage do not expo...

Page 16: ...000 pages 3 000 pages for the toner cartridge that is shipped with the printer 6 Grasp the handle and insert the cartridge in the printer until it drops into place 7 Close the top cover Make sure tha...

Page 17: ...inter Note You can load transparencies letterheads or other print media using the same method 3 Load paper with the print side facing down Make sure it is flat in the tray at all four corners 2 Push d...

Page 18: ...tray see below To Change Paper Size in Tray 1 Squeeze the metal tab on the rear paper guide to adjust for the paper length To Change Paper Size in Tray Load Paper 4 Make sure that the stack goes unde...

Page 19: ...ush the width guide far enough to cause the media to warp If you do not adjust the width guide it may cause paper jam 4 If necessary use the rear width guide Squeeze the rear width guide as shown and...

Page 20: ...the cable plug 3 Connect the other end of the cable to the parallel interface port on your computer and tighten the screws See your computer documentation if you need help Connect to the Computer wit...

Page 21: ...eprint Demo Toner Save To AC outlet As the printer powers up all the printer control panel lights turn on briefly When only the Data light remains on press and hold the Demo button Hold down the butto...

Page 22: ...re on a computer that is attached directly to the printer with a parallel cable If you are printing with a USB Go to Appendix B Using Your Printer with a USB Cable for information on installing the pr...

Page 23: ...n the CD ROM drive Installation will start automatically If the CD ROM drive does not automatically run Select Run from the Start menu and type x cdsetup exe in the Open box where x is the drive lette...

Page 24: ...SETTING UP YOUR PRINTER 2 2 11 Install the Printer Software 3 Click Printer Driver 4 The Welcome window opens Click Next 5 Follow the instructions on the screen to complete the installation...

Page 25: ...uality option Graphic mode Halftoning Manual duplex Booklet printing Poster printing Multiple pages per sheet N up Fit to page printing Different source for first page Watermark Overlay TrueType fonts...

Page 26: ...tures such as paper size and page orientation may be available through your application settings Use application settings if available because they override printer driver settings Access advanced pri...

Page 27: ...chapter This chapter describes how to use the printer s control panel It provides information on the following topics Control Panel Buttons Control Panel Lights 3 3...

Page 28: ...Toner Save Press Toner Save to turn the toner save mode on or off The printer must be in the ready mode If the button backlight is on toner save mode activates and the printer uses less toner to prin...

Page 29: ...ast page of the last print job Note If you want to prevent somebody from reprinting your document you can turn the Reprinting feature off in the printer s properties dialog box When you turn the featu...

Page 30: ...be in the ready mode For further information see page 7 6 Press and hold Demo for about 10 seconds until the control panel lights remain illuminated to automatically clean the printer inside After cl...

Page 31: ...cels the current job and the printer returns to the ready mode Data Control Panel Light Message The Data light is on and the printer is ready to print No action is needed If you press and hold the Dem...

Page 32: ...ual Paper Data The printer is set to Manual Feed mode You have to feed paper manually through the Multi Purpose Tray If you do not want to be in the Manual Feed mode change the setting from your print...

Page 33: ...rly load paper in the different paper trays for the best print quality Topics included in this chapter are Choosing Paper and Other Media Selecting Output Tray Loading Paper Printing on Envelopes Prin...

Page 34: ...weight as follows 16 28 lbs bond for Tray 1 or optional Tray 2 16 53 lbs bond for Multi Purpose Tray Brightness Some papers are whiter than others and produce sharper more vibrant images Surface smoot...

Page 35: ...x 297 mm Transparency films 2 Letter 8 5 x 11 in A4 210 x 297 mm Card stocks 2 Bond 2 Tray 1 or Optional Tray 2 550 550 550 550 550 550 40 3 40 3 40 3 40 3 40 3 Multi Purpose Tray 100 100 100 100 100...

Page 36: ...Colored paper should be of the same high quality as white photocopy paper The pigments must withstand the printer s fusing temperature of 400 F 205 C for 0 1 second without deterioration Do not use p...

Page 37: ...mended for printing the following over 250 sheets of paper continuously Top output tray The printer always prints to the rear output tray if it is open Paper comes out of the printer face up with the...

Page 38: ...position to hold longer paper 3 If you do not want to stack the printed pages on the rear output tray slide the extender to its place and close the tray The pages will then stack on the top output tr...

Page 39: ...n the Tray 1 or optional Tray 2 see Load Paper on page 2 4 Proper paper loading helps prevent paper jams and ensure trouble free printing Do not remove paper tray s while a job is printing Doing so ma...

Page 40: ...labels at a time When you print from the Multi Purpose Tray you must select Multi Purpose Tray for Paper Source from your software application and then select the paper size and type from the software...

Page 41: ...To load paper in the Multi Purpose Tray 2 Slide the extender to extend the tray to its full length position to hold longer paper 3 Prepare a stack of paper for loading by flexing or fanning them back...

Page 42: ...against the stack of print material without bending Stack height limit mark 6 After printing push the extender back to its place and close the Multi Purpose Tray Note Make sure that you have not loade...

Page 43: ...page is printed This loading procedure is almost the same as the procedure for loading in the Multi Purpose Tray except you load paper sheet by sheet in the Multi Purpose Tray send print data to prin...

Page 44: ...ge is printed the Manual light on the control panel blinks again Feed the next sheet into the Multi Purpose Tray and press Demo Repeat this step for every page to be printed Cancel Reprint Demo Toner...

Page 45: ...ed and are not stuck together Do not load more than 10 envelopes into the Multi Purpose Tray Do not feed stamped envelopes Never use envelopes with clasps snaps windows coated lining or self stick adh...

Page 46: ...with the stamp area enters the Multi Purpose Tray first 5 Adjust the guide to the left edge of the envelope stack 3 Flex or fan the envelopes to supply air through them for loading 6 When you print o...

Page 47: ...e to printer components Do not feed a sheet of labels through the printer more than once The adhesive backing is designed for one pass through the printer Do not use labels that are seperating from th...

Page 48: ...ause print quality problems Be careful not to scratch or leave fingerprints on the print side 1 Open the Multi Purpose Tray and pull the extender out ot its full length position 2 Load transparencies...

Page 49: ...op of the page Guidelines Letterheads must be printed with heat resistant ink that will not melt vaporize or release hazardous emissions when subjected to the printer s fusing temperature of 400 F 205...

Page 50: ...he minimum size is 98 by 148 mm 3 9 by 5 83 in and the maximum size is 216 by 356 mm 8 5 by 14 in Guidelines Always insert the short edge first into the Multi Purpose Tray If you want to print in land...

Page 51: ...nt Using Toner Save Mode Printing on Both Sides of the Paper Manual Duplexing Printing Multiple Pages on One Sheet of Paper N Up Printing Printing Booklets Printing on Different Paper for the First Pa...

Page 52: ...document you want to print 2 Select Print from the File menu The Print dialog box for your application will be displayed the Print dialog box for your application may look slightly different The basi...

Page 53: ...Setup Printer or Options click that button instead Then click Properties in the next screen 4 Now you see the Olivetti PGL 12en printer s Properties dialog box The Properties dialog box allows you to...

Page 54: ...e following order Multi Purpose Tray Tray 1 Tray 2 option 4 Make sure the Paper Type is set to Plain Paper If you load a different type of print media select the corresponding paper type For further i...

Page 55: ...ge all print settings available in the software application first and any remaining settings with the printer driver The settings you change remain in effect only while you are using the current progr...

Page 56: ...ttings 2 Select Printers to open the Printers window then double click the Olivetti PGL 12en PCL 6 3 From the Document menu select Cancel Printing Windows 9x or Cancel Windows NT 4 0 Olivetti PGL 12en...

Page 57: ...mode activates and the printer uses less toner to print a page If the button backlight is off toner save mode is disabled and the printer prints in the normal mode To enable this feature from the sof...

Page 58: ...nd card stock 1 When you change the print settings from your software application access the printer properties See page 5 2 to access the printer properties From the Paper tab select the paper orient...

Page 59: ...efore the duplexing job is printed If the box is empty this feature is disabled 5 Start printing The printer automatically prints only the odd numbered pages Choosing Long Edge lets you have the bindi...

Page 60: ...ng Edge in the Landscape orientation Long Edge in the Portrait orientation Short Edge in the Landscape orientation Short Edge in the Portrait orientation Note If you have selected the Face Up tray opt...

Page 61: ...printer properties From the Paper tab select the paper orientation source size and type 2 Click the Output tab and choose Multiple Pages per Side in the Type drop down list Then select the number of p...

Page 62: ...e page 5 2 to access the printer properties From the Paper tab select the paper orientation source size and type 2 Click the Output tab then choose Booklet Printing from the Type drop down list When y...

Page 63: ...document 6 After side one has been printed remove the remaining paper from the Multi Purpose Tray and set it aside until your booklet job is complete The printer prints side one as shown below for an...

Page 64: ...pages Your printer knows the stacked page order and will print the corresponding second side for each page 8 9 8 You are prompted to reinsert the paper into the Multi Purpose Tray Click OK on screen...

Page 65: ...the printer properties 2 Click the Paper tab and click Different Source for First Page If the box is checked this feature is enabled and the dialog box allows you to select the desired paper source fo...

Page 66: ...o check fine details on a small document 1 When you change the print settings from your software application access the printer properties See page 5 2 to access the printer properties 2 Click the Out...

Page 67: ...ther to form one poster size document 1 When you change the print settings from your software application access the printer properties See page 5 2 to access the printer properties From the Paper tab...

Page 68: ...Style 2x2 3x3 4x4 or Custom For example if you select 2x2 the output will be automatically stretched to cover 4 physical pages If you select Custom you can adjust the scaling factor manually For exam...

Page 69: ...s to adjust the print quality for your specific printing needs when you access the printer properties See page 5 2 to access the printer properties If necessary click the Graphic tab to display the se...

Page 70: ...ion to improve the print quality of your text and image and make the characters and images appear smoother Note SRT Mode is disabled when 1200 dpi settings are selected Normal SRT mode is disabled Cho...

Page 71: ...nes and fine detail like clip art graphics This setting provides solid lines and sharp contrasts between shaded areas Halftoning This option can be used for configuring the printer to process graphics...

Page 72: ...redefined watermarks that come with the PGL 12en printer and they can be modified or you can add new ones to the list 1 When you change the print settings from your software application access the pri...

Page 73: ...so that you can see how the watermark will appear on the printed page 3 Select the desired watermark options You can select the font type and size color and angle There are three checkboxes at the bot...

Page 74: ...ist edit then click Update 6 When you complete the edit click OK then start printing To stop printing the watermark select None in the Message drop down list 1 When you change the print settings from...

Page 75: ...t need to load preprinted letterhead paper in the printer You need only to tell the printer to print the letterhead overlay on your document What is an Overlay To use a page overlay you must create a...

Page 76: ...n your computer HDD disk Note The overlay document size must be the same as documents you will print with the overlay Using Page Overlay Using Page Overlay After an overlay has been created it is read...

Page 77: ...rlay file If you have stored the overlay file you want to use into an external source you can also load the file when you access this Load Overlay window After you select the file click OK The file is...

Page 78: ...a message box will appear each time you submit a document for printing asking you to confirm your wish to print an overlay on your document Answering Yes to the message box means that the selected ove...

Page 79: ...provides suggestions for high quality and economical printing and information for maintaining the toner cartridge and the printer Topics included in this chapter are Maintaining Toner Cartridge Clean...

Page 80: ...o the toner cartridge do not expose it to light for more than a few minutes Toner cartridge storage The life of the toner cartridge depends on the amount of the toner that print jobs require When prin...

Page 81: ...cartridge Redistributing Toner 1 Open the top cover 2 Remove the toner cartridge from the printer 3 Gently shake the toner cartridge from side to side 5 or 6 times to redistribute the toner Note If th...

Page 82: ...sert the toner cartridge into the printer Be sure that the toner cartridge is firmly in its place 5 Firmly close the cover If the print remains light Remove the old cartridge and install a new toner c...

Page 83: ...r but be careful not to be let any water drip onto the printer or inside of it Cleaning the Outside During the printing process paper toner and dust particles can accumulate inside the printer Over ti...

Page 84: ...riencing blurred faded or smeared printouts This process will produce a page with toner debris which should be discarded 1 Make sure the printer is turned on and in the ready state and there is paper...

Page 85: ...It provides information on the following topics Troubleshooting Checklist Solving General Printing Problems Printing Special Pages Clearing Paper Jams Solving Print Quality Problems Troubleshooting E...

Page 86: ...nother outlet If other lights are on go to Troubleshooting Error Messages on page 7 22 If a demo page does not print check the paper supply in the paper tray If the paper jams in the printer go to Cle...

Page 87: ...Olivetti PGL 12en PCL 6 or Olivetti PGL 12en PS as your default printer The printer cover is not closed Paper is jammed No paper is loaded Toner cartridge is not installed Printer system error occurs...

Page 88: ...r properties to make sure that all print settings are correct Uninstall the printer driver then reinstall the printer driver Try printing a demo page Check the lights on the control panel to determine...

Page 89: ...Solution Install more random access memory RAM in your computer See Memory and PostScript SIMMs on page H 2 Simplify the page layout and remove any unnecessary graphics from the document if possible...

Page 90: ...you know works If possible attach the cable and printer to another computer and try a print job that you know works Finally try a new printer cable Check the application s printer selection menu to m...

Page 91: ...blink slowly Demo Page The configuration sheet lists many of the current settings and properties of the printer To print the configuration sheet press and hold Demo for about 6 seconds until the cont...

Page 92: ...is outside of the supported size range has been used See Paper Specifications If a paper jam occurs the Paper and the Error lights remains lit on the control panel Find and remove the jammed paper If...

Page 93: ...t roller then pull the roller in the direction of arrow 3 Remove the stopper fastening the rear output tray and push the tray down so that it is widely open at 90 degrees angle 2 If the jammed paper i...

Page 94: ...lace If you fail to do so the printer system recognizes it as the printer cover is open or system fuser error occurs and turn on the Error light on the control panel 8 To resume printing open the top...

Page 95: ...s entered the toner cartridge area follow the instructions on page 7 12 It is easier to remove such jams from the inside of the printer than the paper input area Input Area 1 Slide out Tray 1 to expos...

Page 96: ...er Jams 3 Slide the tray back into the printer 4 To resume printing open the top cover and then close Note If the Paper and the Error lights do not turn off there is still jammed paper inside the prin...

Page 97: ...it to light for more than a few minutes Place a piece of paper over the top of the toner cartridge to shield it while it is out of the printer Inside the Printer 1 Open the top cover and remove the to...

Page 98: ...e toner cartridge is difficult to reinstall make sure the guide feed has been flipped back down into position Note If you have the optional Tray 2 installed and cannot find the jammed paper in the out...

Page 99: ...1 half way out of the printer and remove the paper as shown in the figure at right In the Optional Tray 2 1 Pull the option Tray 2 out of the printer 2 If you see the jammed paper remove the paper fr...

Page 100: ...Make sure the paper is under the paper capacity mark on the inside of the paper tray Do not pull out the paper tray while print jobs are in process Flex fan and straighten the paper before loading it...

Page 101: ...a vertical white streak or faded area appears on the page The toner supply is low You may be able to temporarily extend the toner cartridge life See Redistributing Toner on page 6 2 If this does not...

Page 102: ...s on page A 2 The paper lot is bad The manufacturing processes can cause some areas to reject toner Try a different kind or brand of paper The toner cartridge may be defective See Vertical repetitive...

Page 103: ...peatedly appear on the printed side of the page at even intervals The toner cartridge may be damaged If a repetitive mark occurs every 95 mm or 38 mm on the page print the cleaning sheet several times...

Page 104: ...age skew Solving Print Quality Problems Background scatter results from bits of toner distributed on the printed page The paper may be too damp Try printing with a different batch of paper Do not open...

Page 105: ...ng to the face up output tray Turn over the stack of paper in the paper tray Also try rotating the paper 180 in the tray Wrinkles or creases The transfer roller may be dirty See Cleaning the Inside on...

Page 106: ...cifications on page A 2 Character Voids Clean the inside of the printer Check the paper type and quality See Paper Specifications on page A 2 Try installing a new toner cartridge If the problem persis...

Page 107: ...generate a response Make sure that the printer is powered with the specified AC voltage Power off Error Manual Paper Data The printer is out of paper in the paper tray The Paper light blinks until pa...

Page 108: ...e printer Press the Cancel Reprint button to cancel the current job Turn the printer power off and back on to remove any unnecessary fonts macros or any data currently in printer memory Add more print...

Page 109: ...light on the control panel is on If bi directional communication is not turned on in the driver it will also cause this message From the Start menu select Settings then Printers Right click on the Oli...

Page 110: ...using a high quality cable Make sure that the printer is on the correct network Select Network or AppleTalk Control Panel from Control Panels in the Apple menu and then choose the correct network Mak...

Page 111: ...ckground Printing on at the Print dialog box Problem When I use Olivetti Printer in EPSON Dot Printer Environment sometimes I can not get the output I want Possible Cause and Solution Change the emula...

Page 112: ...b may not be PS The printer driver has not been configured to recognize the optional Tray 2 Solution Print a configuration page and verify that the PS version is available for printing and that total...

Page 113: ...Appendix This appendix provides information on the following topics Printer Specifications Paper Specifications A A...

Page 114: ...X 850 PostScript Level 3 optional Random Access Memory RAM Interface Switching Standard 4 MB Expandable to 68 MB 72 pin EDO non parity 60ns 4 MB 8 MB 16 MB 32 MB or 64 MB available Less than 30 second...

Page 115: ...per jams Premature wear on the printer requiring repairs Overview Notes Some paper may meet all of the guidelines in this manual and still not produce satisfactory results This might be the result of...

Page 116: ...X 0 0055 in Thickness 10 X 14 mm 0 0039 X 0 0055 in up to 90 g m2 16 24 lb 20 typical 25 typical up to 10 a The printer supports a wide range of media sizes See Printing on Card Stock or Custom Sized...

Page 117: ...em with Paper Too moist too rough too smooth or embossed faulty paper lot Stored improperly Too heavy Too moist wrong grain direction or short grain construction Cutouts or perforations Ragged edges S...

Page 118: ...ut with sharp blades with no visible fray Moisture Content 4 6 by weight Smoothness 100 250 Sheffield Must not scorch melt offset or release hazardous emissions when heated to 200 C 392 F for 1 second...

Page 119: ...than can be easily used in a short time about 3 months Paper stored for long periods may experience heat and moisture extremes which can cause damage Planning is important to prevent damage to large s...

Page 120: ...on Envelopes should not be wrinkled nicked or otherwise damaged Temperature You should use envelopes that are compatible with the heat and pressure of the printer Size You should use only envelopes wi...

Page 121: ...y even damage the fuser Envelopes with Adhesive Strips or Flaps The following gives typical address margins for a commercial 10 or DL envelope Envelope Margins Proper storage of envelopes helps contri...

Page 122: ...bubbles or other indications of separation See Printing on Labels on page 4 14 Transparencies used in the printer must be able to withstand 200 C 392 F the printer s fusing temperature See Printing o...

Page 123: ...d on your computer and if your computer is running Windows 98 you can connect your PGL 12en printer to the USB chain of devices This appendix provides information on the following topics Installing th...

Page 124: ...SB 1 0 compliant cable To PC Installing the Printer Software To operate your printer with Windows PC you must install the PCL printer driver Place the CD ROM in the CD ROM drive and perform the instru...

Page 125: ...6 Check CD ROM drive and click Browse then choose x PGL 12en Eng or the desired language code see page D 2 USB where x is the drive letter for the CD ROM drive 7 Click Next The USB driver will be ins...

Page 126: ...Printers 2 Select the PGL 12en PCL 6 printer icon in the Printers folder 3 Select Properties from the File menu 4 Click the Details tab Select SSUSB PGL 12en in the Print to the following port box Cli...

Page 127: ...er to it or to a chain of USB devices via a USB cable 1 1 1 In Windows 98 select Start Settings Control Panel 2 Double click the System icon 3 Click the Device Manager tab 4 Click the plus icon before...

Page 128: ...l my printer why isn t my PGL 12en printer assigned to an LPT printer port in the Print dialog box of my software application USB uses a different naming convention for USB devices After the printer h...

Page 129: ...terface card option for PGL 12en When you print a file from Macintosh you can use the PCL driver to support your printer s major printing features You can also use PostScript driver by installing the...

Page 130: ...Macintosh G3 G4 iMac series iBook series USB interface or network interface for network connection only For network connection System 7 6 or later For USB connection System 8 6 or later PS SIMM for PS...

Page 131: ...mputer 2 Hold the USB cable so the icon faces up and connect it to your printer s USB connector 3 Connect the other end of the cable to an available USB port on your Macintosh computer If you have any...

Page 132: ...ry 5 twisted pair cable with RJ 45 connectors for 10 100Base T Ethernet 1 Plug one end of the network cable into the twisted pair connector on the back of the printer 2 Connect the other end to the ne...

Page 133: ...age then click Continue 5 The Olivetti Laser Printer Installer opens Select installation type The installer provides two options for software installation Easy Install recommended method This option l...

Page 134: ...and close the Chooser window 4 You see the message box indicating that you have changed your current printer Click OK 5 Then you see the Olivetti PCL printer icon is created as a desktop printer Choos...

Page 135: ...ou want to add a watermark to each page in your document to emphasize its purpose or indicate how it should be handled For details on watermark option see page 5 21 Using PCL Driver 3 Choose your pape...

Page 136: ...ettings dialog box 5 Choose the number of copies and indicate which pages you want to print For advanced printing features select the desired option For details see page C 8 Using PCL Driver 6 Click P...

Page 137: ...or Background Printing Paper Source Figures below display each property in the Page Setup dialog box Advanced Printing Darkness Quality Select print darkness Select print resolution Layout Select the...

Page 138: ...e any Normal priority job Print at to print at the specific time you enter in the day and time in the fields to the right Put document on hold to hold the print job in the print queue until you are re...

Page 139: ...ck Apple LaserWriter Software 4 Double click Desktop Printer Utility 5 Select LaserWriter 8 and select Printer USB in the list box Then click OK 6 Click the Change button in the USB Printer Selection...

Page 140: ...op printer If Auto Setup does not work properly click Select PPD and choose Olivetti PGL 12en then click OK Installing PPD file on the network connected Macintosh Follow these steps to print from a Ma...

Page 141: ...an also print from a DOS software program using the Remote Control Panel utility provided in the PGL 12en CD ROM Topics included in this Appendix are About Remote Control Panel for DOS Installing the...

Page 142: ...print settings are not available through DOS software programs Notes PGL 12en printer s Remote Control Panel for DOS can be used when the printer is connected via the parallel interface The PGL 12en p...

Page 143: ...PY x where x is the floppy drive designator From the CD ROM drive type COPY x PGL 12en xxx RCP where x is the CD ROM drive designator and xxx is the designator for your language See the list on the le...

Page 144: ...of two ways With the mouse Move the mouse to position the pointer on the desired selection then click the left mouse button With the keyboard Press the key that corresponds to the highlighted letter...

Page 145: ...nds Otherwise the printer will wait for you to load paper in the Multi Purpose Tray Jam Recovery determines what action the printer should take when a paper jam occurs When set to OFF the printer does...

Page 146: ...cted font Pitch sets the font pitch only if you have selected a scalable monospaced font Pitch refers to the number of fixed space characters in a horizontal inch of type Lines Per Page sets the numbe...

Page 147: ...nal character set It selects the set of characters printed for specific character codes Character table It selects the character sets LPI Lines Per Inch It sets the line spaceing Pitch It sets the num...

Page 148: ...PRINTING FROM DOS APPLICATIONS D D 7 Selecting Print Settings memo...

Page 149: ...er provided with your system CD ROM or diskettes to print a document use the information on this Appendix Topics included in this Appendix are Setting Up Your Printer with PS Option Installing PPD Fil...

Page 150: ...PGL 12en CD ROM Notes Installing the PostScript printer driver may require the use of the operating system files on the original CD ROM or diskette that came with your system If you have a PostScript...

Page 151: ...en appears select the appropriate language 4 Click PostScript Driver 5 Click on HaveDisk click Browse then choose for Windows 9x x Eng or the desired language code See page D 2 ps Win95_98 level 2 for...

Page 152: ...ript printer driver can be opened from the Printers folder or an application To open the properties window from the Printer folder 1 Click the Windows Start button 2 Select Settings then Printers to o...

Page 153: ...ronment the printer can be shared by other users on the network This appendix provides information on the following topics About sharing the Printer on a Network Setting Up a Locally Shared Printer Se...

Page 154: ...k The printer can then be shared by other users on the network through a Windows 9x or NT 4 0 network printer connection Network Connect If an option network card was installed on your printer see pag...

Page 155: ...d As box Fill in the Shared Name field then click OK Setting Up Client PC 1 Right click Start and select Explorer 2 Open your network folder in the left column 3 Right click the shared name and select...

Page 156: ...optional network card in your printer See page H 5 for information on installing network card After the network card is installed you must set up your printer as a network printer using the documenta...

Page 157: ...not have a CD ROM drive use the instruction on this appendix to create the software diskettes and install the printer software from the diskettes This appendix provides information on the following t...

Page 158: ...rinter driver USB driver for Windows 98 PostScript Printer Description PPD file and Remote Control Panel utility independently Make sure that you have several formatted diskettes ready then follow the...

Page 159: ...select the disk you want to copy in the Disk Images window then click Copy selected disk image 6 When prompted insert a blank formatted diskette into the floppy drive and click Yes to copy the first...

Page 160: ...om Diskettes The instructions to install a PCL 6 printer driver PPD file and RCP are same Take the following steps 1 Insert the first diskette if the selected software diskettes are more than one whic...

Page 161: ...printing needs Recognizing that each user may have different requirements however Olivetti makes several options available to enhance the printer s capabilities This appendix provides information on t...

Page 162: ...printer option DISCHARGE STATIC ELECTRICITY The control board and internal printer options Memory SIMM PS SIMM Network interface are sensitive to static electricity Before installing or removing an in...

Page 163: ...s applicable to either option Notes Since PostScript setting requires 12 MB of printer memory and the PGL 12en comes with 4 MB standard installation of the PS SIMM requires installation of a 8 MB SIMM...

Page 164: ...ned with the slot as shown and insert the SIMM all the way into the upper slot labeled DRAM MODULE at a 45 degrees angle 5 Rotate it up until it snaps into place FLASH ROM MODULE DRAM MODULE FLASH ROM...

Page 165: ...in place by the metal clips and pins on both sides of the connectors pin clip 9 Reconnect the power cord and turn the printer on Note For PostScript driver installation and usage information on a Mac...

Page 166: ...rinter 1 Unpack the network printer card You should find the following items 2 Turn the printer power off and unplug all cables from the printer 3 Remove the two screws on the back of the printer then...

Page 167: ...in place 6 Tighten the two screws as shown 7 Tighten the two screws then replace the plate 8 Reconnect the power cord and printer cable then turn the printer on Network Interface Card Note For informa...

Page 168: ...omponents the support unit and paper tray 1 Turn off the printer and unplug all cables from the printer 2 Observe the location of the support unit s connector and tabs 3 Align the printer with the sup...

Page 169: ...Appendix You can use Olivetti PGL 12en printer in Linux environment This appendix provides information on the following topic Linux Driver Installation I I...

Page 170: ...M drive 1 Insert the Olivetti PGL 12en CD ROM into the CD ROM drive 2 Mount the CD ROM drive under a directory like mnt in order to access the files on the CD ROM mount t iso9660 dev cdrom mnt cdrom N...

Page 171: ...indow opens where xxxx is the printer type you have selected at step 3 If you are not an advanced user do not change the Names Spool Directory File Limit in Kb Printer Device option 7 Click the Select...

Page 172: ...2 8 7 6 diskette make install software G 1 DOS RCP see remote control panel driver PCL6 access 5 1 features 2 12 install 2 10 remove 2 13 E envelopes print 4 12 epson D 6 error messages 7 22 F face d...

Page 173: ...y option H 2 multi purpose tray loading paper 4 8 paper source setting 5 3 multiple pages on one sheet print 5 10 N network interface install network card H 5 set up a locally shared printer F 2 shari...

Page 174: ...isformed characters 7 19 page skew 7 19 toner smear 7 18 toner specks 7 17 vertical lines 7 17 vertical repetitive defects 7 18 wrinkles or creases 7 20 printer light patterns 7 22 printer driver see...

Page 175: ...23 T toner cartridge cleaning sheet 6 5 install 2 2 life expectancy 6 1 recycle 6 1 redistribute toner 6 2 save toner 5 6 6 1 storage 6 1 Toner Save button 3 1 5 6 top output tray 4 4 transparency pri...

Page 176: ...INDEX IIV V...

Reviews: