


Using Data Administrator (for the Administrator)
7
7-14
d-Color MF552/452/362/282/222
7.5
7.5.3
Registering User Authentication Information
To register user authentication information with
Data Administrator
, connect the authentication unit to the
USB port of the computer, and also connect the computer to this machine via network.
0
To use
Data Administrator
, set up the operating environment in advance. For details about the setup
procedure, refer to page 7-11.
1
Turn on the
Main Power Switch
of this machine.
2
Start
Data Administrator
, and import device information of this machine.
%
Restart the procedure five or more seconds after connecting the authentication unit.
%
For details about how to import device information, refer to the relevant
Data Administrator
man-
ual.
3
In [Function selection], select [Authentication settings] - [User authentication settings], and then click
[Add].
4
Select a user template, and click [OK].
%
For details about templates, refer to the relevant
Data Administrator
manual.
The User Registration screen appears.
5
Enter the user name and password, select the [AU-102] tab, then click [Register Auth. Info].
%
Up to two authentication information items can be registered for each user. For [Location of
registration1] and [Location of registration2], register separate fingers. You should register two au-
thentication information items in case you injure your finger.
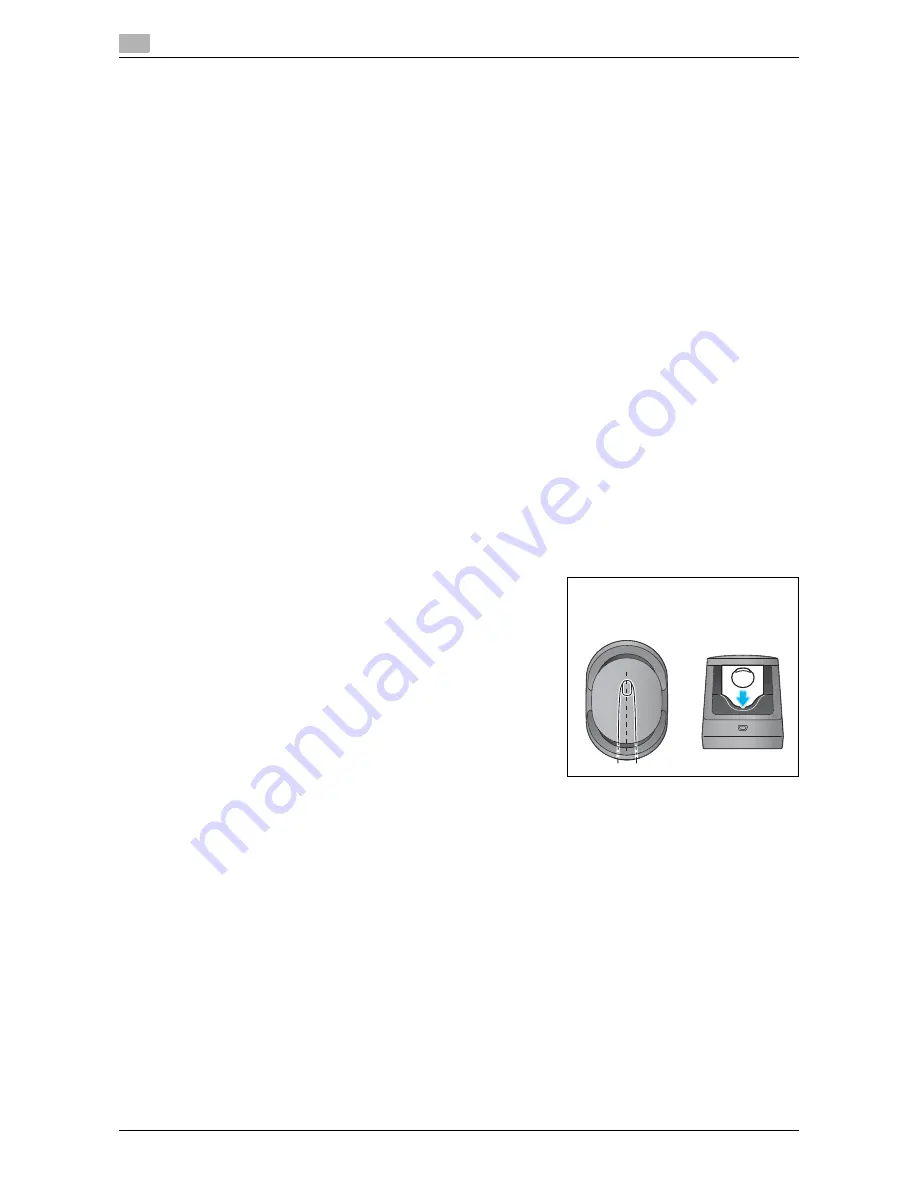
6
Place your finger on the authentication unit to scan the finger vein pattern.
%
Place your finger straight so that your finger cushion lightly touches the hollow and protuberance
part of the scanning section.
%
Scan a finger vein pattern three times. Place the same finger on the authentication unit again after
scanning just once, and press [Start Reading].
%
After scanning the finger vein patterns, place the same finger, then click [Authentication Test]. If the
authentication test has succeeded, click [Register]. If the authentication test has failed, click [Reset]
to repeat the scanning process.
7
Click [OK], and register authentication information of the next user.
8
After the registration of authentication information has been completed for all users, click [Export to the
device].
%
When necessary, select a user name, and click [Edit] to change registered information.
9
Click [Write].
%
Data Administrator
supports the batch copy function. When necessary, you can collectively write
the registered authentication information to multiple devices.
10
When writing to this machine has finished, click [OK].
Summary of Contents for d-COLOR MF452plus
Page 5: ...1 Checking the Name and Function of Each Part in This Machine d Color MF 552 452...
Page 6: ......
Page 12: ...1 1 8 d Color MF552 452 362 282 222...
Page 13: ...2 Checking the Name and Function of Each Part in This Machine d Color MF 362 282 222...
Page 14: ......
Page 19: ...3 Checking the Name and Function of Each Optional Component...
Page 20: ......
Page 49: ...4 Checking the Available Paper Types...
Page 50: ......
Page 53: ...5 Checking the Specifications of This Machine...
Page 54: ......
Page 66: ...5 5 14 d Color MF552 452 362 282 222...
Page 67: ...6 Checking the Specifications of Optional Components...
Page 68: ......
Page 88: ...6 6 22 d Color MF552 452 362 282 222...
Page 89: ...7 Using the Authentication Unit Biometric Type...
Page 90: ......
Page 104: ...Using Data Administrator for the Administrator 7 7 16 d Color MF552 452 362 282 222 7 5...
Page 105: ...8 Using the Authentication Unit IC Card Type...
Page 106: ......


