background image

10 

7.

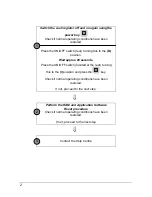
Press the

 key again. 

Warning:

 pressing the RECOVERY key activates a Diagnostics mode used 

for updating the firmware. Note that this is an operation that must be 
performed by Service technicians only. 

8.

The touch screen calibration procedure starts automatically 

(for more information,

refer to the chapter “Calibrating the Touch Screen” in the User Manual).

9.

Perform touch screen calibration and, at the end, wait until the initialisation
procedure completes and a message is printed on the ticket.

10.

 The cash register starts automatically. At the end, a screen is displayed asking

you to confirm or modify the date proposed, and then the time.

11.

Enter the date and time. The cash register issues a print-out and displays the

main Sales screen.

Note:

  Check the date and time. If they are not correct, 

refer to the chapter “S

etting 

the Date and Time

” in the User Manual for how to set them correctly). 

12.

 The cash register is now operational again and ready for use.

Summary of Contents for CRF3000

Page 1: ...ERRORS AND TROUBLESHOOTING ENGLISH FRAN AIS DEUTSCH ESPA OL CASH REGISTER NETTUN 3000 int l...

Page 2: ...arking on the product Your attention is drawn to the following actions which could compromise the conformity attested to above and also product characteristics incorrect power supply incorrect install...

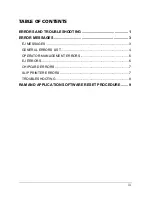
Page 3: ...ORS AND TROUBLESHOOTING 1 ERROR MESSAGES 3 EJ MESSAGES 3 GENERAL ERRORS LIST 4 OPERATOR MANAGEMENT ERRORS 6 EJ ERRORS 6 CHIPCARD ERRORS 7 SLIP PRINTER ERRORS 7 TROUBLESHOOTING 8 RAM AND APPLICATION SO...

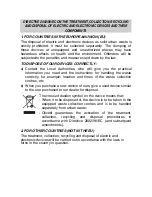
Page 4: ...you need and the instructions for handling the waste correctly for example location and times of the waste collection centres etc b When you purchase a new device of ours give a used device similar t...

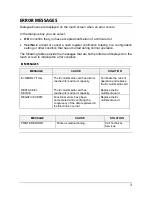
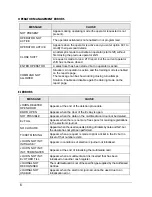
Page 5: ...t is displayed MESSAGE the cause of the error CAUSE and when possible the solution SOLUTION To make consulting the errors easier they are grouped according to the environments in which they appear EJ...

Page 6: ...Wait approx 20 seconds Press the ON OFF switch located at the rear turning this to the I position and press the key Check if normal operating conditions have been restored If not proceed to the next...

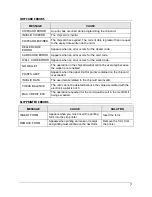
Page 7: ...ed and displayed on the touch screen to indicate the error condition EJ MESSAGES MESSAGE CAUSE SOLUTION EJ NEARLY FULL The EJ multimedia card has almost reached its maximum capacity Terminate the curr...

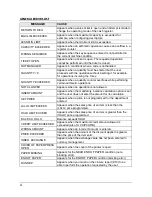
Page 8: ...ED Appears when an operation is not allowed INSERT AMOUNT Appears when the mandatory balance calculation option is set and the user does not enter the amount for its calculation SET PRICE Appears when...

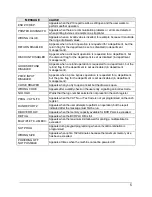
Page 9: ...ears when a price bypass operation is requested for a department but the price flag for the department is set as disabled in department management CLOSE DRAWER Appears when you try to open a ticket bu...

Page 10: ...AUSE JOURN DELETED OPEN DOOR Appears at the end of the deletion procedure DOOR OPEN Appears when the door of the EJ bay is open NOT POSSIBLE Appears when the data on the multimedia card cannot be dele...

Page 11: ...wallet cannot be executed because the wallet is not enabled POINTS LIMIT Appears when the upper limit for points contained on the chipcard is exceeded INVALID DATA The user details related to the chi...

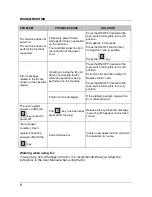
Page 12: ...turning this to the O position Extract the EJ and then reinsert it Replace the EJ card Press the ON OFF located at the rear switch turning this to the I position Error messages related to the EJ are s...

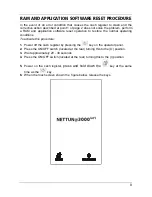
Page 13: ...he normal operating conditions To activate this procedure 1 Power off the cash register by pressing the key on the operator panel 2 Press the ON OFF switch located at the rear turning this to the O po...

Page 14: ...en calibration and at the end wait until the initialisation procedure completes and a message is printed on the ticket 10 The cash register starts automatically At the end a screen is displayed asking...

Page 15: ...Code 578116en...

Reviews: