Miter Gauge
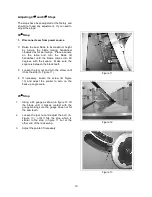
1. The miter guage comes pre-assembled.
Unpack the miter guage and clean
thoroughly.
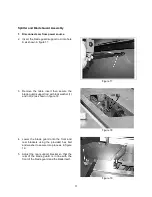
2. Be certain the miter guage ‘T’ slots in the
table are also thoroughly cleaned.
3. The miter guage is guided through the ‘T’
slot with a roller guide at the front of the
guide bar. To insert miter guage, first insert
roller guide into ‘T’ slot at front of table.
Note:
Always make test cuts. The scale is for
reference. There are two holes in the miter
gauge fence used to attach a wooden fence.
Controls (see Figures 24 & 25)
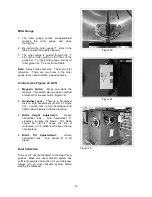
1.
Magnetic Switch:
Stops and starts the
machine. This switch also provides overload
protection for the saw motor (Figure 24).
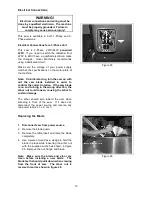
2.
Handwheel Lock:
There is a handwheel
lock on both handwheels (B & D of Figure
25). Loosen lock to turn handwheel and
tighten when blade is in desired location.
3.
Blade Height Adjustment:
Loosen
handwheel lock. Turn handwheel ‘C’
clockwise to raise the blade. The blade
should be 1/8”-1/4” above the top of
workpiece, or 3-5 blade teeth above the top
of workpiece.
4.
Blade Tilt Adjuststment:
Loosen
handwheel lock. Turn handle ‘B’ to tilt
blade.
Dust Collection
There is a 4” dust port located on the side of saw
cabinet. Make sure dust collection system has
sufficient capacity and suction for your tablesaw.
Always turn on dust collection system before
starting the tablesaw.
Figure 23
Figure 24
Figure 25
12


