10014 Planer
OLIVERMACHINERY.NET
15
|
Page
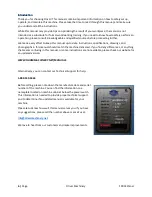
When Planning:
1.
DUST COLLECTION SYSTEM
is required for this planer. Please make sure the system is on and
provide enough suction before operation begins.
2.
KICKBACK
happens
when
a workpiece is ejected, usually towards the infeed side of the planer,
during the operation.
This can cause serious injuries or even death.
This planner is equipped with
metal anti-kickback fingers to reduce the risk of kickback. Make sure they are clean and moving
freely before operation. Even with this safety device installed, kickback can still happen due to
workpiece quality, grain orientation and many factors. Operator should be cautious about possible
kickback.
•
ALWAYS
wear proper protection device and stay away from the line-of-fire to avoid kickback
related accidents.
•
NEVER
look inside the planer during operation.
•
NEVER
plane boards that are shorter than 6”as mentioned in the specifications.
3.
PROPER WORKPIECE FEEDING
avoids kickback. Never start the machine with the workpiece
engaging the cutterhead. Never start feeding until the planer has reached its full speed. Ensure
there is proper gripping force from the feeding rollers when passing through a workpiece.
•
NEVER
force a workpiece through the planer. Make adjustments as needed.
•
ONLY
plane one board at a time.
•
For twisted workpieces, use a jointer to face joint the bottom side of the workpiece before
planning.
4.
STUCK WORKPIECE
should
be removed only after the planer is powered off, and the cutterhead
comes to a complete stop. Do not use hands or push sticks to force feed a workpiece through the
planer, as it can result in severe injuries and/or machine damage.
5.
DEPTH OF CUT SETTINGS:
Never exceed the designed maximum depth of cut capacity found in the
specification. Failing to comply can cause machine damage and injuries. Consider the hardness of
the workpiece when setting the depth of cut, as harder wood types increase the workload of the
planer.
After Operation
1.
STOP THE MACHINE
if the operator leaves the machine for any reason.
2.
WAIT
until the machine comes to a complete stop.
3.
CLEAN UP
the work area before departure.
Summary of Contents for 10014
Page 2: ......
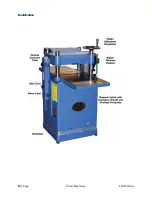
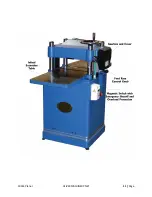
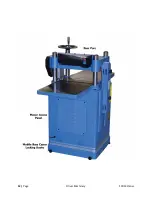
Page 10: ...10 Page Oliver Machinery 10014 Planer Identification...
Page 11: ...10014 Planer OLIVERMACHINERY NET 11 Page...
Page 12: ...12 Page Oliver Machinery 10014 Planer...
Page 38: ...38 Page Oliver Machinery 10014 Planer Figure 1 Figure 2 Figure 3 Figure 4 Figure 5 Figure 6...
Page 44: ...44 Page Oliver Machinery 10014 Planer between the cutterhead and the feed rollers...
Page 51: ...10014 Planer OLIVERMACHINERY NET 51 Page WiringDiagram...
Page 52: ...52 Page Oliver Machinery 10014 Planer PartsList Table Assembly...
Page 53: ...10014 Planer OLIVERMACHINERY NET 53 Page Cabinet Assembly...
Page 54: ...54 Page Oliver Machinery 10014 Planer Motor Mount Assembly...
Page 55: ...10014 Planer OLIVERMACHINERY NET 55 Page Headstock Assembly...
Page 56: ...56 Page Oliver Machinery 10014 Planer Gearbox Assembly and Dust Port Assembly...
Page 62: ...62 Page Oliver Machinery 10014 Planer MaintenanceRecord Date Task Operator...
Page 63: ...10014 Planer OLIVERMACHINERY NET 63 Page Notes...


