BOOKCASE
Installation Guide
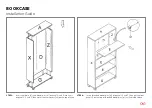
STEP 4:
Insert threaded dowel pins (p1) into panels X and Z, then put the four
panels E on the top of threaded dowel pins (p1) as illustrated above.
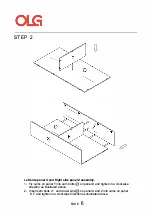
STEP 3:
Insert cam bolts (c1) and dowel pins (d1) on panel G and A into cams
on panel X, Z and D, then cover the cam covers (c2) on the top of cams.
PA G E
6
PA G E
5
Summary of Contents for AXC18
Page 1: ...TOOLS REQUIRED Powered screwdriver Installation Guide myolgoffice com Bookcase...
Page 2: ...BOOKCASE Installation Guide PARTS PAG...
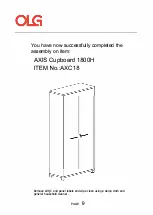
Page 5: ...ASSEMBLY INSTRUCTION AXIS Cupboard 1800H ITEM No AXC18 PAGE 1...
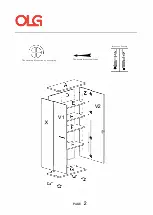
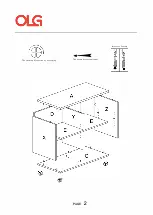
Page 6: ...Incorrect Correct r The turning direction of attaching The arrow direction front V2 V1 PAGE 2...
Page 14: ...ASSEMBLY INSTRUCTION AXIS Caddy Bookcase 993W ITEM No AXCMB PAGE 1...
Page 15: ...Incorrect Correct The turning direction of attaching The arrow direction front PAGE 2...
Page 21: ...ASSEMBLY INSTRUCTION AXIS System Tambour Insert Studio ITEM No AXCTI PAGE 1...
Page 22: ...11ie turning direction of attaching X1 C 11ie mTOlr directiCJll i ront Roller door PAGE 2...
Page 27: ...ASSEMBLY INSTRUCTION AXIS Credenza 1800W ITEM No AXCZ18 PAGE 1...
Page 28: ...Incorrect Correct The turning direction of attaching The arrow direction front V4 V3 V1 PAGE 2...
Page 36: ...ASSEMBLY INSTRUCTION Axis Locker Single ITEM No AXLOC1 PAGE 1...
Page 44: ...ASSEMBLY INSTRUCTION Axis Locker Single ITEM No AXLOC2 PAGE 1...
Page 53: ...ASSEMBLY INSTRUCTION AXIS Planter for Tambour Cabinet 750W ITEM No AXPBOX200 PAGE 1...
Page 54: ...The turning direction of attaching Incorrect Correct The arrow direction front PAGE 2...
Page 58: ...STEP 4 6 PCS Transparant plastic sticker I PAGE 6...
Page 60: ...ASSEMBLY INSTRUCTION AXIS Tambour Cabinet 1250H ITEM No AXT12 PAGE 1...
Page 61: ...Incorrect Correct The turning direction of attaching The arrow direction front PAGE 2...
Page 68: ...ASSEMBLY INSTRUCTION AXIS Tambour Cabinet 900H ITEM No AXT9 PAGE 1...
Page 69: ...Incorrect Correct The turning direction of attaching The arrow direction front PAGE 2...
Page 76: ...ASSEMBLY INSTRUCTION AXIS Tambour Mobile ITEM No AXTM PAGE 1...
Page 77: ...Incorrect Correct The turning direction of attaching The arrow direction front PAGE 2...
Page 79: ...STEP 1 Preparation for Tambour Mobile A 1 Assemble castor with screws on bottom panel G PAGE 4...


