31
GB
makes it easier to collect, e.g. by raking.
• Try to work rhythmically. Stand firmly with
your feet apart. Move forward after the return
stroke and stand firmly again.
• Let the support cup rest lightly against the
ground. It is used to protect the blade from
hitting the ground.
• Reduce the risk of material wrapping around
the blade by following these instructions:
1. Always work at full throttle.
2. Avoid the previously cut material during the
return stroke.
• Stop the engine, unclip the harness and place
the machine on the ground before you start to
collect the cut material.
Grass trimming with a trimmer head
CAUTION: Do not work with mowing
line longer than the intended diameter. With
a properly mounted guard, the built-in cutter
will automatically adjust the line to its proper
length. Overly long lines can overload the
engine, resulting in damage to the clutch
mechanism and nearby parts.
Trimming
• Hold the trimmer head just above the ground
at an angle. It is the end of the cord that does
the work. Let the cord work at its own pace.
Never press the cord into the area to be cut.
• The cord can easily remove grass and weeds
up against walls, fences, trees and borders,
however it can also damage sensitive bark on
trees and bushes, and damage fence posts.
• Reduce the risk of damaging plants by
shortening the cord to 10-12 cm and reducing
the engine speed.
Clearing
• The clearing technique removes all unwanted
vegetation. Keep the trimmer head just above
the ground and tilt it. Let the end of the cord
strike the ground around trees, posts, statues
and the like (
Fig.14
).
CAUTION: This technique increases the
wear on the cord.
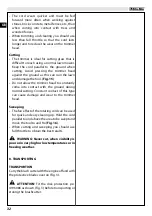
force. The tightening torque of the locking nut
should be
25 Nm.
• Check that the blade guard is not damaged or
cracked. Replace the blade guard if it is
cracked.
WARNING: Never use the machine
without a guard or with a defective guard.
Never use the machine without the
transmission shaft.
Forestry clearing
• Before you start clearing, check the clearing
area, the type of terrain, the slope of the
ground, whether there are stones, hollows etc.
• Start at whichever end of the area is easiest,
and clear an open space from which to work.
• Work systematically to and fro across the area,
clearing a width of around 4-5 m on each pass.
This exploits the full reach of the machine in
both directions and gives the operator a
convenient and varied working area to work
in.
• Clear a strip around 75 m long. Move your fuel
can as work progresses.
• On sloping ground you should work along the
slope. It is much easier to work along a slope
than it is to work up and down it.
• You should plan the strip so that you avoid
going over ditches or other obstacles on the
ground. You should also orient the strip to
take advantage of wind conditions, so that
cleared stems fall in the cleared area of the
stand.
Grass clearing using a grass blade
• Grass blades and grass cutters must not be
used on woody stems.
• A grass blade is used for all types of tall or
coarse grass.
• The grass is cut down with a sideways,
swinging movement, where the movement
from right-to-left is the clearing stroke and the
movement from left-to-right is the return
stroke. Let the left-hand side of the blade
(between 8 and 12 o’clock) do the cutting.
• If the blade is angled to the left when clearing
grass, the grass will collect in a line, which
Summary of Contents for BC 22 TR
Page 1: ......
Page 2: ......
Page 3: ......
Page 4: ......
Page 5: ......
Page 147: ...GR 143 8 158 9 10 11 12 13 14 15 16 25 17 149 18 19 20 21 1 2 3 4 5 6 15 7...
Page 153: ...GR 149 6 18 1 17 STOP 7 A Y...
Page 154: ...GR 150 1 2 3 4 5 15...
Page 155: ...GR 151 2 5 kgm 25 Nm 4 5 m 75 m 8 12 1 2...
Page 156: ...GR 152 15 16 8 3 p n 4196086 3 10 12 cm 14...
Page 160: ...GR 156 23 11 EKTAKT YNTHPH 10 A O 148...
Page 165: ...GR 161 15 1 2 1 CMR7H 2 148 1 2 3 1 2 3 T 21 1 1...
Page 213: ...RUS UK 209...
Page 214: ...RUS UK 210 2 3 4 5 15 1...
Page 215: ...RUS UK 211 8 12 1 2 2 5 kgm 25 Nm 4 5 75...
Page 216: ...RUS UK 212 10 12 14 15 16 8 A C O O A P c 3 p n 4196086 3...
Page 220: ...RUS UK 216 10 XPAHEH E o e a o a a a o e e o a e o a e e a o o o a o e o o a e a 208 23 11...
Page 225: ...RUS UK 221 15 1 2 1 cmr7h 2 208 1 2 3 1 2 2 3 T 21 1 1...
Page 246: ......

