background image

30

61

62

Italiano

English

Français

UTILIZZO

USE

UTILISATION

SRAMATURA
a) Partire sempre dal diametro maggiore andando verso la 

punta per sramare la pianta o eventuali rami secondari.

b) Cercare sempre la posizione più stabile e sicura prima di 

accelerare la motosega. Se occorre, mantenere l’equilibrio 
appoggiando il ginocchio più vicino al tronco stesso.

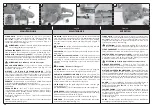
c) Tenere la motosega appoggiata al tronco per non 

affaticarsi eccessivamente, ruotandola sul lato sinistro 
o destro a seconda della posizione del ramo da tagliare 
(Fig. 61).

d) Nel caso di rami sotto tensione cercare una posizione 

sicura per proteggersi dall’eventuale colpo di frusta. 
Iniziare sempre il taglio dalla parte opposta alla piegatura.


ATTENZIONE - Non usare il bordo superiore della 
punta della barra soprattutto per sramare perchè si 
corre il rischio di ricevere un contraccolpo.

SEZIONATURA
Prima di iniziare a sezionare il tronco guardare come questo 
è appoggiato al suolo; questo permetterà di tagliarlo nel 
modo corretto evitando che la barra rimanga bloccata in 
mezzo al tronco.
a) Iniziare a tagliare nella parte superiore per circa 1/3 del 

diametro (1 - Fig. 62). Finire il taglio dalla parte inferiore 
(2 - Fig. 62). In questo modo il taglio sarà perfetto e la 
barra non rimarrà bloccata nel tronco.

b) Iniziare il taglio nella parte inferiore per circa 1/3 del 

diametro (1 - Fig. 63). Finire il taglio dalla parte superiore 
(2 - Fig. 63).


ATTENZIONE - Se il legno si chiude sulla catena 
durante il taglio, fermare il motore, alzare il tronco 
e cambiargli posizione (Fig. 64). Non cercare 
di liberare la catena tirando l’impugnatura della 
motosega.

LIMBING
a) Always start from the larger diameter and move towards 

the tip to cut off limbs and any secondary branches.

b) Always find the safest and most stable position before 

accelerating the chainsaw. If necessary, keep your balance 
by resting your knee on the trunk itself.

c)  Keep the chainsaw on the trunk so as not to get too tired, 

turning it onto the left- or right-hand side depending on 
the position of the branch to cut (Fig. 61).

d) In the case of branches under tension, find a safe position 

to protect yourself if they whip back. Always start the cut 
from the opposite side to the bend.


WARNING - Do not use the upper edge of the tip of 
the guide bar to cross-cut; otherwise you might risk 
a kickback.

BUCKING
When bucking up the trunk to desired lengths, there is one 
basic rule to follow. Look to see where the trunk is supported, 
and determine which way the two halves will fall when cut.
a) If the trunk is supported at both ends, first make a small 

cut at the top (1 - Fig. 62), then complete the cut from the 
bottom (2 - Fig. 62). This will avoid pinching the saw.

b) If the trunk is supported at one end or near the center, 

first make a small cut from underneath (1 - Fig. 63), then 
complete the cut from the top (2 - Fig. 63).


WARNING - If the saw becomes pinched in the trunk, 
stop the engine, lift the log and change its position 
(Fig. 64). Never attempt to free the saw by pulling on 
it.

EBRANCHAGE
a) Commencez toujours par le diamètre le plus grand 

en allant vers la pointe pour ébrancher la plante ou 
d’éventuelles branches secondaires.

b) Cherchez toujours la position la plus stable et la plus sûre 

avant d’accélérer la tronçonneuse. Maintenez l’équilibre, 
s’il le faut, en appuyant le genou plus proche du tronc.

c) Tenez la tronçonneuse appuyée au tronc pour ne pas 

trop vous fatiguer, en tournant sur le côté gauche ou sur 
le côté droit suivant la position de la branche à couper 
(Fig. 61).

d) Lorsque vous avez affaire à des branches sous tension, 

cherchez une position sûre pour vous protéger 
d’éventuels coups de fouet. Commencez toujours la 
coupe du côté opposé au pli.


ATTENTION - N’utilisez pas le bord supérieur de la 
pointe du guide, surtout pour ébrancher, parce que 
vous courez le risque de recevoir un contrecoup.

DEBITAGE
Avant de commencer à débiter le tronc, vérifiez la façon 
dont il est appuyé au sol. Ceci permet de le couper de façon 
correcte en évitant ainsi que le guide reste coincé au milieu 
du tronc.
a) Commencez à couper la partie supérieure pour environ 

1/3 du diamètre (1-Fig. 62). Terminez la coupe par la partie 
inférieure (2-Fig. 62). De cette façon la coupe sera parfaite 
et le guide ne restera pas coincé dans le tronc.

b) Commencez à couper la partie inférieure pour environ 1/3 

du diamètre (1-Fig. 63). Terminez la coupe par la partie 
supérieure (2-Fig. 63).


ATTENTION - Si le guide coince dans une entaille, 
arrêtez le moteur, soulevez le tronc et changez-le de 
position (Fig. 64). Ne tentez pas de libérer la chaîne 
en tirant sur la poignée de la tronçonneuse.

Summary of Contents for 947

Page 1: ...2 51 7 cm3 I D F GB E SK OWNER S MANUAL MANUALE USO E MANUTENZIONE BETRIEBS UND WARTUNGSANLEITUNG MANUEL D UTILISATION ET D ENTRETIEN MANUAL DE USO Y MANTENIMIENTO N VOD NA POU ITIE A DR BU Pubbl 5007...

Page 2: ...rding to Country requirements and are subject to change without notice by the manufacturer F INTRODUCTION TRADUCTION DES INSTRUCTIONS ORIGINALES Pour un emploi correct de la tron onneuse et pour viter...

Page 3: ..._____ 48 MAINTENANCE CHART_____________ 50 TROUBLE SHOOTING CHART ________ 53 WARRANTY CERTIFICATE ___________ 57 INTRODUCCION __________________ 2 EXPLICACION SIMBOLOS Y ADVERTENCI S DE SEGURIDAD____...

Page 4: ...er Inbetriebnahme lesen 2 Immer Helm Schutzbrille und Ger uschschutz tragen 3 Ger t KETTENS GE 4 Garantierter akustischer Schalleistungspegel 5 Seriennummer 6 CE Zeichen 7 Baujahr 8 Starterpumpe E 1 A...

Page 5: ...oir huile 14 Pompe primer 15 Valve de d compression 16 Vis tendeuse de cha ne lat rale 17 Poign e avant 18 Poign e arri re D BAUTEILE DER KETTENS GE 1 Chokehebel 2 Gashebel 3 Sicherheitsgasgriff 4 Ver...

Page 6: ...ime users must familiarize themselves thoroughly with the operation of the machine before working in the field 2 The chainsaw must only be used by adults in good physical condition with knowledge of t...

Page 7: ...ain 2 La tron onneuse ne doit tre utilis e que par des adultes en bonnes conditions physiques et ayant pris connaissance 3 N utilisez pas la tron onneuse si vous tes physiquement fatigu ou sous l infl...

Page 8: ...La motosierra debe de ser usada s lo por personas adultas en buenas condiciones f sicas y con conocimiento de las normas de uso 3 No usar la motosierra en condiciones de fatiga f sica o se encuentre...

Page 9: ...m u obmedzova vn tro t tne predpisy 1 Motorov p lu nepou vajte sk r ako ste boli pou en o jej pecifickom pou van Za iato n ci by si mali pred pr cou obsluhu stroja vysk a 2 Motorov p la mus by pou va...

Page 10: ...e clothing must be proper and not an obstacle Wear adherent anti cut clothing Oleo Mac anti cut jackets Fig 1 dungarees Fig 2 and leggings are the ideal Do not wear clothes scarves ties or bracelets t...

Page 11: ...uridad no elimina los riesgos de lesiones pero reduce los da os en caso de accidente Consultar con el vendedor de la m quina sobre los indumentos adecuados La ropa debe ser cumplir su funci n de prote...

Page 12: ...ttention to the direction of rotation of the chain Fig 6 Put down the chain cover inserting it into its housing and keeping it pressed against the bar screw on the chain tightener screw L Fig 5 so tha...

Page 13: ...a F Fig 3 sobre los esp rragos N Montar la cadena H Fig 4 dentro el pi n E y en la gu a de la barra M Prestar atenci n al sentido de rotaci n de la cadena Fig 6 Apoyen la cubierta cubre cadena introdu...

Page 14: ...el from escaping around the cap Tighten fuel cap securely after refueling Unit vibration can cause an improperly tightened fuel cap to loosen or come off and spill quantities of fuel Wipe spilled fuel...

Page 15: ...tor y dejar enfriar antes del llenado Aflojar el tap n del combustible lentamente para aliviar la presi n y evitar fugas de combustible Apretar firmemente el tap n de combustible despu s del llenado L...

Page 16: ...high quality engine oil JASO specification FD or ISO specification L EGD When oil specifications are NOT equivalent or unknown use 4 1 25 oil fuel mixing ratio CAUTION DO NOT USE AUTOMOTIVE OIL OR 2...

Page 17: ...SINT 2 y EUROSINT 2 Fig 20 o un aceite para motor de alta calidad equivalente especificaciones JASO FD o ISO L EGD Si las especificaciones del aceite no se conocen o NO son equivalentes utilizar una r...

Page 18: ...tructed When the engine is idling the chain must not turn Otherwise contact an Authorized Service Center to carry out a check and fix the problem When the chainsaw is running grip the front handle fir...

Page 19: ...til de los componentes de la motosierra Antes de arrancar el motor asegurarse que la cadena no est en contacto con un cuerpo extra o Con el motor al m nimo la cadena no debe girar De lo contrario en...

Page 20: ...diately replace fuel cap and hand tighten Wipe up any fuel spillage WARNING Check for fuel leaks if any are found correct before use Contact a Servicing Dealer if necessary Engine is Flooded Set the o...

Page 21: ...p sito Evitar que el combustible se derrame 4 Antes de volver a poner el tap n del combustible limpiar e inspeccionar la junta 5 Colocar inmediatamente el tap n y apretarlo a mano Eliminar todo eventu...

Page 22: ...guide bar is in a cut Hold the front handle firmly with the left hand and put your right foot onto the base of the rear handle Fig 37 Pull the starter cord a few times until the first kick over of th...

Page 23: ...tes de arrancar el motor compruebe que la cadena no toca ning n objeto No arranque nunca la motosierra cuando la barra gu a se encuentre en un corte Sujetar firmemente con la mano izquierda la empu ad...

Page 24: ...terrain si la cha ne tourne encore RODAGE DE CHAINE Effectuez toujours le r glage lorsque la cha ne est froide Faites tourner la cha ne la main en la lubrifiant avec de l huile suppl mentaire Fig 42 M...

Page 25: ...OTORA Uvo nite plynov p ku a nastavte motor na vo nobeh B Obr 41 Vypnite motor prepnut m vyp na a zapa ovania C do polohy STOP Nepokladajte p lu na zem ak sa re az e te to Z BEH RE AZE Nap nanie re az...

Page 26: ...utomatically by inertia when the protection is pushed forward Fig 53 in the event of sudden kickback inertial operation The chain brake is released by pulling the lever towards the operator Fig 54 CHE...

Page 27: ...bajo Viene activado con el consiguiente bloqueo instant neo de la cadena cuando la mano del operador hace presi n sobre la palanca Fig 52 accionamento manual o bien autom ticamente por inercia cuando...

Page 28: ...nding area before starting to cut Clear the work area before beginning to cut Prepare the widest possible path of retreat for when the tree falls Fig 57 Cut off any branches at the bottom of the trunk...

Page 29: ...e mal tiempo con escarsa visibilidad o con temperaturas demasiado r gidas o elevadas Aseg rese de que no hay ramas secas que pueden caer ABATIMIENTO Para derribar y seccionar un rbol se debe sacar ven...

Page 30: ...site side to the bend WARNING Do not use the upper edge of the tip of the guide bar to cross cut otherwise you might risk a kickback BUCKING When bucking up the trunk to desired lengths there is one b...

Page 31: ...derecho seg n la posici n de la rama que se debe cortar Fig 61 d En el caso de ramas bajo tensi n buscar una posici n segura para protegerse del posible golpe de l tigo Iniciar siempre el corte por l...

Page 32: ...to see clearly Stop the engine before setting the chainsaw down Be particularly cautious and alert when wearing ear protectors as these can restrict your ability to hear sounds indicating danger shou...

Page 33: ...bajar cerca de cables el ctricos Trabajar s lo cuando la visibilidad y la luz sean suficientes para ver claramente Detener el motor antes de apoyar la motosierra Prestar atenci n especialmente cuando...

Page 34: ...After every 3 4 times the cutters have been sharpened you need to check the height of the depth gauges and if necessary lower them using the flat file and template supplied optional then round off the...

Page 35: ...despu s del afilado deben ser todos de la misma anchura y longitud ATENCION La cadena debe ser afilada cada vez que se observe que las virutas son de dimensiones muy reducidas como el normal aserr n...

Page 36: ...TING UNIT Use a brush or compressed air to keep the cooling louvers of the starter assembly free and clean Fig 75 ENGINE DECOMPRESSION VALVE Clean the cylinder fins Fig 76 with compressed air or a bru...

Page 37: ...l de aceite se activa s lo cuando la cadena est en movimiento ATENCION No emplee nunca aceite recuperado GRUPO DE ARRANQUE Mantener libres y limpios los orificios de refrigeraci n del carter del conju...

Page 38: ...the range Idle screw T is adjusted in order to ensure a good safety margin between idle running and clutch engagement Screw L must be adjusted so that the engine promptly responds to sharp acceleratio...

Page 39: ...y tenga un buen funcionamiento al m nimo El tornillo H se debe regular de manera tal que el motor pueda disponer de la m xima potencia durante la fase de corte ATENCION Las variaciones clim ticas o a...

Page 40: ...y and every two years if with normal use WARNING Any maintenance operations not specifically dealt with in this manual must be carried out by an authorised service centre To ensure that your chainsaw...

Page 41: ...ensivo o cada dos a os si el uso es normal ATENCI N Todas las operaciones de mantenimiento no indicadas en este manual deben ser realizadas por un taller autorizado Para garantizar un funcionamiento c...

Page 42: ...the air filter Fig 89 and the cylinder fins Fig 90 Store the blower in a dry place preferably not in direct contact with the ground away from heat sources and the tanks empty The procedures for retur...

Page 43: ...rter del grupo de arranque Fig 88 el filtro de aire Fig 89 y las aletas del cilindro Fig 90 Conservar la m quina con los dep sitos vac os en un ambiente seco en lo posible sin contacto con el suelo y...

Page 44: ...rale Lateral chain tensioner screw Vis tendeuse de cha ne lat rale Seitliche Kettenspannschraube Tornillo lateral para tensar la cadena Bo n skrutka nap na a re aze Si Yes Oui Ja no Nr denti pignone N...

Page 45: ...1 BPX 56 330 mm 947 952 325 x 058 16 41 cm 168 PXBK 095 168 SLGK 095 21 BPX 66 395 mm 947 952 325 x 058 18 46 cm 188 PXBK 095 188 SLGK 095 21 BPX 72 450 mm ATTENZIONE ATTENTION ATENCION Il rischio di...

Page 46: ...aru en hladina akustick ho v konu dB A LWA 2000 14 EC EN 22868 EN ISO 3744 112 0 113 0 Livello di vibrazione Vibration level Niveau de vibration Vibrationspegel Nivel de vibracion rove vibr ci m s2 EN...

Page 47: ...47 NOTE...

Page 48: ...v hradn zodpovednos e stroj 1 Genere sega a catena 1 Type chainsaw 1 Cat gorie tron onneuse 1 Baurt kettens ge 1 G nero motosierra 1 Typ r t zov pily 2 Marca Tipo 2 Trademark Type 2 Marque Type 2 Mark...

Page 49: ...onformit Verfahren zur Konformit tsbeurteilung durchgef hrt Procedimientos utilizados para determinar la conformidad Bol dodr an postup hodnotenia Livello di potenza acustica misurato Measured sound p...

Page 50: ...amento Ispezionare danni e usura X Sostituire X Carburatore Controllare il minimo la catena non deve girare al minimo X X Candela Controllare distanza elettrodi X Sostituire X Ogni 6 mesi Sistema anti...

Page 51: ...oit pas tourner au ralenti X X Bougie Contr ler la distance des lectrodes X Remplacer X Tous les 6 mois Syst me anti vibrations V rifier dommages et niveau d usure X WARTUNGSTABELLE Die folgenden Wart...

Page 52: ...Buj a Controlar la distancia de los electrodos X Sustituir X Cada 6 meses Sistema antivibraci n Inspeccionar da os y desgaste X TABU KA DR BY Pros m nezabudnite e nasleduj ce intervaly dr by sa vz ahu...

Page 53: ...ioni nel capitolo Montaggio barra e catena Pag 12 3 Vedi le istruzioni nel capitolo Montaggio barra e catena Pag 12 4 Vedi le istruzioni nel capitolo Manutenzione barra e o catena Pag 34 5 Sostituire...

Page 54: ...lorsque le moteur tourne ST RUNGSBEHEBUNG ACHTUNG Vor Durchf hrung aller in der untenstehenden Tabelle empfohlenen Pr fungen das Ger t immer abstellen und die Z ndkerze trennen es sei denn der Betrie...

Page 55: ...Ver las instrucciones en el cap tulo Montaje de la barra y la cadena P g 13 4 Ver las instrucciones en el cap tulo Mantenimiento barra y o cadena P g 35 5 Sustituir si es necesario contactar con un Ce...

Page 56: ...56 NOTE...

Page 57: ...been used for improper purposes or has been modified in any way unsuitable lubricants and fuels have been used non original spare parts and accessories have been fitted work has been done on the machi...

Page 58: ...cado sea v lido se han de completar todas sus partes y ha de estar debidamente timbrado por el vendedor 4 La garant a pierde su validez en los siguientes casos Falta evidente de mantenimiento Uso inco...

Page 59: ...59 NOTE...

Page 60: ...a macchina durante tutta la sua vita GB WARNING This owner s manual must stay with the machine for all its life F ATTENTION Ce manuel doit accompagner le moteur tout au long de sa vie D ACHTUNG Bewahr...

Reviews: