- 29 -
Calibrating the Sensor
Printer
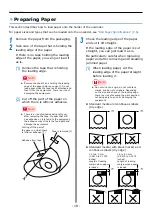
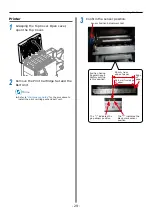
1
Grasping the Top Cover Open Lever,
open the Top Cover.
2
Remove the Print Cartridge Set and the
Belt Unit.
Memo
z
Refer to
“Maintenance Guide”
for the procedure to
install the print cartridge set and belt unit.
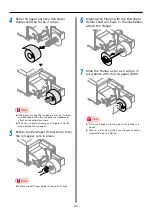
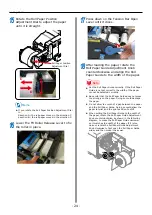
3
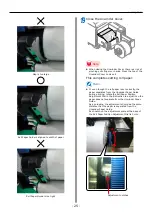
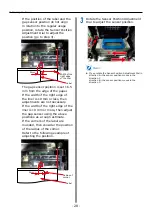
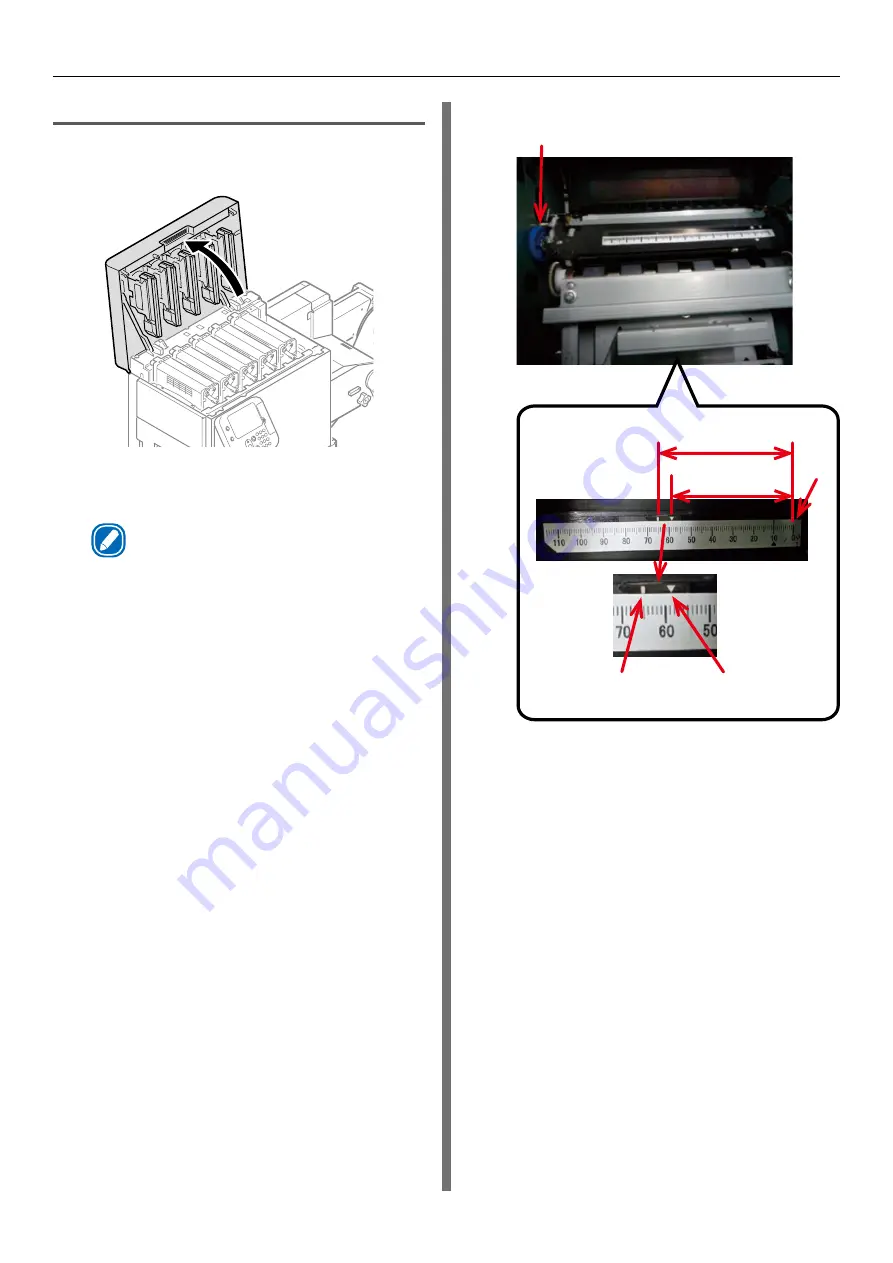
Confirm the sensor position.
Sensor Position Adjustment Dial
Position During
Regular Usage
Factory setting
is this position.
The “│” indicates the
gap sensor position
Edge
of
paper
The “
∆
” indicates the
black mark sensor
position
65 mm from
edge of paper
58.5 mm from edge
of paper
Summary of Contents for Pro1040
Page 1: ...Pro1040 Pro1050 Windows PS Printer Driver User s Guide...
Page 16: ...16 Registering a Desired Paper Size with the Printer Driver...
Page 36: ...36 Canceling a Print Job...
Page 55: ...55 4 Adjusting the Color Adjusting Color with a Printer Driver 56...
Page 72: ...72 Printing by using applications to specify Spot Color toner PS printer drivers only...
Page 73: ...73 6 Troubleshooting Printer Driver Malfunctions 74...


