


ES9160 MFP / ES9170 MFP
© 2012 OKI DATA CORPORATION All rights reserved
DISASSEMBLY AND REPLACEMENT
4 - 18
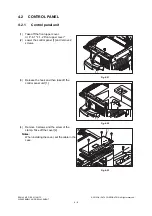
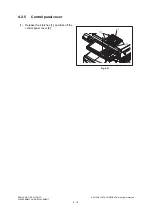
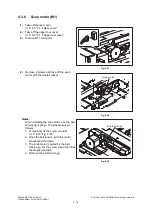
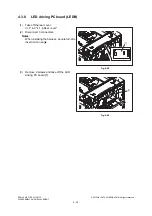
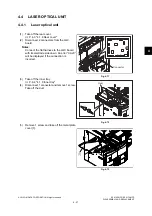
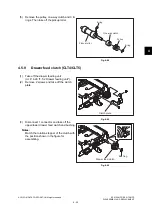
4.3.6
Scan motor (M1)
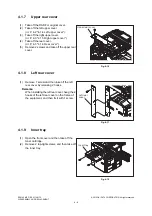
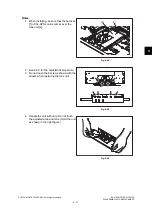
(1)
Take off the rear cover.
(2)
Take off the upper rear cover.
P. 4-4 "4.1.7 Upper rear cover"
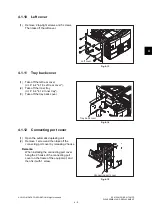
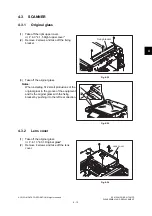
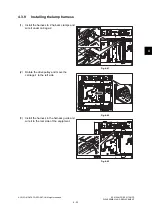
(3)
Disconnect 1 connector.
Fig. 4-47
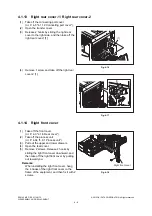
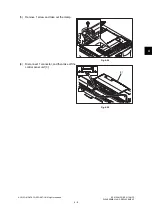
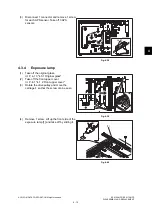
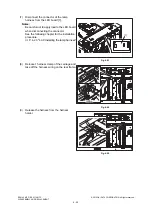
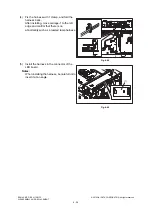
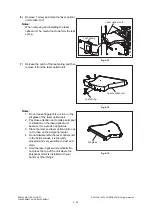
(4)
Remove 2 screws and take off the scan
motor with the whole bracket.
Fig. 4-48
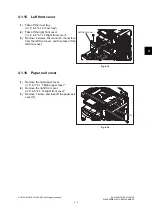
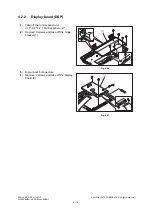
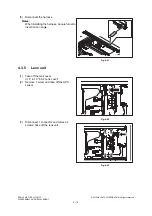
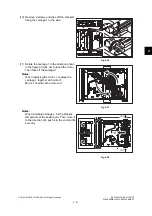
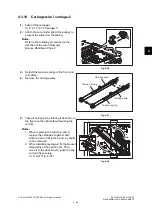
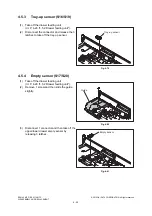
Notes:
When installing the scan motor, use the belt
tension jig (spring). The procedure is as
follows.
1. Temporarily fix the screw A and B.
2. Hook the belt tension jig to the motor
bracket and the flame.
3. The scan motor is pulled by the belt
tension jig. Fix the screw A and then B at
the stopped position.
4. Remove the belt tension jig.
Fig. 4-49
A
Scan motor
B
Belt tension jig
Summary of Contents for ES9160
Page 12: ......
Page 24: ...ES9160 MFP ES9170 MFP 2012 OKI DATA CORPORATION All rights reserved FEATURES 1 2...
Page 308: ...ES9160 MFP ES9170 MFP 2012 OKI DATA CORPORATION All rights reserved SELF DIAGNOSIS MODES 5 56...
Page 832: ...ES9160 MFP ES9170 MFP 2012 OKI DATA CORPORATION All rights reserved REMOTE SERVICE 10 38...
Page 920: ...ES9160 MFP ES9170 MFP 2012 OKI DATA CORPORATION All rights reserved BACKUP FUNCTION 12 12...
Page 1086: ......
Page 1087: ......


