


4
© 2012 OKI DATA CORPORATION All rights reserved
ES9160 MFP / ES9170 MFP
DISASSEMBLY AND REPLACEMENT
4 - 3
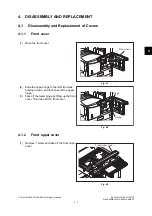
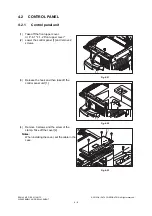
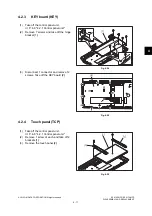
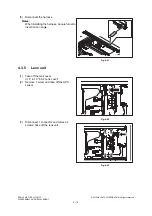
4.1.5
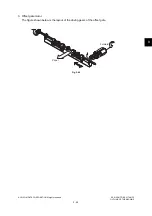
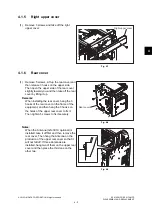
Right upper cover
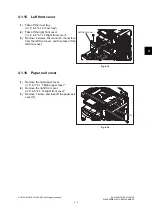
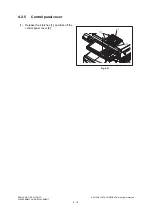
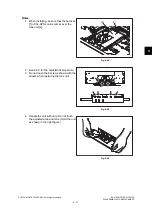
4.1.6
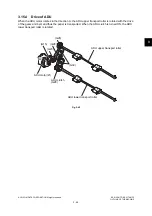
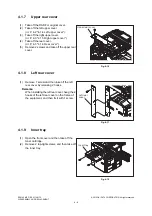
Rear cover
(1)
Remove 3 screws and take off the right
upper cover.
Fig. 4-7
(1)
Remove 5 screws. Lift up the rear cover and
then release 3 hooks on the upper side.
Then open the upper side of the rear cover
slightly toward you, and then take off the rear
cover by lifting it up.
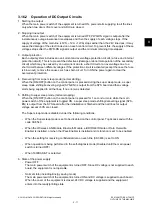
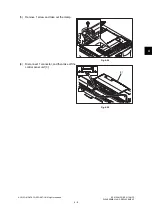
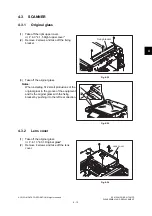
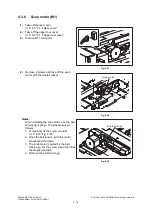
Remarks:
When installing the rear cover, hang the 3
hooks of the rear cover on the frame of the
equipment, and then hang the 3 hooks on
the holes of the upper rear cover to fix it.
Then tighten 5 screws to fix it securely.
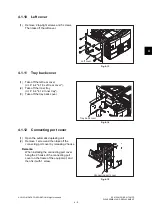
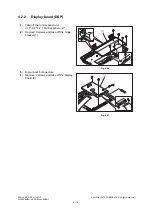
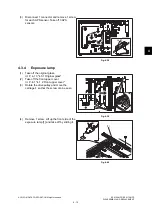
Notes:
When the Antenna (GN-3010, optional) is
installed, take it off first and then remove the
rear cover. Then hang the Antenna on the
protrusion of the upper rear cover so that it
will not fall off. If three Antennas are
installed, hang two of them on the upper rear
cover and then place the third one on the
other two.
Fig. 4-8
Fig. 4-9
Right upper cover
Rear cover
Summary of Contents for ES9160
Page 12: ......
Page 24: ...ES9160 MFP ES9170 MFP 2012 OKI DATA CORPORATION All rights reserved FEATURES 1 2...
Page 308: ...ES9160 MFP ES9170 MFP 2012 OKI DATA CORPORATION All rights reserved SELF DIAGNOSIS MODES 5 56...
Page 832: ...ES9160 MFP ES9170 MFP 2012 OKI DATA CORPORATION All rights reserved REMOTE SERVICE 10 38...
Page 920: ...ES9160 MFP ES9170 MFP 2012 OKI DATA CORPORATION All rights reserved BACKUP FUNCTION 12 12...
Page 1086: ......
Page 1087: ......


