


ES9160 MFP / ES9170 MFP
© 2012 OKI DATA CORPORATION All rights reserved
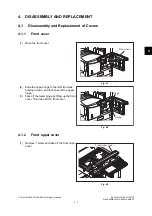
DISASSEMBLY AND REPLACEMENT
4 - 4
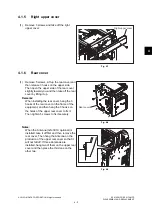
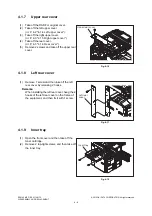
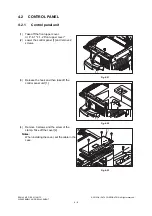
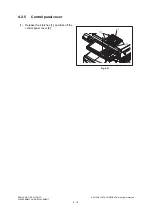
4.1.7
Upper rear cover
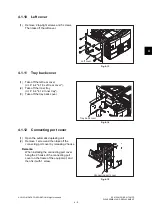
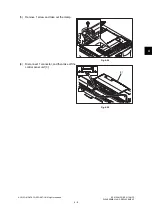
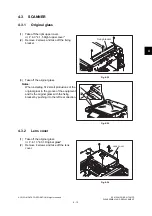
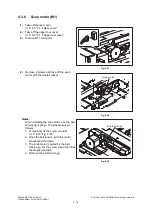
4.1.8
Left rear cover
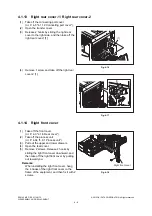
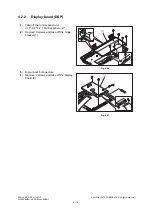
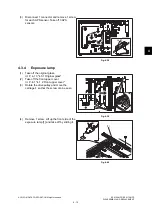
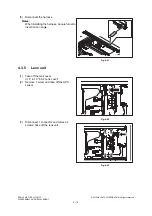
4.1.9
Inner tray
(1)
Take off the RADF or original cover.
(2)
Take off the left upper cover
(
P. 4-2 "4.1.4 Left upper cover").
(3)
Take off the right upper cover.
(
P. 4-3 "4.1.5 Right upper cover").
(4)
Take off the rear cover.
(
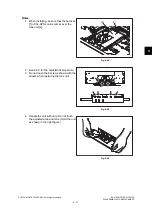
(5)
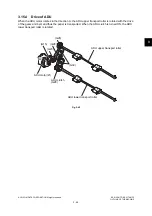
Remove 2 screws and take off the upper rear
cover.
Fig. 4-10
(1)
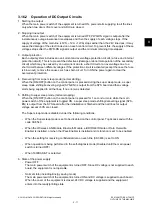
Remove 1 screw and then take off the left
rear cover by releasing 2 hooks.
Remarks:
When installing the left rear cover, hang the 2
hooks of the left rear cover on the frame of
the equipment, and then fix it with 1 screw.
Fig. 4-11
(1)
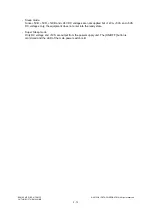
Open the front cover and then take off the
toner cartridge.
(2)
Remove 2 tap-tight screws, and then take off
the inner tray.
Fig. 4-12
Upper rear cover
Left rear
cover
Inner tray
Summary of Contents for ES9160
Page 12: ......
Page 24: ...ES9160 MFP ES9170 MFP 2012 OKI DATA CORPORATION All rights reserved FEATURES 1 2...
Page 308: ...ES9160 MFP ES9170 MFP 2012 OKI DATA CORPORATION All rights reserved SELF DIAGNOSIS MODES 5 56...
Page 832: ...ES9160 MFP ES9170 MFP 2012 OKI DATA CORPORATION All rights reserved REMOTE SERVICE 10 38...
Page 920: ...ES9160 MFP ES9170 MFP 2012 OKI DATA CORPORATION All rights reserved BACKUP FUNCTION 12 12...
Page 1086: ......
Page 1087: ......


