background image

7 - C110 User’s Guide

Introduction

Summary of Contents for C110

Page 1: ...User s Guide 59318501 my okidata com C110...

Page 2: ...acturer While all reasonable efforts have been made to make this document as accurate and helpful as possible we make no warranty of any kind expressed or implied as to the accuracy or completeness of...

Page 3: ...T attempt to induce vomiting If inhaled move the person to an open area for fresh air Seek medical attention If it gets into the eyes flush with large amounts of water for at least 15 minutes keeping...

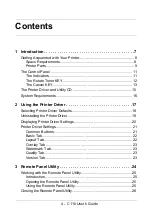
Page 4: ...2 Using the Printer Driver 17 Selecting Printer Driver Defaults 18 Uninstalling the Printer Driver 19 Displaying Printer Driver Settings 20 Printer Driver Settings 21 Common Buttons 21 Basic Tab 22 La...

Page 5: ...rage 43 5 Replacing Consumables 44 Toner Cartridges 45 General Information 45 Storing and Handling Toner Cartridges 45 Replacing a Toner Cartridge 47 Replacing All Toner Cartridges at the Same Time 52...

Page 6: ...89 Clearing Media Misfeeds 90 Clearing Procedures 91 Solving Problems with Media Misfeeds 98 Solving Other Problems 99 Solving Problems with Printing Quality 101 8 Specifications 107 Printer Specifica...

Page 7: ...7 C110 User s Guide Introduction...

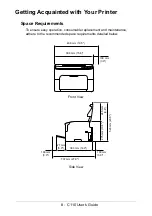
Page 8: ...s To ensure easy operation consumable replacement and maintenance adhere to the recommended space requirements detailed below Side View Front View 496 mm 19 5 100 mm 3 9 396 mm 15 6 707 mm 27 8 100 mm...

Page 9: ...d to throughout this guide so please take some time to become familiar with them Front View 1 Output tray 2 Control panel 3 Front cover 4 Tray 1 Multipurpose tray 5 Top cover 6 Fuser unit 7 Fuser sepa...

Page 10: ...10 C110 User s Guide Rear View 1 Power switch 2 Power connection 2 USB port 1 2 3...

Page 11: ...meaning Ready indicator When lit printing can be performed Attention indicator When lit or blinking an error has occurred or there is a warning Toner indicators When blinking the toner for the corresp...

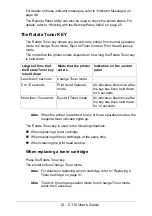
Page 12: ...ey is used in the following situations When replacing a toner cartridge When replacing all toner cartridges at the same time When cleaning the print head window When replacing a toner cartridge Press...

Page 13: ...ter enters Eject All Toner mode Note For details on replacing all toner cartridges at the same time refer to Replacing All Toner Cartridges at the Same Time on page 52 Note To return to normal operati...

Page 14: ...celling a Print Job You can cancel a print job that is currently being processed While data is being processed or printed the green Ready indicator is blinking hold down the Cancel key for more than 5...

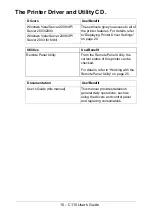
Page 15: ...gs on page 20 Windows Vista Server 2008 XP Server 2003 for 64bit Utilities Use Benefit Remote Panel Utility From the Remote Panel Utility the current status of this printer can be checked For details...

Page 16: ...Server 2008 Windows Server 2008 x64 Edition Windows XP Home Edition Professional Service Pack 2 or later Windows XP Professional x64 Edition Windows Server 2003 Windows Server 2003 x64 Edition Window...

Page 17: ...17 C110 User s Guide Using the Printer Driver...

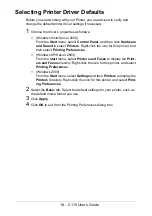
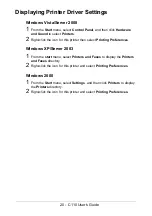
Page 18: ...nter and then select Printing Preferences Windows XP Server 2003 From the start menu select Printers and Faxes to display the Print ers and Faxes directory Right click the icon for this printer and se...

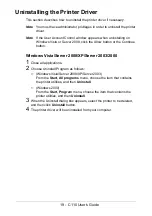
Page 19: ...inue button Windows Vista Server 2008 XP Server 2003 2000 1 Close all applications 2 Choose Uninstall Program as follows Windows Vista Server 2008 XP Server 2003 From the Start All programs menu choos...

Page 20: ...printer then select Printing Preferences Windows XP Server 2003 1 From the start menu select Printers and Faxes to display the Printers and Faxes directory 2 Right click the icon for this printer and...

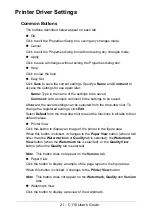
Page 21: ...down list To change the registered settings click Edit Select Default from the drop down list to reset the functions in all tabs to their default values Printer View Click this button to display an i...

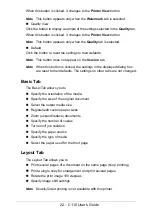
Page 22: ...the displayed dialog box are reset to their defaults The settings on other tabs are not changed Basic Tab The Basic Tab allows you to Specify the orientation of the media Specify the size of the origi...

Page 23: ...watermark to be used Add edit or delete watermarks Print the watermark on the background Print the watermark on only the first page Print multiple copies of the selected watermark on a single page Qu...

Page 24: ...24 C110 User s Guide Remote Panel Utility...

Page 25: ...ars in the Windows notification area right end of the taskbar 2 Double click the Remote Panel Utility icon that appears in the notification area Note When starting Remote Panel Utility again after it...

Page 26: ...the settings specified for Toner Low Message Toner Out Stop Energy Save Time and Auto Continue to the printer Toner Low Message Specifies whether a printer indicator blinks or a warning message appea...

Page 27: ...is enabled The length of time until the machine enters Energy Save mode can be specified from the Panel tab Note This menu is displayed only on the Americas model Flicker Set fuser heater power Image...

Page 28: ...hoose Exit Note When the Close button in the lower right corner of the Remote Panel Utility window is clicked the window is closed and the utility remains miniaturized as an icon in the notification a...

Page 29: ...29 C110 User s Guide Media Handling...

Page 30: ...322 3 UK Quarto 8 0 x 10 0 203 2 x 254 0 Foolscap 8 0 x 13 0 203 2 x 330 2 Government Legal 8 5 x 13 0 215 9 x 330 2 B5 ISO 6 9 x 9 8 176 0 x 250 0 J Postcard 3 9 x 5 8 100 0 x 148 0 Kai 16 7 3 x 10...

Page 31: ...p media between 15 and 85 relative humidity Toner does not adhere well to moist or wet paper DO NOT use plain papers that are Coated with a processed surface such as carbon paper and colored paper tha...

Page 32: ...not approved Thick Stock Paper thicker than 90 g m2 24 lb bond is referred to as thick stock Test all thick stock to ensure acceptable performance and to ensure that the image does not shift You can...

Page 33: ...hrough on the surface You can print continuously with label sheets However this could affect the media feed depending on the media quality and printing environment If problems occur stop the continuou...

Page 34: ...ead Stationery You can print continuously with letterhead However this could affect the media feed depending on the media quality and printing environment If problems occur stop the continuous printin...

Page 35: ...printing your data on a sheet of plain paper first to check placement Use postcards that are Approved for laser printers DO NOT use postcards that are Coated Designed for inkjet printers Precut or pe...

Page 36: ...e frame buffer The printable area for all media sizes is the page size minus 4 0 mm 0 157 from all edges of the media Note When printing in color on legal size media the bottom margin is 16 0 mm 0 63...

Page 37: ...inting on a wide range of media types it is not intended to print exclusively on a single media type except plain paper Continuous printing on media other than plain paper such as labels or thick stoc...

Page 38: ...For details on the types and sizes of media that can be printed from Tray 1 refer to Print Media on page 30 Loading Plain Paper 1 Open Tray 1 Note If there is media in Tray 1 remove it 2 Slide the me...

Page 39: ...e 3 Load the paper face up in the tray Note Do not load paper above the mark Up to 200 sheets 80 g m2 21 lb of plain paper can be loaded into the tray at one time 4 Slide the media guides against the...

Page 40: ...els Letterhead Postcard Thick Stock 1 or Thick Stock 2 in the driver for optimum print quality Loading Label Sheets Letterheads Postcards Thick Stock 1 Open Tray 1 Note If media has been loaded into T...

Page 41: ...41 C110 User s Guide 3 Load the media face up in the tray Note Up to 50 sheets can be loaded into the tray at one time 4 Slide the media guides against the edges of the media...

Page 42: ...nto the output tray on top of the printer This tray has a capacity of approximately 100 sheets A4 Letter of 80 g m2 21 lb paper Note If the media is stacked too high in the output tray your printer ma...

Page 43: ...up too much and cause misfeeding If media has been removed from its wrapper place it in its original packaging and store in a cool dark place on a level surface Avoid moisture excessive humidity direc...

Page 44: ...44 C110 User s Guide Replacing Consumables...

Page 45: ...s nontoxic If you get toner on your skin wash it off with cool water and a mild soap If you get toner on your clothes lightly dust them off If some toner remains on your clothes use cool not hot water...

Page 46: ...may occur degrading print quality Allow the toner to adapt to the environment for about one hour before use Always keep toner cartridges level when handling or stroing them Important Do not hold stan...

Page 47: ...omatically moved so that it can be replaced If this has occurred skip step 2 and continue with step 3 2 Use either operation described below to switch the printer to Change Toner mode Press the Rotate...

Page 48: ...ot already open 4 Check that the toner cartridge to be replaced has been moved to the front Note You can identify the toner cartridge by the color of the handle 5 Pull down the handle on the toner car...

Page 49: ...t rotate the carousel with force otherwise it may be damaged Important Do not touch the contact indicated in the illustration CAUTION Dispose of the empty toner cartridge according to your local regul...

Page 50: ...dge horiaontally a few times to distribute the toner Note Make sure that the toner roller cover is securely attached before shaking the toner cartridge 9 Remove the cover from the toner roller Note Do...

Page 51: ...with its holders and then insert the cartridge Note Before inserting the toner cartridge make sure that the color of the toner cartridge to be installed is the same as the label on the toner cartridge...

Page 52: ...described in steps 3 through 11 13 Press the Cancel key to reset the printer and clear the indicator message Note The printer must complete a calibration cycle less than 2 minutes after a toner cartri...

Page 53: ...or lights up Note To exit Eject All Toner mode press the Clear key 2 Perform the operations described in steps 3 through 11 of Replacing a Toner Cartridge startin on page 47 to replace the magenta ton...

Page 54: ...results use only genuine Oki imaging cartridges 1 Open the top cover Note If there is paper in the output tray remove it and then fold up the output tray before opening the top cover 2 Grab the handle...

Page 55: ...ations Do not burn the imaging cartridge 3 Prepare the new imaging cartridge Important Do not touch the PC drum and the transfer belt on the imaging cartridge 4 Slowly insert the new imaging cartridge...

Page 56: ...Note The printer must complete a calibration cycle less than 2 minutes after the imaging cartridge has been replaced If you open the top or front cover before the printer is reset the calibration sto...

Page 57: ...i fuser unit for your specific printer type 1 Turn off the machine and disconnect the power cord WARNING There are extremely hot parts within the machine Before replacing the fuser unit wait about 20...

Page 58: ...top cover Note If there is paper in the output tray remove it and then fold up the output tray before opening the top cover 3 Push the blue handles back as far as possible 4 Grab the blue handles and...

Page 59: ...59 C110 User s Guide Important Do not touch the matching connectors of the fuser unit and the machine 5 Prepare a new fuser unit Note Be careful not to touch the surface of the fuser roller...

Page 60: ...60 C110 User s Guide a Pull the fuser separator levers forward as far as pos sible b Remove the fuser separator material and then return the fuser separator levers to their original positions...

Page 61: ...ide Important Be careful not to touch the paper exit sensor and the surface of the fuser roller in the fuser unit 6 While lifting the fuser unit with the blue handles one on each side vertically inser...

Page 62: ...62 C110 User s Guide Important Do not touch the paper exit sensor on the fuser unit Important Do not touch the matching connectors of the fuser unit and the machine M...

Page 63: ...63 C110 User s Guide 7 After the fuser unit is firmly installed flip the blue handles down toward you 8 Carefully close the top cover 9 Reconnect the power cord and turn on the machine...

Page 64: ...64 C110 User s Guide Maintenance...

Page 65: ...o the printer otherwise the printer will be damaged and an electric shock may occur CAUTION The fuser unit is hot When the top cover is opened the fuser unit temperature drops gradually one hour wait...

Page 66: ...e printer during printing Do not tap media stacks on the printer Do not lubricate or disassemble the printer Do not tilt the printer Do not touch the electrical contacts gears or laser devices Doing s...

Page 67: ...water and consult a doctor Make sure any parts removed during cleaning are replaced before you plug in the printer Cleaning the Printer CAUTION Be sure to turn off the printer and unplug the power cor...

Page 68: ...68 C110 User s Guide Exterior Control Panel Ventillation Grill Exterior Housing Y M C K READY EADY ROTATE OTATE TONER ONER ATTENTION TTENTION CANCEL ANCEL...

Page 69: ...Roller 1 Open the top cover Note If there is paper in the output tray remove it and then fold up the output tray before opening the top cover 2 Grab the handle and lift it up slightly to the back and...

Page 70: ...ally as shows in the illustration at the right Be sure to keep the imaging cartridge horizontal and place it where it will not become dirty Do not leave the imaging cartridge removed for more than 15...

Page 71: ...y wiping them with a soft dry cloth CAUTION The area around the fuser unit is extremely hot Touching anything other than the indicated levers may result in burns If you get burned immediately cool the...

Page 72: ...ult if the surface of the transfer roller is touched Be careful not to touch the surface of the transfer roller 1 bottom view 4 Slowly insert the imaging cartridge vertically and then push it slightly...

Page 73: ...ode and the magenta toner indi cator lights up Note It is not possible to exit Print Head Cleanup mode before the operation is finished even if the Clear key is pressed If the printer has incorrectly...

Page 74: ...rtridge is unlocked and moves out slightly toward you 4 Remove the toner cartridge Note When the magenta toner cartridge is removed a gap is created within the printer so that the print head window ca...

Page 75: ...rotate within the printer 6 After the toner cartridges have finished rotating and all indicators on the control panel begin blinking open the top cover 7 Grab the handle and lift it up slightly to th...

Page 76: ...ally as shows in the illustration at the right Be sure to keep the imaging cartridge horizontal and place it where it will not become dirty Do not leave the imaging cartridge removed for more than 15...

Page 77: ...y wiping it with a soft dry cloth CAUTION The area around the fuser unit is extremely hot Touching anything other than the indicated levers may result in burns If you get burned immediately cool the s...

Page 78: ...ult if the surface of the transfer roller is touched Be careful not to touch the surface of the transfer roller 1 bottom view 9 Slowly insert the imaging cartridge vertically and then push it slightly...

Page 79: ...top cover 11 Press the Clear key The blinking of all indicators stop and the magenta toner indicator lights up The toner cartridges rotate within the printer 12 After the toner cartridges have finish...

Page 80: ...80 C110 User s Guide 13 Align the shaft on each end of the toner cartridge with its holders and then insert the cartridge Important Do not touch the contact indicated in the illustration...

Page 81: ...81 C110 User s Guide 14 Press in the magenta toner cartridge until it locks into place 15 Close the front cover...

Page 82: ...82 C110 User s Guide Troubleshooting...

Page 83: ...encounter or at least guide you to the proper sources for help Preventing Media Misfeeds page 84 Understanding the Media Path page 85 Indicator Messages page 86 Clearing Media Misfeeds page 90 Solving...

Page 84: ...int quality media misfeeds and printer damage You load the media printing side up in the tray many manufacturers place an arrow on the end of the wrapper to indicate the printing side Avoid Media that...

Page 85: ...ser s Guide Understanding the Media Path Understanding the printer s media path will help you locate media misfeeds 1 Output tray 2 Imaging cartridge 3 Toner cartridge carousel 4 Tray 1 5 Fuser unit 1...

Page 86: ...ondition of the printer The printer status also can be checked on the Remote Panel Utility Refer to Working with the Remote Panel Utility on page 25 Ready indicator green Attention indicator orange Co...

Page 87: ...Off On Toner out Note This message appears when the Toner Out Stop in the Remote Panel Utility is set to Off Replace the toner cartridge Note Printing can continue however the printing results are not...

Page 88: ...nstalled Install the all toner cartridges Toner empty Replace the toner cartridge Slow blinking Slow blinking Media empty Load media into Tray 1 Slow blinking alternately Media size error The size of...

Page 89: ...er s covers If the error is not corrected turn off the printer After a few seconds turn on the printer Off On All blinking Imaging cartridge end Replace the imaging cartridge Ready indicator green Att...

Page 90: ...emoving the misfed media Make sure not to spill any toner inside the printer CAUTION Unfused toner can mess your hands clothes or anything else it gets on If you accidentally get toner on your clothes...

Page 91: ...pen the top cover Note If there is paper in the output tray remove it and then fold up the output tray before opening the top cover 2 Grab the handle and lift it up slightly to the back and then slowl...

Page 92: ...ally as shows in the illustration at the right Be sure to keep the imaging cartridge horizontal and place it where it will not become dirty Do not leave the imaging cartridge removed for more than 15...

Page 93: ...ack as far as possible CAUTION The area around the fuser unit is extremely hot Touching anything other than the indicated levers may result in burns If you get burned immediately cool the skin under c...

Page 94: ...94 C110 User s Guide 4 Remove any misfed media Note Raise the fuser unit cover and remove the media M M...

Page 95: ...e Important Do not touch the paper exit sensor on the fuser unit Important Decreased print quality may result if the surface of the transfer roller is touched Be careful not to touch the surface of th...

Page 96: ...r s Guide 5 Return the fuser separator levers to their original positions 6 Slowly insert the imaging cartridge vertically and then push it slightly down toward you to finish reinstalling the imaging...

Page 97: ...97 C110 User s Guide 7 Carefully close the top cover...

Page 98: ...ay Remove the misfed media and reposition the media properly in the tray The number of sheets in the tray exceeds the maximum allowed Remove the excess media and reload the correct number of sheets in...

Page 99: ...ications listed in appendix A Technical Specifications Printing takes too much time The printer is set to a slow printing mode for example thick stock It takes more time to print with special media Wh...
Page 100: ...With N up on multiple prints the output is incorrect Both the driver and the application have been set for collation For N up on multiple prints choose Collate only in the driver s Basic Tab Do not s...

Page 101: ...loaded in the printer Load the correct media in the printer The power source does not match the printer specifications Use a power source with the proper specifications Several sheets are being fed at...

Page 102: ...terheads specify the appropriate media type in the printer driver Image is too dark One or more of the toner cartridges may be defective Remove the toner cartridges and check for damage If it is damag...

Page 103: ...y media Unsupported media wrong size thickness type etc is being used See Print Media on page 30 One or more of the toner cartridges may be defective Remove the toner cartridges and check for damage I...

Page 104: ...toner cartridges are defective Remove the toner cartridges and check for damage If it is damaged replace it The imaging cartridge is defective Remove the imaging cartridge and check for damage If it...

Page 105: ...more of the toner cartridges may be defective Remove the toner cartridges and check for damage If it is damaged replace it The imaging cartridge is defective Remove the imaging cartridge and check fo...

Page 106: ...above have been performed contact Technical Support with the error information The color has a poor reproduction or has poor color density The imaging cartridge is defective Remove the imaging cartrid...

Page 107: ...107 C110 User s Guide Specifications...

Page 108: ...Warm up time Avg 30 seconds time to return to Ready mode from Energy save mode Media sizes Paper width 92 to 216 mm 3 6 to 8 5 Paper length Plain paper 195 to 356 mm 7 7 to 14 0 Thick stock 1 2 184 t...

Page 109: ...40 V 4 4 A or less Acoustic Noise Printing 52 dB or less Standby 32 dB or less External dimensions Height 275 mm 10 8 Width 396 mm 15 6 Depth 380 mm 14 9 Weight 13 kg without consumables 15 kg with co...

Page 110: ...ing when print jobs of one page are often printed or the type of paper used for example thick paper In addition the life will be affected by the temperature and humidity of the operating environment S...

Reviews: