


OKAYO® C 7191 DVD CD USB MP3 Playback Module
OKAYO® C 7191 DVD CD USB MP3 Playback Module
Page 9
Page 4
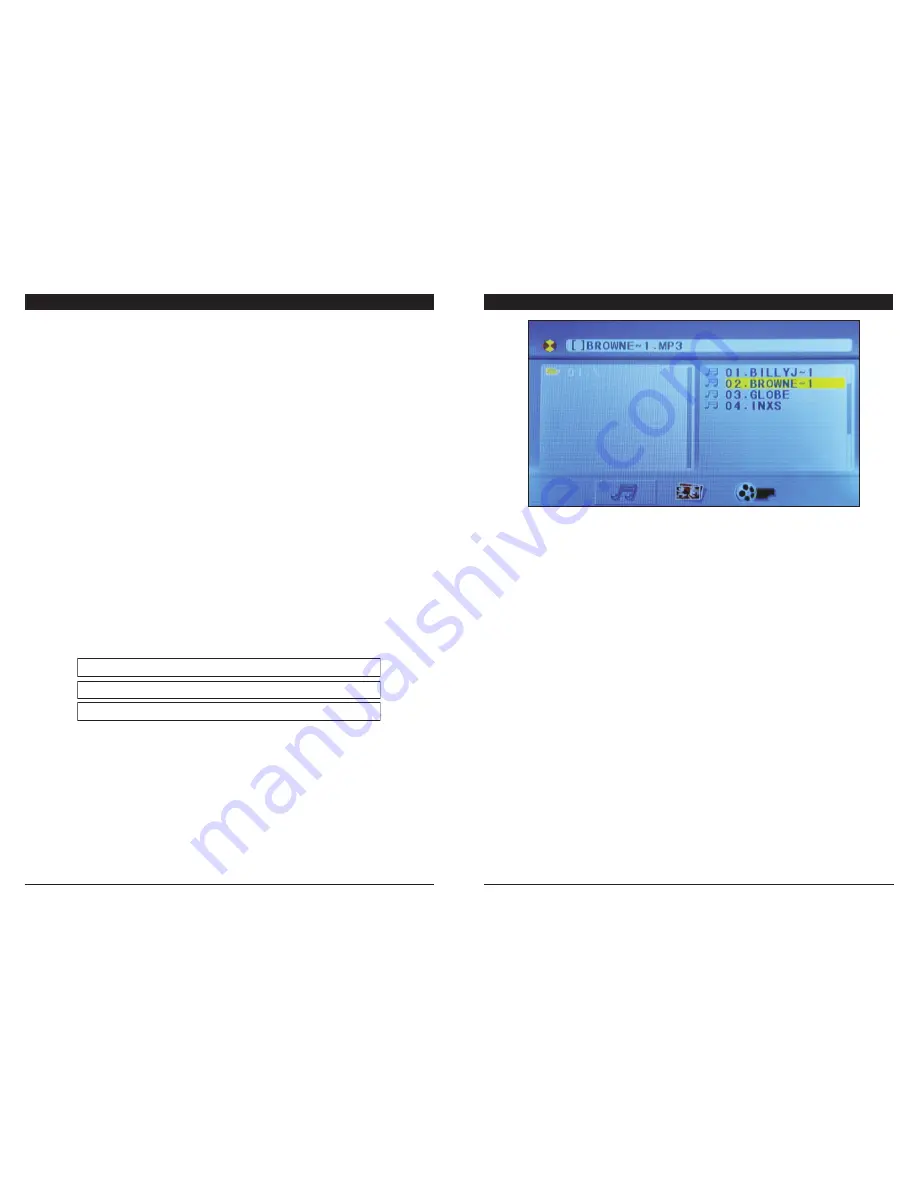
FIGURE 7: USB / SD CARD / CD AUDIO PLAYBACK SCREEN LAYOUT
PLAYBACK SCREEN
Icons at the bottom of the screen are highlighted when that type of media is selected. Therefore, to select avail-
able music, use the cursor to choose the ‘Notes’ icon, and the compatible music tracks will be displayed for that
folder. The device will normally start playing whatever is stored in the root directory of the media inserted into the
device, usually music tracks first. It will also automatically assign numbers to the tracks or photos, starting in the
root directory folder and then continuing to order the track number sequentially in subdirectories as well. This
makes it quite easy to program playlists (using PROG function) of your selected favourites in an order that you
desire. This screen does not appear during DVD playback or regular format audio CD playback, but it does appear
for CD MP3 playback.
PHOTO SLIDE SHOW
The normal order for the playback of photos stored on an inserted media is as per the sequential order of the list-
ing displayed on the playback control interface. The device reads the root directory first, and then those photos
stored in subdirectories next, down the directory tree.
Transitions: During photo playback, press PROG on remote control to change the transition style. Keep pressing
the button to move through the different transition options, the last of which is RANDOM, which will play all of the
transition styles in random order for each slide in the directory. Following RANDOM is NONE i.e. no transition
style, which just flicks through the photos sequentially without adding any transition style.
Note: The functions for RANDOM, REPEAT, and PROG operate in much the same manner for photos / slides
stored in folders on a media, as they operate for music tracks. This enables a user to customize a slide show to
play in the order of their choosing, or repeat slides in a loop, or in a randomized order.
LCD READOUT MARKERS
•
CD:
CD inserted for playback.
•
VCD:
Video CD inserted for playback.
•
DVD:
DVD inserted for playback.
•
SD:
SD card inserted for playback.
•
USB:
USB memory stick inserted for playback.
•
MP3:
MP3 tracks being played.
•
:
Playback ongoing.
•
:
Playback paused.
•
LOAD:
Loading/reading a disc and/or media (USB or SD card).
•
NO DISC:
No disc inserted or disc ejected.
•
PH 00:
Pitch adjustment, 6 steps. Press Key HI or Key LO to adjust up/down.
•
REPEAT 1:
Repeat single track over again until cancelled.
•
REPEAT ALL:
Repeat every track on disc
•
REPEAT:
Repeat every track in folder of MP3s (only displays for MP3 media).
•
A
B:
Denotes playback of marked section of a track in a loop.
Note: When video out is connected to a monitor or TV, all of the LCD markers listed have similar ‘on screen’
equivalents that display simultaneously in the top left corner of the TV screen interface. When a remote control
button is pressed an activation word will display on screen, eg: PLAY, STOP etc.
TRACK PLAYBACK STATUS BAR
This appears on the top of the TV screen when the (display) or GOTO button on the remote control is pressed. It
also appears as soon as an audio CD is inserted and playback commenced. The audio CD status bar displays the
following information:
DISC OPERATIONS:
• This player accepts 12 cm discs like CD, CD-R, CD-RW, VCD, DVD, MP3, and CD-G discs. CD-ROM, CD-I and
CDV formats are not compatible with this device.
• This player can accepts format CD, MP3, VCD, DVD, JPG, CD-G, WMA and MPG.
• Insert a disc into the disc slot with the label side up and playback will start automatically.
• The words “DISC MODE” then “READ” will appear in the top left corner of the TV screen..
• To pause playback or resume normal playback, press PLAY/PAUSE on the unit or on the remote control.
• Press
REV
,
F.WD
, or
,
on the remote controller, to skip to the next or previous track number.
• To stop playback, press
STOP
or press
once on the remote control.
• Press FB, FF or
,
on the remote control, to activate fast forward or reverse until desired section is located
CD
TRK 1/12
MUTE ICON REPEAT ICON TIME ICON TIME PLAYING COUNTER
DVD TT 1/2 CH 2/44 TIME ICON TIME PLAYING COUNTER/ELAPSED
CD ROM TRK 1/12
MUTE ICON REPEAT ICON TIME ICON TIME PLAYING COUNTER


