5-8
5.4 Realtime Trend
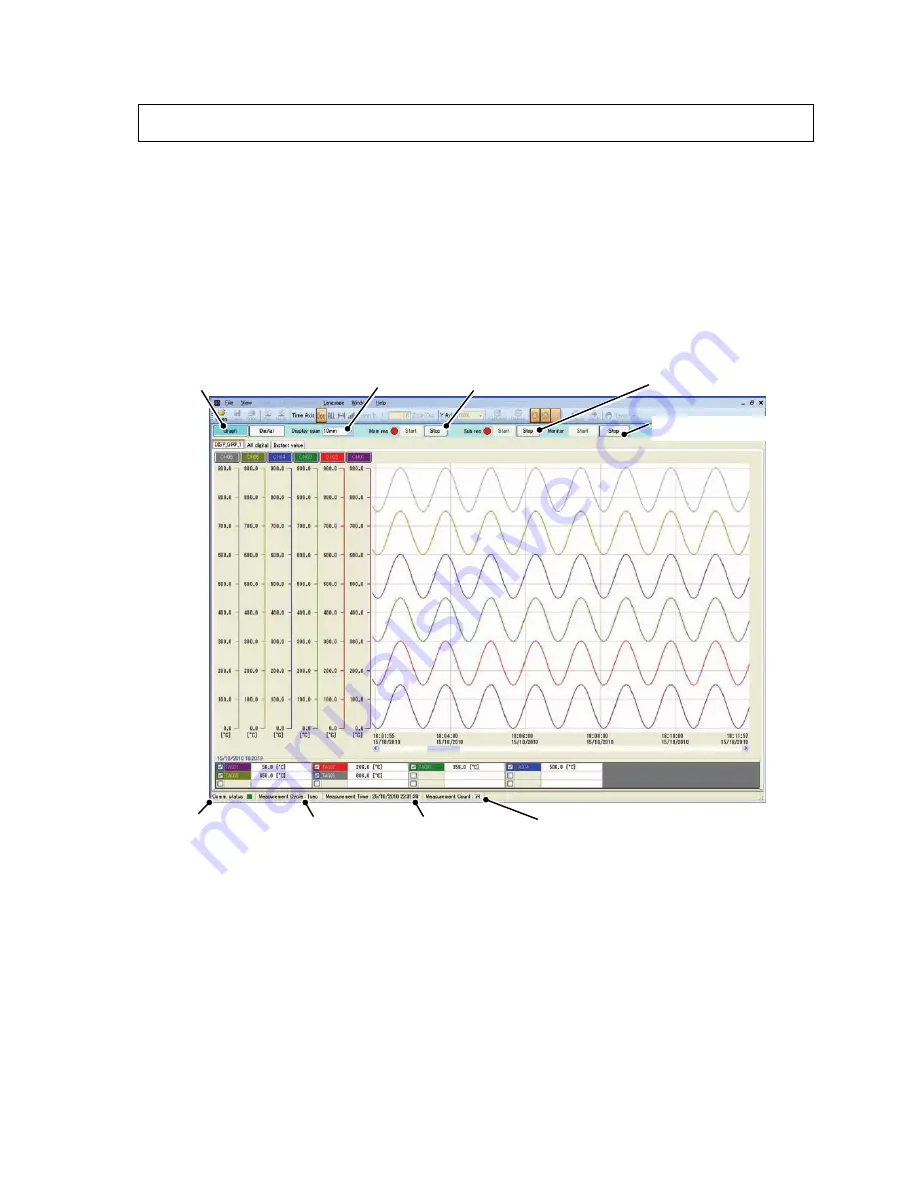
When the Paperless recorder connects to the personal computer, the “Realtime trend” is displayed
with the Data Viewer.
When you select “View”
⇒
“Realtime Trend” of the menu bar of the Data Viewer, the connection
with a Paperless recorder begins.
(Up to eight can be displayed simultaneously.)
※
Please match “IP Address” of Data Viewer and “IP Address” of Paperless recorder from
“Option”
⇒
“Communication” of the menu bar before it connects.
(
IP Address of a Paperless recorder can be set from “System”
⇒
“Comm.”
⇒
“Ethernet1”.
Refer the item 5.3 “
●
Example of setting telecommunication facility” for the details.)
①
Main record start / stop button (It supports since software version 1.20.)
The recorder start main recording and stop main recording.
②
Sub record start / stop button (It supports since software version 1.20.)
The recorder start sub recording and stop sub recording.
Sub record of a Recorder can record only during main record.
Moreover, [System]
⇒
[Device/Other]
⇒
[FUNC key] is "OFF". And, [Parameter]
⇒
[Record]
⇒
[Setting(Sub)]
⇒
[Sub rec timing] is need to “Func key”.
(Refer item 7.20 and 8.15 of Paperless Recorder Manual for "Record" and "FUNC key".)
③
Monitor start / stop button
②
Sub record start / stop button
①
Main record start / stop button
④
Graph display switch
⑤
Display span
⑥
Comm. status
⑦
Measurement Cycle
⑧
Measurement time
⑨
Measurement Count


