background image

11 


Maintenance 

5.1 

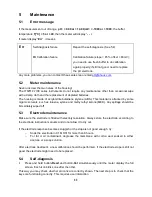
Error message 

If the measurement out of range,  

pH: < 0.00 or > 14.00;mV: < -1999 or > 1999

; the buffer 

temperature 

T[°C] < 5 or > 40

, then the meter will display “

- - -

“. 

If meter display “

Err

” , it means 


Err 


Self-diagnosis failure 


Or

 Calibration failure 


Repeat the self-diagnosis. (See 5.4) 


Calibration failure (slope < 85%, offset > 60mV); 

you need to use fresh buffer to do calibration 

again properly; if still not good, need to replace 

the pH electrode.


Any more problems, you can contact Ohaus sales rep or email 

[email protected]


5.2 

Meter maintenance 

Never unscrew the two halves of the housing! 
The 

STARTER 2100

 series instruments do not require any maintenance other than occasional wipe 

with a damp cloth and the replacement of depleted batteries. 
The housing is made of acrylonitrile butadiene styrene (ABS). This material is attacked by some 
organic solvents, such as toluene, xylene and methyl ethyl ketone (MEK). Any spillage should be 
immediately wiped off. 

5.3 

Electrode maintenance 

Make sure the electrode is filled with electrolyte solution. Always store the electrode according to 
the electrode instruction manuals and do not allow it to dry out. 
 
If the electrode response becomes sluggish or the slope is not good enough, try: 

o


Soak the electrode in 0.1M HCl for more than 8 hours. 

o


For  fat  or  oil  contaminant,  degrease  the  membrane  with  cotton  wool  soaked  in  either 
acetone or a soap solution. 

 
After electrode treatment, a new calibration should be performed. If the electrode slope is still not 
good, the electrode might need to be replaced. 

5.4 

Self-diagnosis 


Press  and  hold  button-

Read

  and  button-

Cal

  simultaneously  until  the  meter  display  the  full 

screen. Each icon blinks one after the other.  

This way you may check whether all icons are correctly shown. The next step is to check that the 
keys are functioning correctly. This requires user interaction. 

Summary of Contents for STARTER 2100

Page 1: ...STARTER 2100 Bench pH Meter Instruction Manual...

Page 2: ......

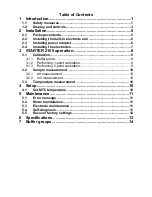
Page 3: ...tion 8 3 1 Calibration 8 3 1 1 Buffer group 8 3 1 2 Performing 1 point calibration 9 3 1 3 Performing 2 point calibration 9 3 2 Sample measurement 10 3 2 1 pH measurement 10 3 2 2 mV measurement 10 3...

Page 4: ......

Page 5: ...show the pH electrode performance Can recall last calibration data Quick Guide attached in the meter to help user operate 1 1 Safety measures Measures for your protection Never work in an environment...

Page 6: ...when the equipment is operated in a commercial environment This equipment generates uses and can radiate radio frequency energy and if not installed and used in accordance with the instruction manual...

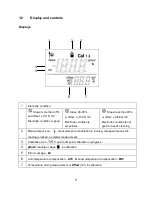
Page 7: ...trode condition is not good or needs cleaning 2 Measurement icon measurement or calibration is running disappear means the reading is locked no matter measurement 3 Calibration icon 1 point or 2 point...

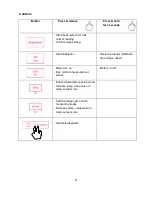
Page 8: ...ting Start calibration Review the latest calibration data slope offset Meter turn on Exit return to measurement screen Meter turn off Entered temperature setup mode Increase temp value when in temp se...

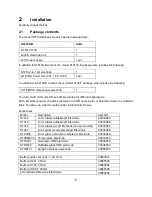
Page 9: ...able pH Electrode 83033965 ST210 2 in 1 plastic refillable pH Electrode 83033966 ST320 3 in 1 plastic gel pH Electrode no need to refill 83033967 ST230 2 in 1 glass muddy sample pH Electrode 83033968...

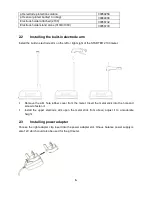
Page 10: ...ectrode arm on the left or right sight of the STARTER 2100 meter Remove the arm hole rubber cover from the meter Insert the metal stick into the hole and screw to fasten it Install the upper electrode...

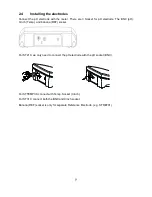
Page 11: ...pH electrode The BNC pH Cinch Temp and banana REF socket For ST210 we only need to connect the pH electrode with the pH socket BNC For STTEMP30 connect with Temp Socket Cinch For ST310 connect both t...

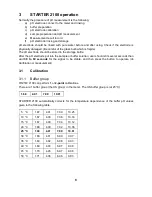
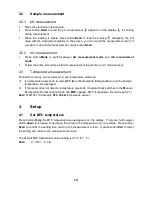
Page 12: ...le or buffer solution user should stir several seconds then wait 30 to 60 seconds for the signal to be stable and then press the button to operate do Calibration or measurement 3 1 Calibration 3 1 1 B...

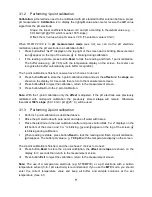
Page 13: ...libration return to the measurement screen Press button Cal to do the 2 point calibration Note With the 1 point calibration only the offset is adjusted If the pH electrode was previously calibrated wi...

Page 14: ...r accuracy we recommend to use temperature electrode If a temperature electrode is used ATC Auto Temperature Compensation and the sample temperature are displayed If the meter does not detect a temper...

Page 15: ...some organic solvents such as toluene xylene and methyl ethyl ketone MEK Any spillage should be immediately wiped off 5 3 Electrode maintenance Make sure the electrode is filled with electrolyte solut...

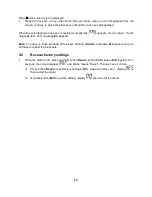
Page 16: ...message Err appears Note You have to finish pressing all five keys within 2 minutes otherwise Err appears and you will have to repeat the procedure 5 5 Recover factory settings When the meter is off...

Page 17: ...5 C Calibration 1 or 2 points 1 predefined buffer group 4 01 7 00 10 01 Memory Recall last calibration data Power supply 110 240V 50Hz DC 12V Size weight Approximately 220 W x 175 D x 78 H mm 0 75 kg...

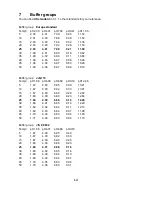
Page 18: ...10 10 Buffer group JJG119 Temp pH1 68 pH4 00 pH6 86 pH9 18 pH12 46 5 1 67 4 00 6 95 9 39 13 21 10 1 67 4 00 6 92 9 33 13 01 15 1 67 4 00 6 90 9 28 12 82 20 1 68 4 00 6 88 9 23 12 64 25 1 68 4 00 6 86...

Page 19: ...rporation 7 Campus Drive Suite 310 Parsippany NJ 07054 USA Tel 973 377 9000 Fax 973 944 7177 With offices worldwide www ohaus com pH ohaus com PN 30031622 A Ohaus Corporation 2013 all rights reserved...

Reviews: