OCULUS Binoptometer 4P Instruction Manual Download Page 27

9  Conducting an Examination

Instruction Manual Binoptometer® 4P (G/59860/1016/en)

23 / 55

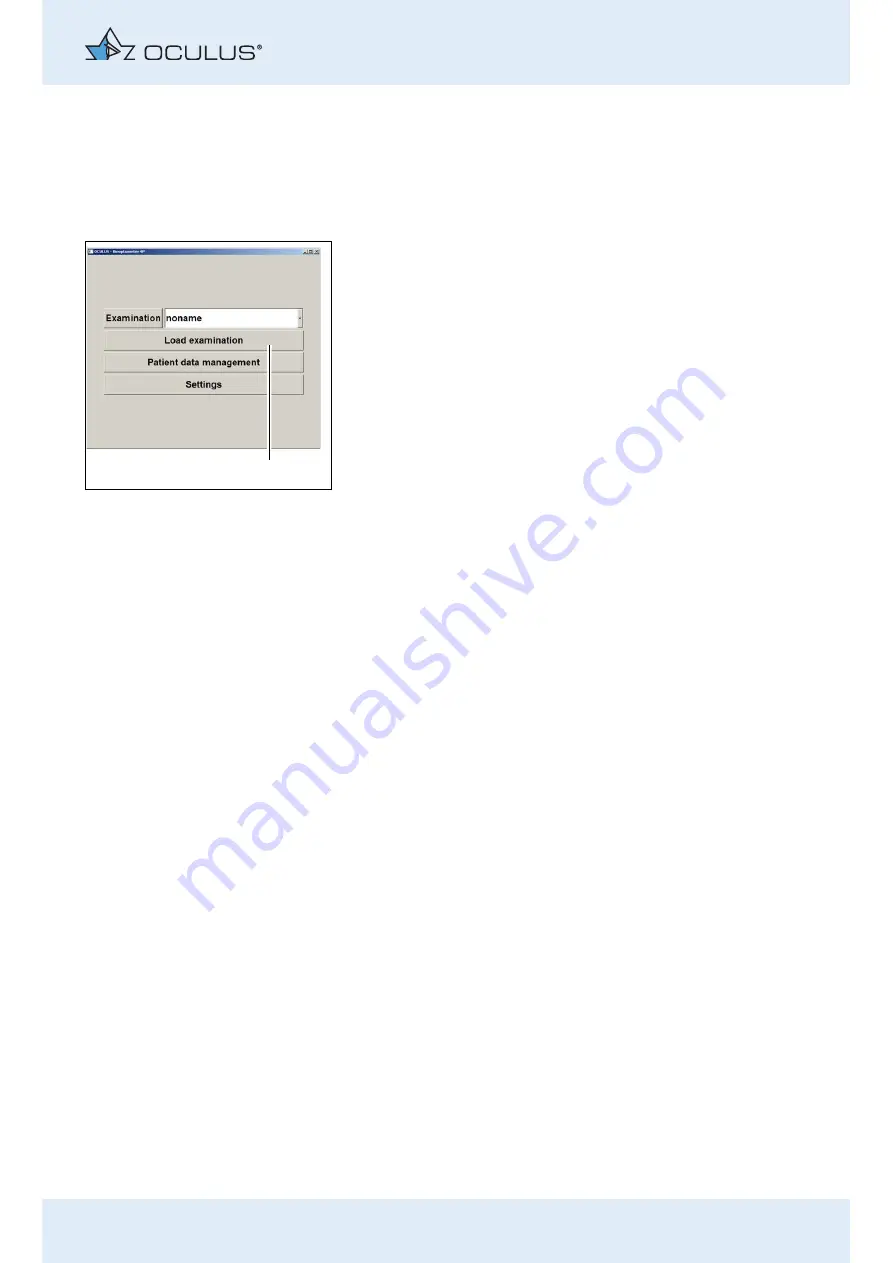
Show "Load examination"

If you do not work with the OCULUS patient data management, you can 
use this function to load an existing examination.

"Miscellaneous” box 

(fig. 9-5, page 21, item 9)

:

Enable the [Show "Load examination"] checkbox.

The according button (1) will be added in the "Binoptometer® 4P" 
menu.

Display Gender

"Miscellaneous” box 

(fig. 9-5, page 21, item 10)

:

Activate the [display gender of patient] checkbox.

Now you can record the gender of the patients in the list of patients.

Full Screen Display

"Miscellaneous” box 

(fig. 9-5, page 21, item 10)

:

Enable the [full screen at startup] checkbox.

Enable Demo Mode

This function is for demonstration purposes only, if a Binoptometer® 4P is 
not connected to your laptop/netbook/PC.

"Miscellaneous” box 

(fig. 9-5, page 21, item 10)

:

Enable the [Demo Mode] checkbox.

Fig. 9-7: Button [Show "Load examination"] 

1

Summary of Contents for Binoptometer 4P

Page 1: ...OCULUS Binoptometer 4P OCULUS Binoptomete INSTRUCTION MANUAL Vision Test Device...

Page 2: ...noptometer 4P you can determine visual acuity test binocular vision color vision contrast sensitivity and peripheral visual field perception You also have the option to test mesopic vision and glare s...

Page 3: ...2 Connecting 13 7 3 Software Installation 14 8 Daily Startup 15 8 1 Setup and Connection for Daily Operation 15 8 2 Clean the Device Viewer 16 8 3 Use of the External Light Shield 16 8 4 Turning On 16...

Page 4: ...Disassembly and Packing 42 12 2 Transport and Storage 43 13 Disposal 44 14 Troubleshooting 44 15 Terms of Warranty and Service 45 15 1 Terms of Warranty 45 15 2 Assumption of Liability for Functions a...

Page 5: ...glass wipes 10x double pack 59869 05490175 05490165 Device connection lead 2 5 mm black 05200320 Software module Binoptometer 4P 59866 USB memory stick with software 59880 USB cable 80 cm Alternative...

Page 6: ...t 2 Symbols on the Equipment Graphic symbols on packaging 1 Company logo address 8 Heed Instruction Manual 2 Disposal in household trash is prohibited 9 Fuses 3 Type B applications only 10 US patent n...

Page 7: ...lained and more detailed information about the Patient Data Management system is given Software Installation The introduction to the Software Installation describes how to install the Binoptometer 4P...

Page 8: ...ment When the device is delivered with a netbook Read the User Instructions for the netbook Observe the legal requirements for accident prevention 4 1 1 Used Graphic Symbols Caution Denotes a potentia...

Page 9: ...onnection Do not use or store the Binoptometer 4P in rooms that are humid Keep the Binoptometer 4P away from water that may drip surge or splash on it and make sure that no liquids can enter the devic...

Page 10: ...contact with any part of a medical electrical equipment ME equipment or with another person being in contact with the ME equipment In the patient environment use devices that conform to IEC 60601 1 I...

Page 11: ...f the Binoptometer 4P Only operate the equipment after your have read and understood the User Instructions Do not touch the patient and the device at the same time Make sure that the device cannot tip...

Page 12: ...the Binoptometer 4P to the power supply you must heed the following information Use an extension cord that complies with the requirements of DIN EN ISO 60601 1 20005 section 16 Do not place the multip...

Page 13: ...Velhagen Broschmann color charts and Matsubara color charts Contrast sensitivity testing under photopic conditions Mesopic twilight vision test with and without glare in acc with DIN 58220 Part 7 DVLA...

Page 14: ...ield 2 Forehead rest 3 Viewing window 4 Knob to adjust the viewing angle 5 Indicator light 6 Netbook laptop PC connection 7 Rocker switch for height adjustment optional Fig 6 1 Front View 8 Handhold 9...

Page 15: ...ved downward down gaze angle Viewing window fig 6 1 page 10 item 3 The light protected yet open viewer prevents interfering reflections and contributes to a pleasant test atmosphere Rocker switch for...

Page 16: ...em 8 Place the Binoptometer 4P on a level surface Position the Binoptometer 4P so that the patient is not affected by sunlight or artificial light sources Avoid reflections from windows mirrors etc on...

Page 17: ...ometer 4P and the computer that is being used with the unit if applicable into the multiple socket extension cord Use a socket with a protective earth connection which is fully operating Connect the u...

Page 18: ...the plug is inserted in the correct position Heed the manual of the netbook laptop PC 7 3 Software Installation Before first use you must install the Binoptometer 4P software on your laptop or PC Proc...

Page 19: ...tometer 4P devices 8 1 Setup and Connection for Daily Operation The ambient conditions are given in Ambient Conditions page 48 Take the Binoptometer 4P from the trolley bag Lift it with the handhold 1...

Page 20: ...if you cannot darken the room You need the external light shield optional extra for this purpose Hook the external light shield into place at the holder 1 Secure the external light shield with the sec...

Page 21: ...formation about the screening programs of individual tests and how to proceed can be found in the User Guide The following steps are part of the examination Find the patient in the patient data manage...

Page 22: ...icon It then displays the user interface for patient data management To get to the Binoptometer 4P program you must first enter a new patient 8 or select an existing patient from the patient list 7 1...

Page 23: ...patient name to start the Binoptometer 4P program 9 1 3 Selecting an Existing Patient The patient list on the left hand side of the screen displays all previously examined patients in alphabetical ord...

Page 24: ...4P menu is displayed The following settings can be changed Select language and change units of measure page 21 Set the date format page 21 Change font size of examination display page 22 Change the vi...

Page 25: ...start of the Binoptometer 4P Activate the checkbox Show metric values to switch over to metric units of measure If the checkbox is deactivated the units of measure are output in a non metric system o...

Page 26: ...ses Miscellaneous box fig 9 5 page 21 item 10 If you activate this function the examination program displays a selection of corrective lenses which can be placed in front of the patient s eyes during...

Page 27: ...the Binoptometer 4P menu Display Gender Miscellaneous box fig 9 5 page 21 item 10 Activate the display gender of patient checkbox Now you can record the gender of the patients in the list of patients...

Page 28: ...al software modules see User Guide Press the Options button fig 9 5 page 21 item 4 The current software status is displayed 3 Have the serial number SN see rating plate of the Binoptometer 4P availabl...

Page 29: ...ilable in the network The Options list 1 lists the available options Release status of the option 2 Yes License for the option is present No License for the option is not present You need the field Li...

Page 30: ...n results CSV Export of the examination data to an Excel file Change the Presentation Time of the Colour Test With this screen function you can set the length of time that the color charts are present...

Page 31: ...intout such as e g your office address Press the button 3 to find the file that contains the wanted image e g your office logo and confirm your selection In the in the input field Miscellaneous 4 enab...

Page 32: ...ents in the patient list and possibly changed the settings you must now prepare the patients for the examination Check to be sure that any adaptation disorder has been resolved Check the patient s gla...

Page 33: ...he patient is sitting properly if he keeps his head straight and is relaxed Via the Binoptometer 4P program Press the appropriate arrow button see fig 9 19 page 32 item 9 Make sure that the forehead o...

Page 34: ...t Patients with multi focal or progressive lenses Change the viewing angle if the test distance is shortened The selected viewing angle is displayed in the test menu see fig 9 19 page 32 item 5 We rec...

Page 35: ...y press the Binoptometer 4P button in the patient data management to start the Binoptometer 4P program The following dialog is displayed Press the button 1 A drop down list of all predefined applicati...

Page 36: ...ual tests and how to proceed can be found in the User Guide 1 Header with information about patients 6 Arrow keys for steps back and next 2 Test pattern display 7 Slider to adjust the test distance 3...

Page 37: ...the data on a USB stick and print them later from a different netbook laptop or PC The Binoptometer 4P software must be installed on the other device For more information see Exporting Results via the...

Page 38: ...the examination menu If you are not working with the OCULUS Patient Data Management you can nevertheless load an existing examination To do so you must have activated the appropriate button in the set...

Page 39: ...you want to transport or store the Binoptometer 4P after an exam you must proceed in the proper manner Proceed as described in sec 12 page 42 Caution Risk of electric shock if the Binoptometer 4P is...

Page 40: ...t The following dialog is displayed The default options for import and export of data are configured in the settings field See also User Guide Depending on the settings you may not have to perform all...

Page 41: ...re configured in the settings field See also User Guide Depending on the settings you may not have to perform all of the following steps e g selection of the directory Select the option 5 which contai...

Page 42: ...descriptions and directions for use of products you use to care for clean and disinfect the unit and or its accessories Do not clean the Binoptometer 4P with aggressive chlorinated abrasive or sharp c...

Page 43: ...the lenses with a soft cloth or lens brush and if necessary with alcohol or a lens cleaner 11 2 Disinfection Materials needed Disinfection and cleaning kit included Alternative Mikrozid sensitive wipe...

Page 44: ...off sec 9 8 page 35 Pull the power plug before maintenance When disconnecting electrical connections pull on the respective plug and not on the cable itself Note Faulty examinations due to damaged equ...

Page 45: ...nplug the power cord Unplug the power cord from the Binoptometer 4P Press the latches on the sides 1 together Pull the fuse holder 3 out Replace the blown fuse A blown fuse is indicated by burnt out f...

Page 46: ...rds somewhat to release the lock That way the cable and plug are not damaged Remove the lightproof viewer if applicable Pick up the Binoptometer 4P with the handhold and insert it into the transport b...

Page 47: ...Note Equipment damage due to improper transport and storage Avoid shocks vibration and dust Avoid high temperatures and moisture Transport the Binoptometer 4P in a compliant manner Store the Binoptom...

Page 48: ...damage due to improper troubleshooting If an error occurs which you are unable to correct by following the instructions below label the device as out of order and contact our service department or an...

Page 49: ...persons interfere with the PC hardware and software supplied Report any transport damage to the shipper immediately upon delivery Have the damage confirmed on the bill of lading so that an orderly ha...

Page 50: ...for this purpose OCULUS will supply authorized persons with spare parts lists and additional descriptions Make certain that only original OCULUS parts are used 15 3 Manufacturer and Service Address S...

Page 51: ...16 Declaration of Conformity Instruction Manual Binoptometer 4P G 59860 1016 en 47 55 16 Declaration of Conformity...

Page 52: ...re via a PC laptop netbook Electric height adjustment optional Rocker switch on the device The measuring head can be adjusted by motor via the software Eye cover LCD shutter Test field luminance appro...

Page 53: ...protection against electric shock Type B Housing protection class IP 20 Ambient temperature 30 C to 70 C Relative humidity including condensation 10 to 90 Air pressure 500 hPa to 1060 hPa Binoptomete...

Page 54: ...g the examination is permissible as it does not affect the diagnosis treatment and monitoring A brief interruption of the USB connection during the examination is permissible as it does not affect the...

Page 55: ...ative USB connection cable Alternative USB connection cable 0 8m 3 m 1 8 m Guidance and manufacturer s declaration electromagentic emmissions IEC 60601 1 2 5 2 2 1 table 1 The OCULUS Binoptometer 4P i...

Page 56: ...V differential mode 2 kV line s to earth Mains power quality should be that of a typical commercial or hospital environment Voltage dips short interruptions and voltage variations on power supply inpu...

Page 57: ...than the compliance level in each frequency range b Interface may occur in the vicinity of equipment marked with the following symbol Note 1 Note 2 At 80 Hz and 800 MHz the higher frequency range app...

Page 58: ...uipment Rated maximum output power of transmitter W Separation distance according to frequency of transmitter m 150 KHz to 80 Mhz d 1 2 P 80 MHz to 800 MHz d 1 2 P 800 MHz to 2 5 GHz d 2 3 P 0 01 0 12...

Page 59: ...dix Instruction Manual Binoptometer 4P G 59860 1016 en 55 55 18 3 Description of the Connection Computer PC laptop Mains connection Binoptometer 4P USB connection cable 025986000002 025986000004 02598...

Page 60: ...nchholzh user Stra e 29 D 35582 Wetzlar Tel 49 0 641 2005 0 Fax 49 0 641 2005 255 E mail sales oculus de www oculus de USA OCULUS Inc 17721 59th Avenue NE Arlington WA 98223 1337 Tel 1 425 670 9977 Fa...

Reviews: