8
6. mount the console to the console mast
Note: Record the serial number of your console, located on the lower edge of the console, before
attaching the console to the console mast. (If you have installed the optional LCD Mounting Arm,
and mounted the console to the mast according to those instructions, skip to Step 7.)
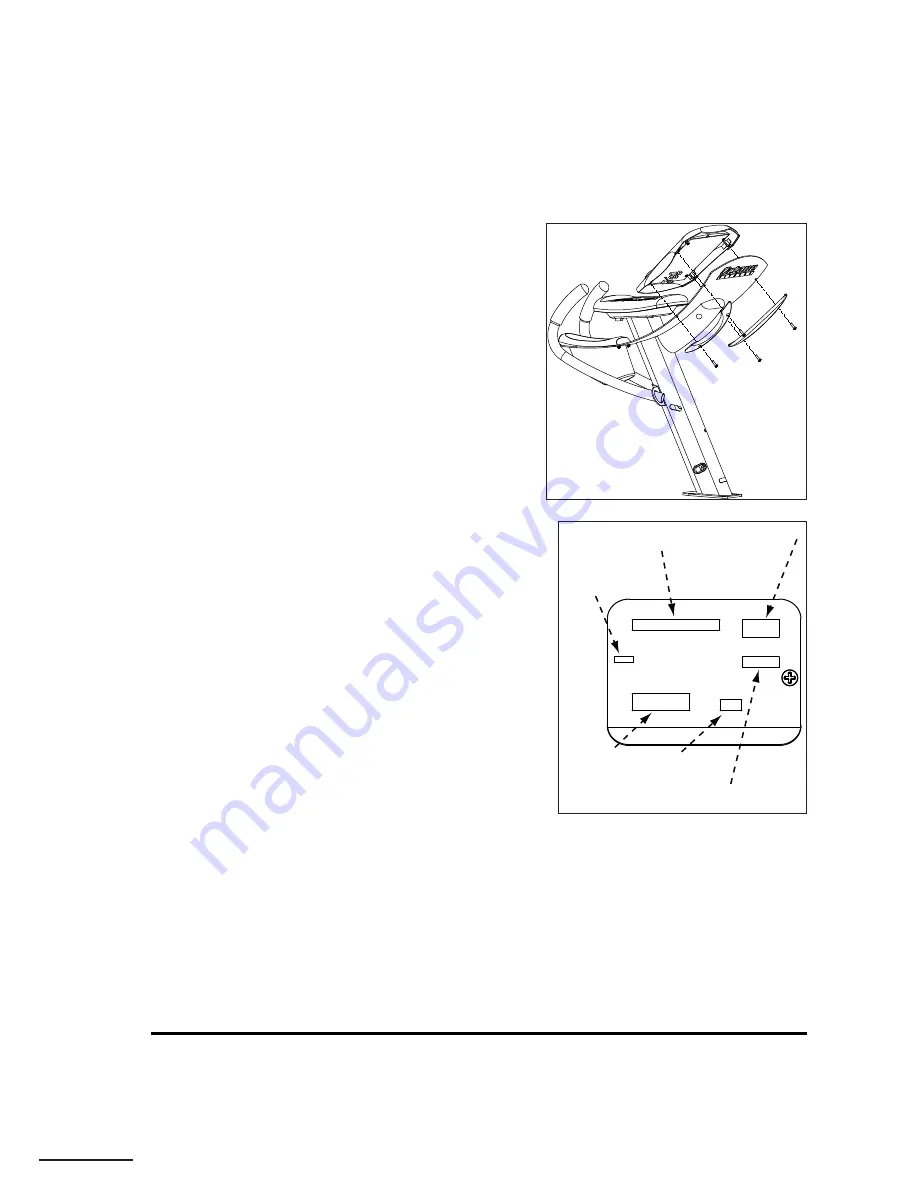
a. Position the console (1) on the plate at the top of the
mast (B) and place the left back arc (3) behind it. Holding
both in place, insert two of the 18mm Phillips screws (5)
partially through the back arc (3) and the mast plate into
the console back. Repeat on the right side. Tighten all
screws to secure.
b. Attach the white 14-pin main connector to its connection
on the back of the console.
c. Attach the black keypad connector to its connection on
the back of the console.
d. Attach the metal connector on the green ground wire
that is connected to the back of the mast plate to its
connection on the back of the console.
e. Attach the white 3-pin heart rate connector to its
connection on the back of the console.
f. If applicable for your installation, attach the white 5-pin
CSAFE connector to its connection on the back of the
console.
g. Pedal the unit and verify that the console LEDs light and
that a heart rate reading is displayed when you grasp
the contact handgrips on the moving handlebars. If
any issues are detected, recheck the connections, then
contact Octane Fitness Customer Service for assistance.
Once you have verified these functions, proceed with
remaining steps.
h.
Tug each cable gently to ensure each connector is
completely seated.
i.
Make sure excess cable is pushed into the mast
tube
.
j. Reposition the console back piece and reattach it using
the two screws provided
.
Keypad
(black)
Console to Base
(white, 14-pin)
Heart Rate
(white, 3-pin)
Console Ground
(metal; green wire)
Software Update
(black)
CSAFE Audio
(white, 6-pin)


