


3
Configuring the Ocean ST
The Ocean ST can be used with OceanView software when connected to the USB port. If you have followed the previous steps and started your spectroscopy
application, the spectrometer is already acquiring data. Even with no light in the spectrometer, there should be a dynamic trace displayed in the bottom of the
graph. If you allow light into the spectrometer, the graph trace should rise with increasing light intensity. This means the software and hardware are correctly
installed.
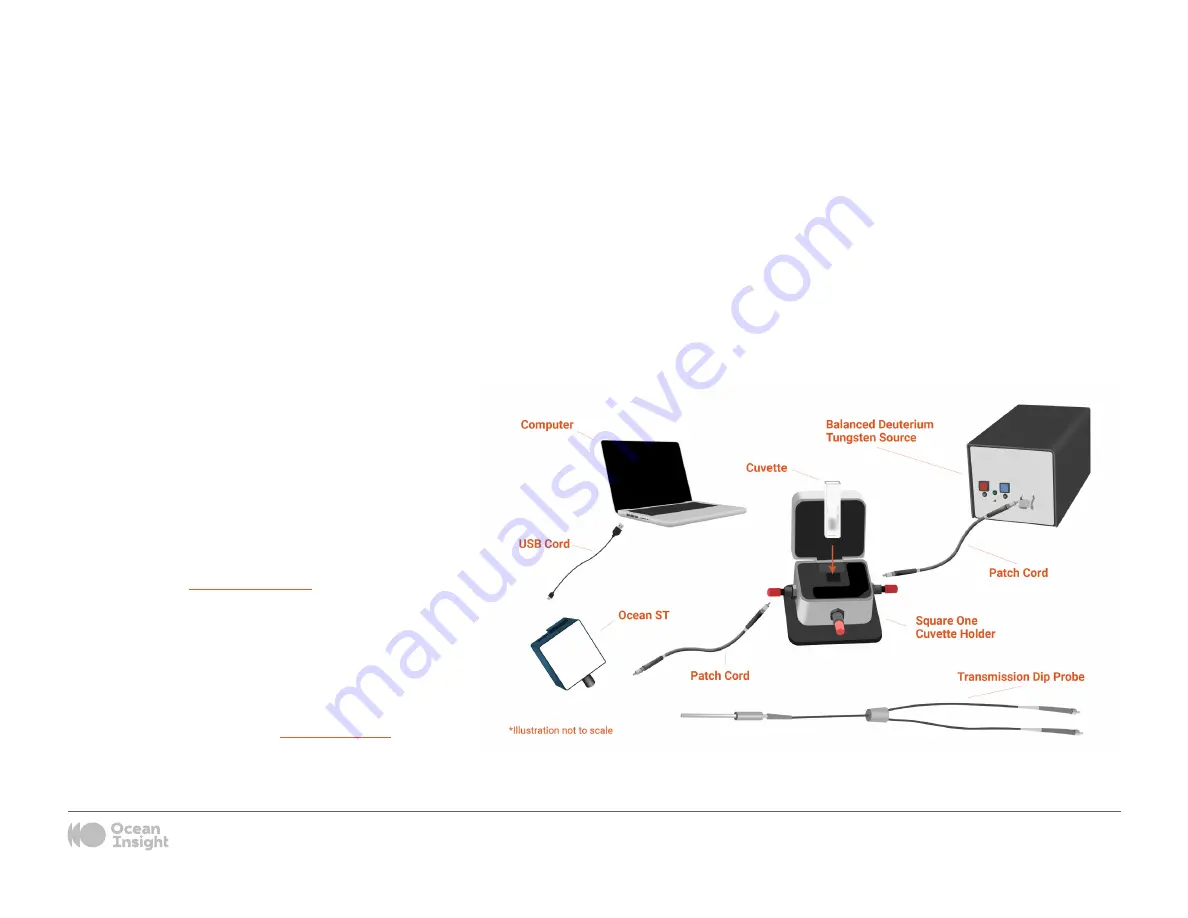
Hardware Setup
The Ocean ST Spectrometer connects to a computer via the USB port. When connected through a USB 2.0 or 1.1 port, the spectrometer draws power from the
host computer, eliminating the need for an external power supply
Follow the steps below to connect the OCEAN ST to a computer via the USB port:
1. Install the spectrometer operating software on the
destination computer.
2. Locate the USB cable (CBL-USB-AMCM) provided with the
Ocean ST.
3. Insert the micro connector end of the cable into the side
of the Ocean ST and the larger end of the cable into the USB
port of the computer.
4. Connect any spectroscopy accessories. To find operating
instructions for Ocean ST-compatible products (such as light
sources, sampling chambers, and probes), consult the Ocean
Insight website at
5. Attach the fiber to the fiber optic connector on the
spectrometer.
If you installed the spectrometer operating software prior to
connecting the Ocean ST, the software automatically installs
the correct drivers. If the drivers do not successfully install
(or if you connected the Ocean ST to the computer before


