background image

4

Security settings in the Web page

When the machine is used as a network printer and the Pull Print function is used, the data
security kit enables authentication of the user by means of a "USER NAME" and
"PASSWORD". (The Pull Print function allows a file on a previously stored FTP server to be
printed directly from the operation panel of the machine without using the printer driver; see
"Directly printing a file on an FTP server" on page 5-7 of the "OPERATION MANUAL (for
printer)".)

User authentication is enabled by selecting the "Enable User Authentication" checkbox in
the machine's Web page for Pull Print function settings. (This checkbox appears when the
data security kit is installed, and is initially selected (a checkmark appears)).
System requirements and the procedure for accessing the Web page containing this
checkbox are explained in "REMOTE OPERATION VIA A NETWORK" on page 5-2 of the
"OPERATION MANUAL (for printer)". The checkbox appears in the screen shown in step 2
of "

■ 

Storing an FTP server" on page 5-7 of the "OPERATION MANUAL (for printer)".

Procedure for directly printing a file on an FTP server when
user authentication is enabled

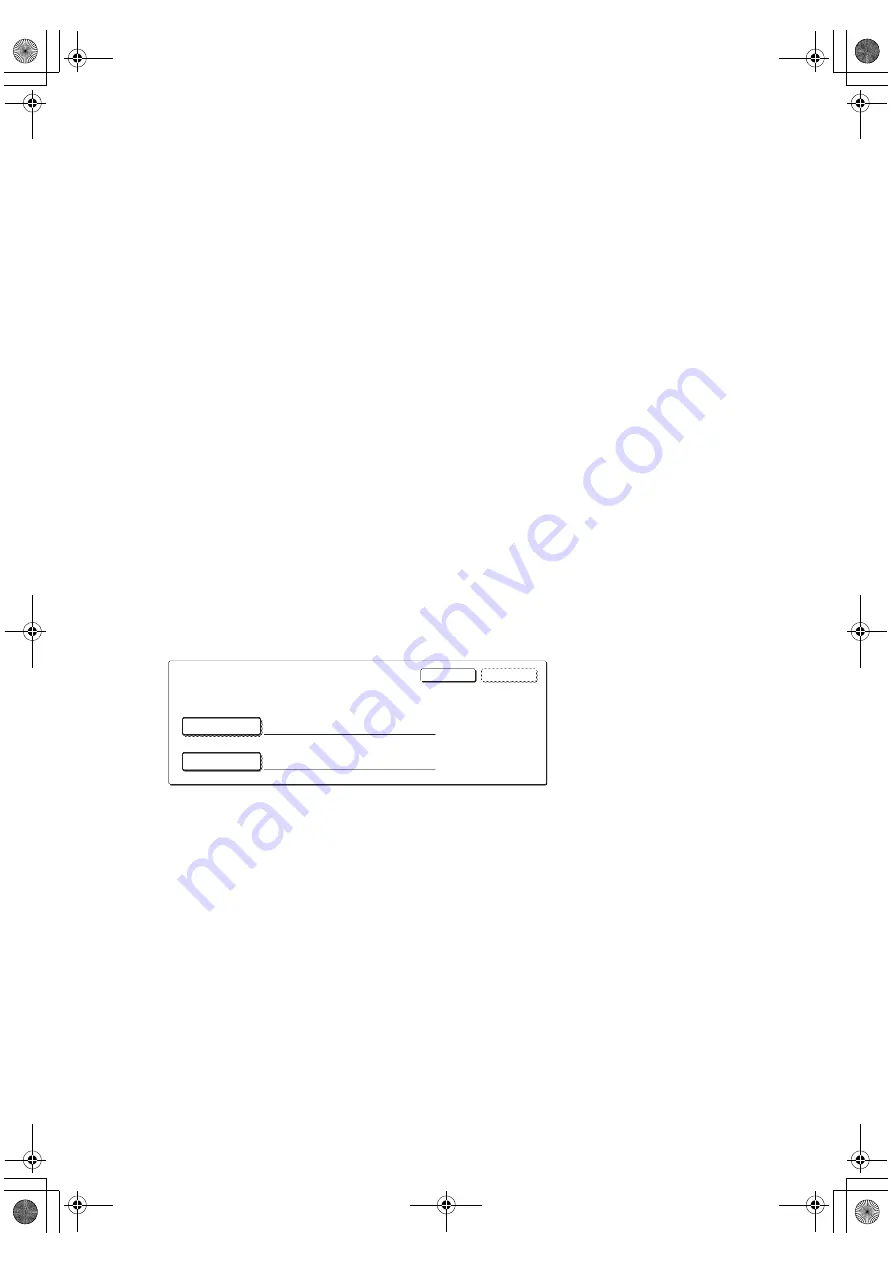
Your user name and password must be entered following selection of the FTP server that
contains the file to be printed from the touch panel of the machine.
When the FTP server is selected in step 3 of "

■ 

Printing a file on an FTP server from the

operation panel of the machine" on page 5-7 of the "OPERATION MANUAL (for printer)",
a screen will appear prompting you to enter your user name and password for the FTP
server.

Press the [USER NAME] key to enter your user name and the [PASSWORD] key to
enter your password. A letter entry screen will appear in each case. When you have
finished entering your user name/password, touch the [OK] key.
After entering your user name and password, continue from step 4 on page 5-8 of the
"OPERATION MANUAL (for printer)".

USER NAME 

PASSWORD

OK

CANCEL

ENTER THE USER NAME AND PASSWORD FOR FTP SERVER.

MX-FRX7U.book  4 ページ  2007年6月12日 火曜日 午前8時10分

Summary of Contents for im4512

Page 1: ...cover_12 fm 1...

Page 2: ...MX FRX7U book 2...

Page 3: ...e job of administrator for the data security kit Be sure to change the administrator password immediately each time a new person takes over as administrator Change the administrator password on a regu...

Page 4: ...e entry of the user or admin password will be prohibited for 5 minutes NOTE Some of the procedures for operating the machine change when the data security kit is installed The OPERATION MANUAL for gen...

Page 5: ...ow based on the configuration of the server machine and client machine whether or not the data security kit is installed NOTE If the machine power is turned off before jobs are finished the data may n...

Page 6: ...the OPERATION MANUAL for printer The checkbox appears in the screen shown in step 2 of Storing an FTP server on page 5 7 of the OPERATION MANUAL for printer Procedure for directly printing a file on a...

Page 7: ...ed settings related to security with the exception of SSL SETTINGS and ENABLE IPsec are added to the settings that appear when the SECURITY SETTINGS key is touched The security settings menu consists...

Page 8: ...lace the percentage of data cleared and the number of repetitions is displayed When the data has been cleared the power briefly turns off and then automatically turns on again NOTE In the event that t...

Page 9: ...IMAGE SEND REGISTERED DATA This setting is used to clear the items indicated below which cannot be cleared or initialized using the CLEAR ALL MEMORY setting page 6 or RESTORE FACTORY DEFAULTS page 15...

Page 10: ...Touch the or key to move between the screens After selecting the data to be cleared touch the OK key No checkboxes are initially selected NUMBER OF TIMES POWER UP AUTO CLEAR PROGRAM IS REPEATED This...

Page 11: ...ument is left on an output tray after being printed in printer mode it is possible that another person might take the document and leak sensitive information This program is used to disable all print...

Page 12: ...s when COMPLETE is selected in the job status screen is displayed page 1 15 of the OPERATION MANUAL for general information and copier operation The setting can be selected separately for PRINT JOB SC...

Page 13: ...en When there are no locked jobs the RELEASE THE LOCK ON PRINT HOLD DATA MANIPULATION key in the SECURITY SETTINGS menu screen is grayed out PRODUCT KEY To initially enable the security function you m...

Page 14: ...MX FRX7U book 12...

Page 15: ...t appareil num rique de la classe A est conforme la norme NMB 003 du Canada Note This equipment has been tested and found to comply with the limits for a Class A digital device pursuant to Part 15 of...

Page 16: ...PRINTED IN JAPAN 2007L DSC1 CINSE3947FC51 cover_34 fm 2...

Reviews: