Wide
Format
March 8, 2009
Océ Arizona 350 GT Printer
www.bertl.com
Copyright © 2008 BERTL, Inc.
March 8, 2009
All Rights Reserved. The license under which this document is made available and applicable law prohibit any reproduction or further transmission of any portion of this document. This
document may only be viewed electronically through the www.BERTL.com Web site and may not be stored in electronic or hard copy format. Any reproduction of trademarks is strictly
prohibited. BERTL accepts no responsibility for any inaccuracies or omissions contained in this document.
Page 13
RIP has a preflight mode that brings up a dialog box for the print jobs,
allowing for quick modification. The ONYX ProductionHouse RIP has
countless print and job setting parameters that can be set and fine tuned to
the print media. To make life easy, you can create quick sets beforehand for
certain standard types of printing. A quick set is a collection of print
parameters that you apply to a job. A quick set is inferred by its name and
makes it quick to apply all relevant print settings in a single operation. The
quick sets records media and page size, print mode, color management
profiles to be used, sizing rules, control of output options, rotation, number of
copies, tiling, print marks, default crop area, and various PostScript options.
When you submit a print job to the print queue, you can either automatically
or manually launch the Preflight dialog box as needed. The Preflight dialog
box allows you to make any last minutes changes or fine tuning of parameters
from the chosen quick sets.
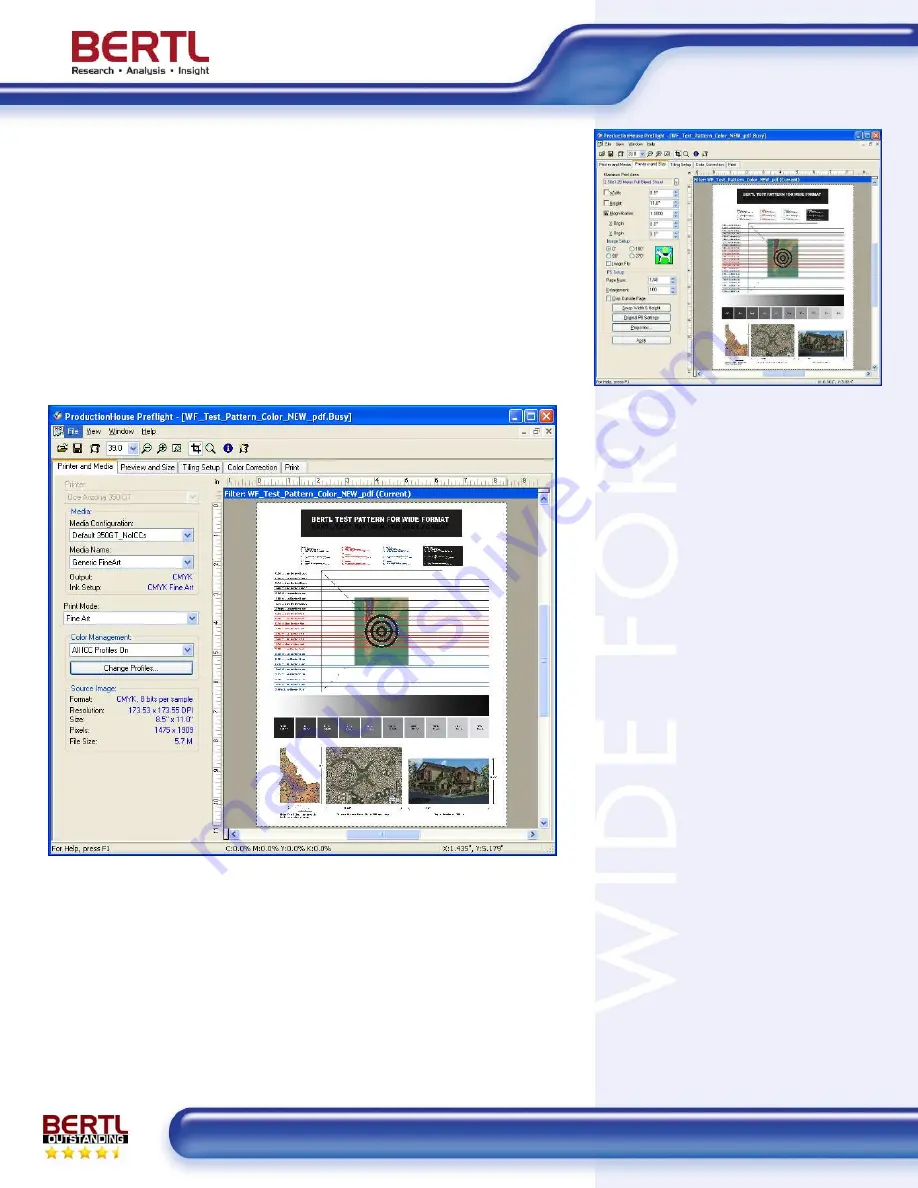
The Preflight dialog box is an efficient way to make last-minute changes in the
print settings for a print job.
The Preflight dialog box has five different tabs controlling how the image will
be printed. The first tab
Printer and Media
controls the media configuration
and print mode. The second tab
Preview & Size
controls what part of your
media is printing with an easy way to crop the image, so you only print the
part that you need, plus image rotation and enlargement or reduction of the
image.
The Preview and Size tab allows you to
crop, reduce or enlarge an image.
The third tab
Tiling Setup
can enable
tiling. Tiling separates a job into two or
more pieces and lets you print an image
larger than your page size or break an
image into specific sizes for display and
mounting purpose.
The fourth tab
Color Correction
allows
you to adjust the color in your image
using several tools like Primary Color
levels, Color/Gray level, White/Black
limits, Color replacement, Spot layer, and
lastly for the real professional, you can
apply color filters.
The last tab is the
tab, and it is used
for submitting the job and controlling the
workflow by adding after-processing
options like deleting the source image and
after-printing options like archiving the job
or deleting the job after printing. If a job is
archived, it is moved to the buffered job
area on the main screen and can easily
be accessed and reprinted.


