


NXP Semiconductors
UM10276_1
TED-Kit 2 User Manual
All information provided in this document is subject to legal disclaimers.
© NXP B.V. 2010. All rights reserved.
User manual
Rev. 1.29 — 20 August 2010
13 of 79
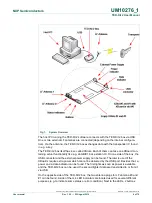
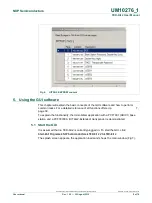
In Fig 11 there is one TED-Kit 2 box connected with one ABIC1 base station XBoard.
Thus, the Immobilizer applet could be started.
To run an RKE or PKE applet, a LoPSTer XBoard is required. Because the current TED-
Kit 2 does not have any, the Immobilizer/RKE and the Immobilizer/RKE/PKE applet trees
are grayed out.
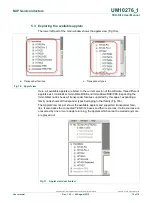
To run any of them, the current TED-Kit 2 box must be equipped with a proper LoPSTer
board or a second TED-Kit 2 box (with at least one ABIC1 XBoard and one LoPSTer
board) must be plugged-in. This can be done without closing the TED-Kit 2 GUI.
Note: If an applet (e.g. Immobilizer) consumes all remaining resources, the af-
fected parts of the applet view are also grayed out to avoid starting applets without
having proper hardware resources.
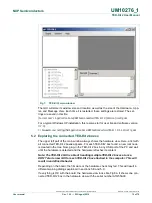
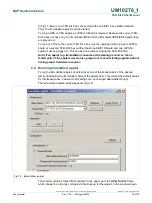
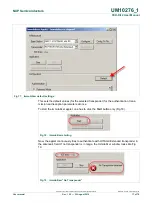
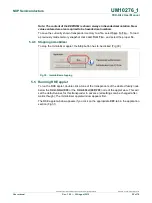
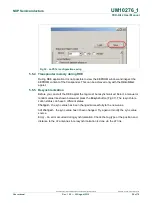
5.4 Running immobilizer applet
To run the Immobilizer applet, double click at one of the transponders of the desired
family node below the Immobilizer node of the applet view. This will set the default values
for this transponder in advance (all settings can be changed afterwards though).
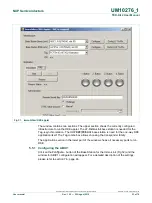
The Immobilizer applet window appears (Fig 12).
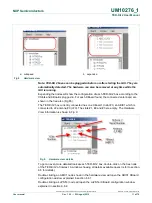
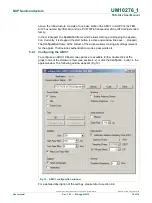
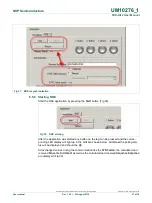
Fig 12. Immobilizer applet
The window contains three different parts: In the upper part, the
I
I
n
n
f
f
r
r
a
a
s
s
t
t
r
r
u
u
c
c
t
t
u
u
r
r
e
e
frame
which shows the currently configured infrastructure for the applet. In the window shown