


10
LOOPING
The MIXDECK has a seamless looping feature, which means that if you define a loop, there is no delay when the music loops
back to the beginning. This looping feature allows you to be very creative with your mixes, allowing you to extend desired
sections of a song for as long as you want, or create remixes on the fly!
There are three buttons used for looping:
LOOP IN:
This is the point where you would like a loop to start. By default, a "loop in" point is automatically set at the
beginning of the song. To define a new "loop in" point, press the LOOP IN button when the song reaches the desired point
where you would like a loop to begin. The LOOP IN button will light, indicating a new "loop in" point has been set. The
RELOOP/STUTTER
button will also illuminate indicating that you can now press it to immediately go back to the "loop in" point
and begin playing. If you wish to change the "loop in" point, just press the LOOP IN button again.
LOOP OUT:
Sets the end point of the loop. The first time you press LOOP OUT while a song is playing, the LOOP OUT button
will blink, and the song will begin playing in a seamless loop, starting from the "loop in" point and ending at the "loop out" point.
To release, or end the loop, press LOOP OUT a second time and play will continue forward when the song passes the
previously set loop out point. The LOOP OUT button will then be continuously lit, indicating that the loop is now in memory for
re-looping purposes.
RELOOP / STUTTER:
Repeats play or "stutters" (if repeatedly tapped) from the loop in point. If a loop has previously been
set, it plays and repeats that loop, until the loop is released by pressing the LOOP OUT button.
SHIFT
: Adjusts the loop length by half length or double length increments. Move the shift switch to the right to increase loop
length or to the left to shorten the loop.
Hint: The assignable 1-2-3 TRIGGER BUTTONS can be used as a second set of loop buttons. Read the preceding
chapter for more information on these multi-mode trigger buttons.
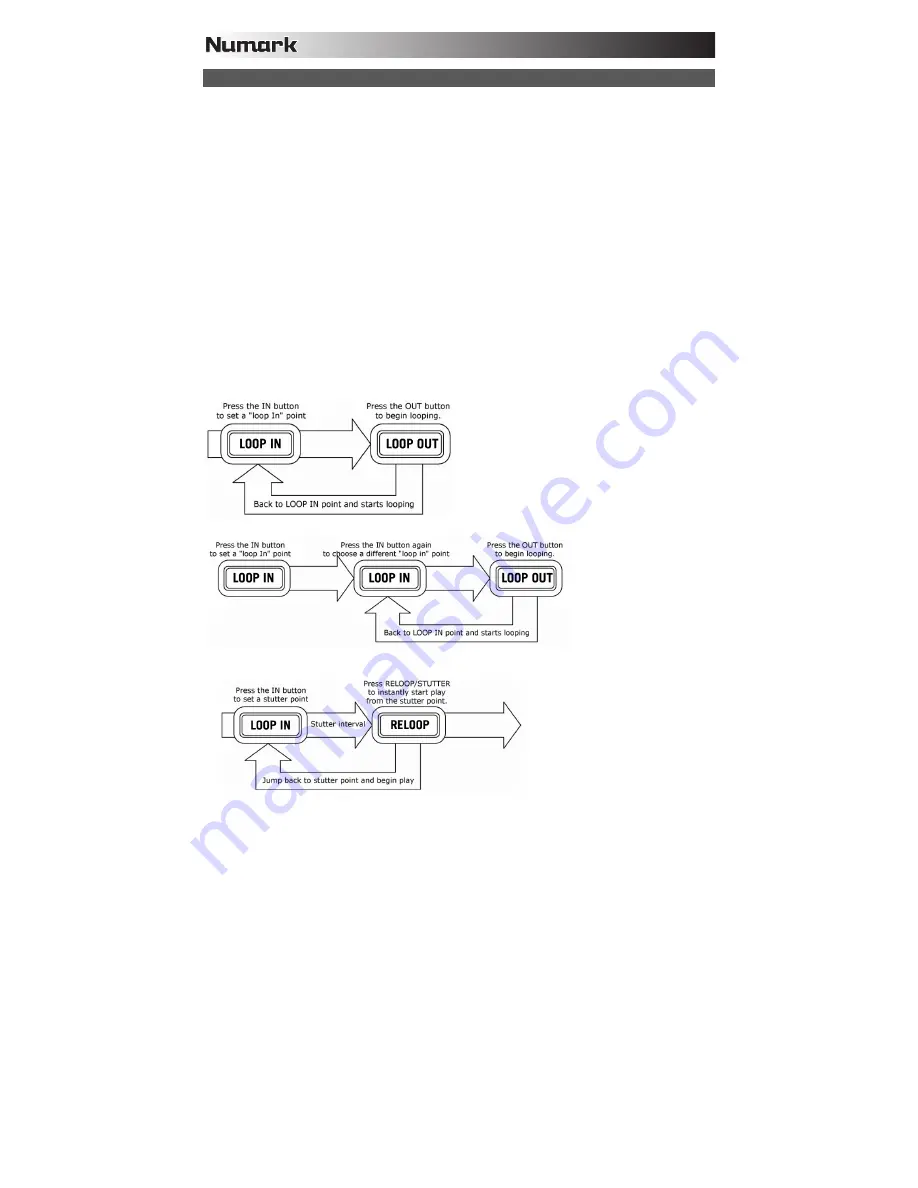
Press LOOP IN to set the beginning of the loop,
then press LOOP OUT to set the end point of the
loop. Once you press LOOP out, the MIXDECK will
loop between these two points. If you press LOOP
OUT again, the MIXDECK will exit the loop and
continue playing normally.
If you press LOOP IN but
then decide you want to
set a different "loop in"
point, just press LOOP IN
again. Then press LOOP
OUT to start looping
between the IN and OUT
points.
The "loop in" point can also be used
as a way to "stutter" play beginning
from a certain point in a song. Just
press LOOP IN to set the "stutter
point", then press RELOOP to begin
play from the stutter point. Each time
you press RELOOP the MIXDECK will
jump back to the stutter point and play
from that point.
Summary of Contents for MIXDECK
Page 2: ......


