


nuaire.co.uk
029 2085 8200
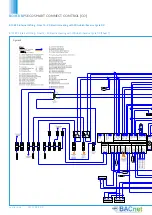
BOXER BPS
ECOSMART CONNECT CONTROL (CO)
19.0 CERTIFICATION
DECLARATION OF INCORPORATION AND INFORMATION FOR SAFE INSTALLATION,
OPERATION AND MAINTENANCE
INFORMATION FOR SAFE INSTALLATION, OPERATION AND MAINTENANCE
OF NUAIRE VENTILATION EQUIPMENT
We declare that the machinery named below is intended to be assembled with
other components to constitute a system of machinery. All parts
except for moving parts requiring the correct installation of safety guards comply
with the essential requirements of the Machinery Directive. The
machinery shall not be put into service until the system has been
declared to be in conformity with the provisions of the EC Machinery
Directive.
Designation of machinery:
Machinery Types:
Relevant EC Council Directives:
2006/42/EC (Machinery Directive)
Applied Harmonised Standards:
BS EN ISO 12100, BS EN ISO 13857
EN60204-1, BS EN ISO 9001
Applied National Standards:
BS848 Parts 1, 2.2 and 5
Note: All standards used were current and valid at the date of signature.
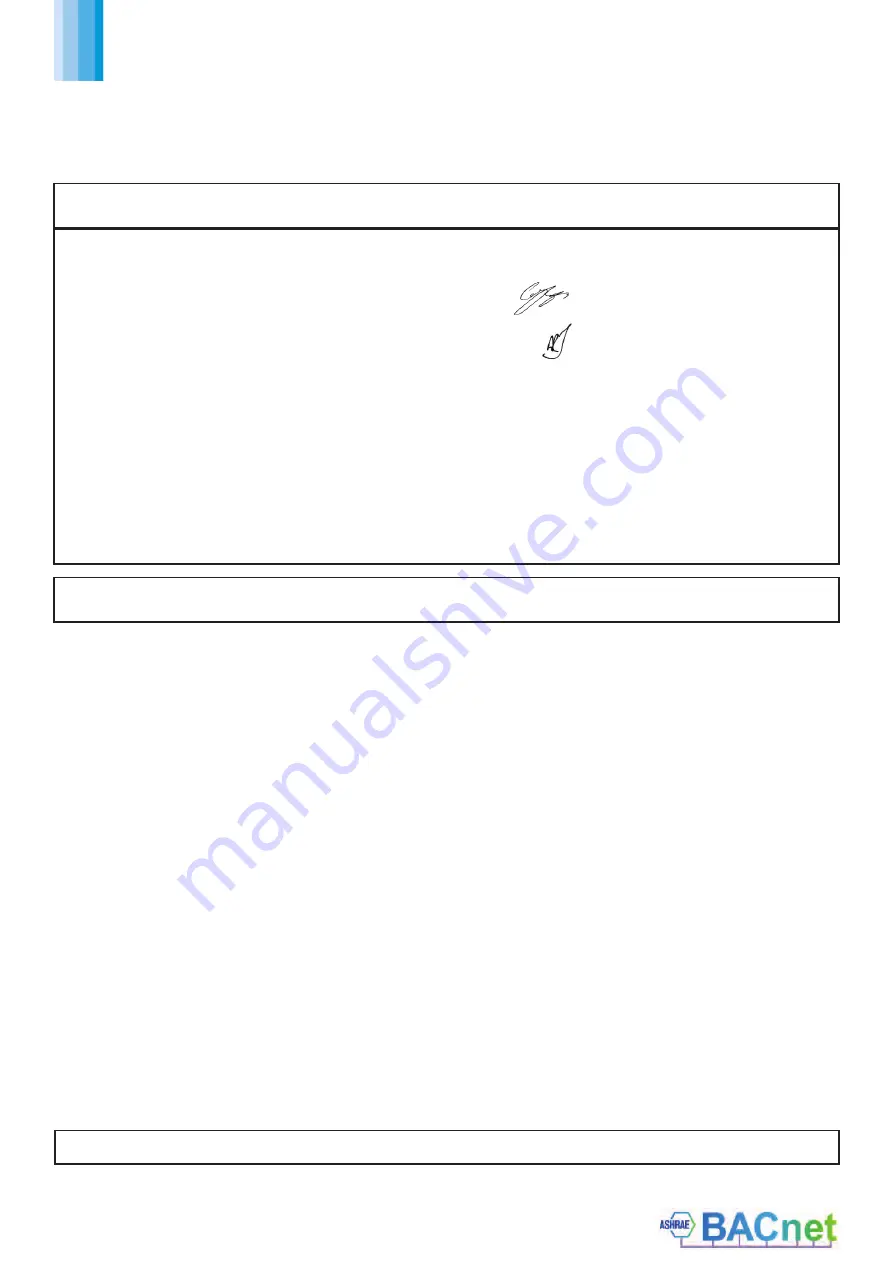
Signature of manufacture representatives:
Name:
Position:
Date:
1)C. Biggs
Technical Director
2)A.
Jones
Manufacturing
Director
Technical or commercial considerations may, from time to time, make it necessary to alter the design, performance and
dimensions of equipment and the right is reserved to make such changes without prior notice.
To comply with EC Council Directives 2006/42/EC Machinery Directive
and 2004/108/EC (EMC).
To be read in conjunction with the relevant Product Documentation (see 2.1)
1.0
GENERAL
1.1
The equipment referred to in this
Declaration of Incorporation
is supplied by Nuaire to
be assembled into a ventilation system which may or may not include additional components.
The entire system must be considered for safety purposes and it is the responsibility of the
installer to ensure that all of the equipment is installed in compliance with the
manufacturers recommendations and with due regard to current legislation and codes
of practice.
2.0
INFORMATION SUPPLIED WITH THE EQUIPMENT
2.1
Each item of equipment is supplied with a set of documentation which provides the
information required for the safe installation and maintenance of the equipment.
This may be in the form of a Data sheet and/or Installation and Maintenance instruction.
2.2
Each unit has a rating plate attached to its outer casing. The rating plate provides
essential data relating to the equipment such as serial number, unit code and electrical
data. Any further data that may be required will be found in the documentation.
If any item is unclear or more information is required, contact Nuaire.
2.3
Where warning labels or notices are attached to the unit the instructions given must be
adhered to.
3.0
TRANSPORTATION, HANDLING AND STORAGE
3.1
Care must be taken at all times to prevent damage to the equipment. Note that shock
to the unit may result in the balance of the impeller being affected.
3.2
When handling the equipment, care should be taken with corners and edges and that
the weight distribution within the unit is considered. Lifting gear such as slings or ropes
must be arranged so as not to bear on the casing.
3.3
Equipment stored on site prior to installation should be protected from the weather and
steps taken to prevent ingress of contaminants.
4.0
OPERATIONAL LIMITS
4.1
It is important that the specified operational limits for the equipment are adhered to
e.g. operational air temperature, air borne contaminants and unit orientation.
4.2
Where installation accessories are supplied with the specified equipment eg.
wall mounting brackets. They are to be used to support the equipment only.
Other system components must have separate provision for support.
4.3
Flanges and connection spigots are provided for the purpose of joining to duct work
systems. They must not be used to support the ductwork.
4.4
Local Environment - Humidity.
Ambient humidity (the humidity at the unit’s installed
location) shall be within the range: 10 to 95% (for controls, non-condensing).
Air humidity (the humidity of the air passing through the unit) shall be within the
range: 10 to 95% (for controls, non-condensing).
5.0
INSTALLATION REQUIREMENTS
In addition to the particular requirements given for the individual product, the following
general requirements should be noted.
5.1
Where access to any part of equipment which
moves
, or can become
electrically live
are
not prevented by the equipment panels or by fixed installation detail (e.g. ducting), then
guarding to the appropriate standard must be fitted.
5.2
The electrical installation of the equipment must comply with the requirements of the
relevant local electrical safety regulations.
5.3
For EMC all control and sensor cables should not be placed within 50mm or on the same
metal cable tray as 230V switched live, lighting or power cables and any cables not
intended for use with this product.
6.0
COMMISSIONING REQUIREMENTS
6.1
General pre-commissioning checks relevant to safe operation consist of the following:
Ensure that no foreign bodies are present within the fan or casing.
Check electrical safety. e.g. Insulation and earthing.
Check guarding of system.
Check operation of Isolators/Controls.
Check fastenings for security.
6.2
Other commissioning requirements are given in the relevant product documentation.
7.0
OPERATIONAL REQUIREMENTS
7.1
Equipment access panels must be in place at all times during operation of the unit, and
must be secured with the original fastenings.
7.2
If failure of the equipment occurs or is suspected then it should be taken out of service
until a competent person can effect repair or examination. (Note that certain ranges of
equipment are designed to detect and compensate for fan failure).
8.0
MAINTENANCE REQUIREMENTS
8.1
Specific maintenance requirements are given in the relevant product documentation.
8.2
It is important that the correct tools are used for the various tasks required.
8.3
If the access panels are to be removed for any reason the electrical supply to the unit
must be isolated.
8.4
A minimum period of two minutes should be allowed after electrical disconnection before
access panels are removed. This will allow the impeller to come to rest.
NB: Care should still be taken however since airflow generated at some other point
in the system can cause the impeller to “windmill” even when power is not present.
8.5
Care should be taken when removing and storing access panels in windy conditions.
XBOXER BPS models
Supply & Extract fans with
Heat Recovery
18. 06. 16
18. 06. 16
Summary of Contents for ecosmart CONNECT BPS
Page 19: ...05 11 20 Leaflet Number 671828 BOXER BPS ECOSMART CONNECT CONTROL CO 19...
Page 21: ...05 11 20 Leaflet Number 671828 BOXER BPS ECOSMART CONNECT CONTROL CO 21...
Page 25: ...05 11 20 Leaflet Number 671828 BOXER BPS ECOSMART CONNECT CONTROL CO 25...
Page 33: ...05 11 20 Leaflet Number 671828 BOXER BPS ECOSMART CONNECT CONTROL CO 33...
Page 45: ...05 11 20 Leaflet Number 671828 BOXER BPS ECOSMART CONNECT CONTROL CO 45...
Page 55: ...05 11 20 Leaflet Number 671828 BOXER BPS ECOSMART CONNECT CONTROL CO 55 NOTES...


