background image

nuaire.co.uk 

029 2085 8200

BOXER BPS 

ECOSMART CLASSIC CONTROL (ES)

nuaire.co.uk 

029 2085 8200

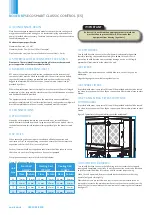
8.0 SETTING TO WORK USING THE TEST
BUTTON ECOSMART CONTROL

The test button allows the individual blowers within the unit to be checked for 
its operation. If the fan is running already, press the button once to stop the fan, 
press again to switch on the fan.

Note that the fan will return to normal operation after 30 seconds.

LED Indication

Settings

BMS Input signals

PWR 

GREEN: Power on & OK,

Standby  LED on when fan is not running.
Fan 1  

GREEN: Fan 1 is running, RED: Fan 1 faulty.

Fan 2  

GREEN: Fan 2 is running, RED: Fan 2 faulty.

Heating*   GREEN: Heating selected RED: Heating faulty.
Cooling*   Not applicable. See note.
Fault  

LED on when a fault is present on unit.

Frost*  

Not applicable. See note.

TX  

LED on when the controller is transmitting data.

RX  

LED on when the controller is receiving data.

* Note that the control panel is common to all the Ecosmart products and 
will have indicators for functions that are not available in this particular 
fan. However these indicators will not be illuminated.

The system’s response to a 0-10V dc BMS signal is given in the

following table.

Note the BMS signal will override any sensors and user control
connected in the system. The voltage tolerance is +/_ 125mV and is
measured at the fans terminal.

Ventilation

Cooling mode *

Heating mode *

Local Control

0.00

-

-

OFF / Trickle

0.25

-

-

Speed 1

0.50

0.75

1.00

Speed 2

1.50

1.75

2.00

Speed 3

2.50

2.75

3.00

Speed 4

3.50

3.75

4.00

Speed 5

4.50

4.75

5.00

Speed 6

5.50

5.75

6.00

Speed 7

6.50

6.75

7.00

Speed 8

7.50

7.75

8.00

Speed 9

8.50

8.75

9.00

Speed 10

9.50

9.75

10.00

Setting the maximum airflow

Setting the maximum trickle airflow (nominal 40%)

Setting the overrun time

Setting the trickle ventilation facility

Setting the ‘air off’ temperature

i)     Ensure the power supply is switched off and that a link wire is
       connected from the supply L to the SL terminal.
       Unplug all items connected to the ‘Net‘ connectors. 

ii)    Switch on the power supply. 

iii)   Wait for the fan to complete its self-test operation.

Measure the airflow using standard commissioning instruments at a suitable 
point in the ductwork. If adjustment is required, rotate the pot marked ‘MAX’ to 
obtain the desired airflow.

i)    Repeat the same procedure as for maximum airflow above but

       without the link wire between supply L and SL terminal. Ensure

       the trickle switch is in the ‘ON’ position. Adjustment must be made on the       

      pot marked ‘Min’.

ii)   Note that the minimum setting (nominally 40%) must be below

       the maximum setting, otherwise minimum setting will be

       automatically set to be the same as the maximum.

A switched live of 100-230V at terminal SL will activate the fan. When the 

switched live signal is removed the fan will overrun for period set by the dial ‘SL 

run on’ - adjust the desired overrun time by rotating clockwise.

Slide the ‘trickle’ switch 0 = Off, 1 = On. With ’trickle’ on and power to unit the 

fan will run at minimum speed until the switch live signal activates it to boost.

The adjustment knob is located in the control pack and must be set to the 

desired ‘air off’ temperature.

LED indicators

Min         Max    SL run on

Trickle                         Test

0                   1

Pwr
Standby
Fan 1
Fan 2
Heating
Cooling
Fault
Frost
TX
RX

Co

nnector

Ecosmart

MIN 

=  Minimum speed 


     adjustment 

MAX 

=  Maximum speed


     adjustment 

SL run on 

=  Switched Live 


     Run-On Timer 


     adjustment 

TRICKLE 

=  Selects trickle 


     running: 0 = off, 


     1 = selected 

TEST 

=  Test button

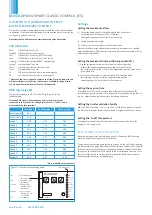
Figure 17: Ecosmart commissioning board

*Only available on relevant unit

8.1 ECOSMART FROST PROTECTION

Ecosmart frost protection is activated on any AHU fitted with LPHW heating, 
when the outlet air temperature is 4ºC or below.

The unit reacts by shutting down the fan to prevent a ‘wind chill’ effect reducing 
the temperature to a point whereby the coil could freeze and burst. The unit will 
also drive open the LPHW valve to a fully open position to allow full water flow 
through the coil and the main PCB will close the ‘Heat demand’ contacts. These 
contacts could be used to send a signal to activate the boiler and/or valve to 
open to provide heat if not already doing so.

Summary of Contents for BOXER B815H Series

Page 1: ...uaire co uk 029 2085 8200 Horizontal BPS with INSTALLATION OPERATION MAINTENANCE INSTRUCTIONS Control 2016 ErP COMPLIANT LEAKAGE CLA SS T H E R MAL RID G I N G CLA SS TB1 D EFLECTIO N CL A SS D1 FOR T...

Page 2: ...ODUCTION 3 2 0 HEALTH SAFETY 3 3 0 DELIVERY OF EQUIPMENT 5 4 0 ERECTION ASSEMBLY 7 5 0 ACCESS TO UNITS 10 6 0 INTERNAL CONNECTIONS 12 7 0 ELECTRICAL DETAILS 13 8 0 SETTING TO WORK 16 9 0 WIRING CONNEC...

Page 3: ...ptional heating LPHW or Electric and cooling Chilled water DX or Reverse Cycle The Reverse Cycle coil is supplied as standard with Mitsubishi Mr Slim Condenser s and inbuilt PAC Control Note control w...

Page 4: ...W Left Handed for Horizontal PHX Units Frost Coil LPHW 3 B AH FL R BPS size Frost Coil LPHW Right Handed for Horizontal PHX Units B AH FL L BPS size Frost Coil LPHW Left Handed for Horizontal PHX Unit...

Page 5: ...of staff That the unit Nuaire have supplied meets the standards written in the technical specification The necessary lifting gear and site plant is available to lift and position the unit in accordanc...

Page 6: ...LIFTING POINTS When units are constructed of multiple modules each module will have it s own individual base frame which is then connected to the next to assemble the full system All base frame secti...

Page 7: ...re 5 Air leakage air blow marks to the unit casings and unacceptable noise levels could result if the correct installation procedures are not employed The equipment must be stored in a dry internal lo...

Page 8: ...e damage on site as the fragile pipework will protrude from the side of the unit 4 7 3 PIPEWORK 4 8 FILTERS 4 8 1 SPARE FILTERS 4 9 2 PANEL BAG FILTERS WITH SIDE WITHDRAWAL Filters will be provided in...

Page 9: ...terminal quarter turn fixings Figure 8b Typical Inlet outlet damper terminal lifting eyes for large BPS units 4 12 ANCILLARY SUPPORT 4 13 FINAL INSPECTION All ancillary items that are supplied withou...

Page 10: ...drain and all other control adjustments are similarly accessible 4 Side access where possible is preferred in all cases in terms of safe working access to the equipment under the CDM regulations 5 Wh...

Page 11: ...n is left handed Extract Supply Intake Exhaust Model shown is right handed Figure 12 Access for horizontal plate heat exchanger units Right and Left handed EXTRACT SUPPLY INTAKE DISCHARGE Access Shown...

Page 12: ...r option only Please ensure that the condensate hose is connected between modules Care must be taken to ensure a constant fall in gradient is maintained and the hose is kept taught see fig 13 Access i...

Page 13: ...acts are not fused If these are used to power any external equipment the installer must provide adequate fusing or other protections These contacts are rated at 3A resistive 0 5A inductive Fault conne...

Page 14: ...15 20 25 30 NET Connections for Ecosmart Devices NET Connections for Ecosmart Devices Main connection Volt Free contacts Electrical Heater connection Remove NET link connection for independent speed c...

Page 15: ...POSITIONED ON ELECTRIC HEATER UNIT Unit Isolator PLATE HEAT EXCHANGER UNIT Cable glands situated on the sides of the units Figure 16 Main wiring points for the customer is to the isolators situated o...

Page 16: ...connected to the Net connectors ii Switch on the power supply iii Wait for the fan to complete its self test operation Measure the airflow using standard commissioning instruments at a suitable point...

Page 17: ...P year 8 2018 3 Unit Size 05 10 15 and 20 4 Heat Exchanger H Horizontal Plate Heat Exchanger 5 Heater L LPHW E Electric N No Heating 6 Cooling N No Heating 7 Control type ES Ecosmart Classic CO Ecosma...

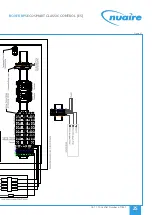
Page 18: ...9 0 CONNECTION WIRING DIAGRAMS 9 2 BASIC CONNECTION DIAGRAM BPS Sizes 05 10 15 20 No Condenser Control...

Page 19: ...Figure 18...

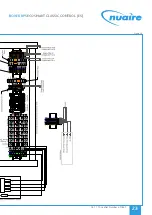
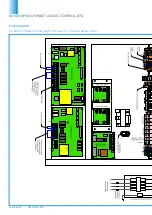
Page 20: ...nuaire co uk 029 2085 8200 BOXER BPS ECOSMART CLASSIC CONTROL ES nuaire co uk 029 2085 8200 9 0 DIAGRAMS 9 3 BASIC CONNECTION DIAGRAM BPS RC Sizes 05 10 with Mitsubishi Reverse Cycle DX Control...

Page 21: ...21 04 11 19 Leaflet Number 671827 BOXER BPS ECOSMART CLASSIC CONTROL ES 21 Figure 19...

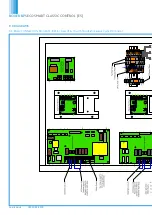
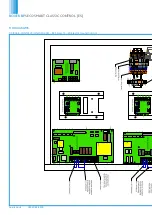
Page 22: ...nuaire co uk 029 2085 8200 BOXER BPS ECOSMART CLASSIC CONTROL ES nuaire co uk 029 2085 8200 9 0 DIAGRAMS 9 4 BASIC CONNECTION DIAGRAM BPS RC Sizes 15 20 with Mitsubishi Reverse Cycle DX Control...

Page 23: ...23 04 11 19 Leaflet Number 671827 BOXER BPS ECOSMART CLASSIC CONTROL ES 23 Figure 20...

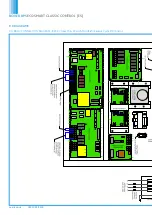
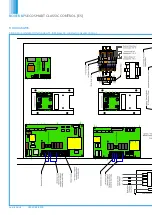
Page 24: ...nuaire co uk 029 2085 8200 BOXER BPS ECOSMART CLASSIC CONTROL ES nuaire co uk 029 2085 8200 9 0 DIAGRAMS 9 5 BASIC CONNECTION DIAGRAM BPS Sizes 15 20 LPHW Heater Control...

Page 25: ...25 04 11 19 Leaflet Number 671827 BOXER BPS ECOSMART CLASSIC CONTROL ES 25 Figure 21...

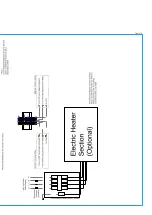
Page 26: ...nuaire co uk 029 2085 8200 BOXER BPS ECOSMART CLASSIC CONTROL ES nuaire co uk 029 2085 8200 9 0 DIAGRAMS 9 6 BASIC CONNECTION DIAGRAM BPS Sizes 05 10 Electric Heater Control...

Page 27: ...27 04 11 19 Leaflet Number 671827 BOXER BPS ECOSMART CLASSIC CONTROL ES 27 Figure 22...

Page 28: ...nuaire co uk 029 2085 8200 BOXER BPS ECOSMART CLASSIC CONTROL ES nuaire co uk 029 2085 8200 9 0 DIAGRAMS 9 7 BASIC CONNECTION DIAGRAM BPS Sizes 15 20 Electric Heater Control...

Page 29: ...29 04 11 19 Leaflet Number 671827 BOXER BPS ECOSMART CLASSIC CONTROL ES 29 Figure 23...

Page 30: ...nuaire co uk 029 2085 8200 BOXER BPS ECOSMART CLASSIC CONTROL ES nuaire co uk 029 2085 8200 9 0 DIAGRAMS 9 8 BASIC CONNECTION DIAGRAM BPS Sizes 32 42 Electric Heater Control...

Page 31: ...31 04 11 19 Leaflet Number 671827 BOXER BPS ECOSMART CLASSIC CONTROL ES 31 Figure 24...

Page 32: ...nuaire co uk 029 2085 8200 BOXER BPS ECOSMART CLASSIC CONTROL ES nuaire co uk 029 2085 8200 9 0 DIAGRAMS 9 9 BPS INTERNAL WIRING Sizes 07 42 No Heater...

Page 33: ...33 04 11 19 Leaflet Number 671827 BOXER BPS ECOSMART CLASSIC CONTROL ES 33 Figure 25...

Page 34: ...nuaire co uk 029 2085 8200 BOXER BPS ECOSMART CLASSIC CONTROL ES nuaire co uk 029 2085 8200 9 0 DIAGRAMS 9 10 BPS INTERNAL WIRING Sizes 07 42 LPHW Heater...

Page 35: ...35 04 11 19 Leaflet Number 671827 BOXER BPS ECOSMART CLASSIC CONTROL ES 35 Figure 26...

Page 36: ...nuaire co uk 029 2085 8200 BOXER BPS ECOSMART CLASSIC CONTROL ES nuaire co uk 029 2085 8200 9 0 DIAGRAMS 9 11 BPS INTERNAL WIRING Sizes 07 22 Electric Heater...

Page 37: ...37 04 11 19 Leaflet Number 671827 BOXER BPS ECOSMART CLASSIC CONTROL ES 37 Figure 27...

Page 38: ...nuaire co uk 029 2085 8200 BOXER BPS ECOSMART CLASSIC CONTROL ES nuaire co uk 029 2085 8200 9 0 DIAGRAMS 9 12 BPS INTERNAL WIRING Sizes 32 42 Electric Heater...

Page 39: ...39 04 11 19 Leaflet Number 671827 BOXER BPS ECOSMART CLASSIC CONTROL ES 39 Figure 28...

Page 40: ...r temperature cut out is healthy AND a 24vac fan run signal is received from the main control panel Once enabled the burst fired controller will increase heating output to achieve the setpoint set by...

Page 41: ...41 04 11 19 Leaflet Number 671827 BOXER BPS ECOSMART CLASSIC CONTROL ES 41 10 0 FROST COIL 10 2 1 ELECTRIC HEATER FROST COIL WIRING BPS Sizes 05 10 15 20 Figure 30...

Page 42: ...ccess to the fan section is via hinged or lift off panels Cable entry must be made through the apertures provided Screwed glands with cable restraint devices should be used Access to the fan is normal...

Page 43: ...d functioning Drain pans should be flushed out periodically to remove contamination and chemical treatments may be used to provide protection between service visits Note The unit application may requi...

Page 44: ...any dust removed Thoroughly inspect the unit and its components for corrosion acting immediately to treat restore any damaged areas Check all earth connections Check thermal wheel belt motor bearings...

Page 45: ...bear on the casing 3 3 Equipment stored on site prior to installation should be protected from the weather and steps taken to prevent ingress of contaminants 4 0 OPERATIONAL LIMITS 4 1 It is importan...

Page 46: ...nuaire co uk 029 2085 8200 BOXER BPS ECOSMART CLASSIC CONTROL ES nuaire co uk 029 2085 8200 NOTES...

Page 47: ...47 04 11 19 Leaflet Number 671827 BOXER BPS ECOSMART CLASSIC CONTROL ES 47 NOTES...

Page 48: ...strial Estate Caerphilly CF83 1NA t 44 0 29 2085 8200 f 44 0 29 2085 8222 e info nuaire co uk www nuaire co uk As part of our policy of continuous product development Nuaire reserves the right to alte...

Reviews: