Nu-Air Ventilation Systems Inc. - HRV Operating & Installation Manual
Rev. 2.3 Aug. 19, 2014
- 25 -
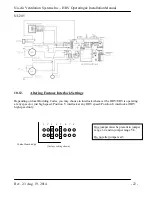
10.17.
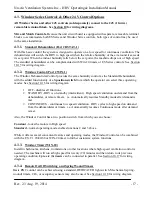
WIN-20 Control Wiring
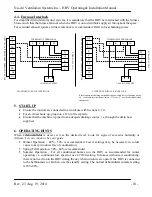
Connect 3-conductor wire to the 24V (10-wire) removable terminal block.
Notes:
1.
If you are using
ONLY
a
WIN-20
to control your unit, you must connect a jumper wire between
R and SB on the 24V (10-wire) removable terminal block. In this situation you can add
continuous low speed operation by connecting a jumper wire between R and LO. Consult local
building code in case a centrally located control with an on/off switch is required.
10.18.
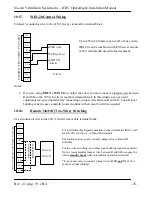
Remote On/Off (Two-Wire) Switching
Use 2-conductor wire to the 24V (10-wire) removable terminal block.
UNI
T
2
4
VAC
R
E
MO
VAB
L
E
T
E
R
MI
NAL
B
L
OC
K
N
C
I
NO
R
C
TL
TS
SB
Hi
LO
PWR (red)
LED (yellow)
SWITCH
(black)
WIN-20
Up to 6 Win-20 timers may run off of one system.
WIN-20 can be combined with ES Series controls
or 24V controls discussed in this document.
For intermittent high speed operation, connect dedicated (RNC) wall
switch, CO
2
sensor, etc. to R and Hi terminals.
For continuous low speed, connect jumper wire to R and LO
terminals.
For two-wire switching, and where local building regulations permit,
Nu-Air recommends a jumper wire between R and SB to engage the
unit in
standby mode
when intermittent operation is desired.
*It is not necessary to connect jumper wires R-SB
and
R-LO (low
speed overrides standby).
U
N
IT
2
4
V
A
C
R
EM
O
V
A
B
LE
TE
R
M
IN
A
L
B
LO
C
K
NC
I
NO
R
C
TL
TS
SB
Hi
LO
J
U
M
P
E
R
W
IR
E
J
U
M
P
E
R
W
IR
E
BLACK
BLACK

