NVIP-TC2400D/MPX1.3-II, NVIP-TDN3400H/IR-3
,
NVIP-TC5400C,
NVIP-TC5401C/MPX2.0 - User’s Manual ver.1.3.
All rights reserved © AAT Holding sp. z o.o.
13
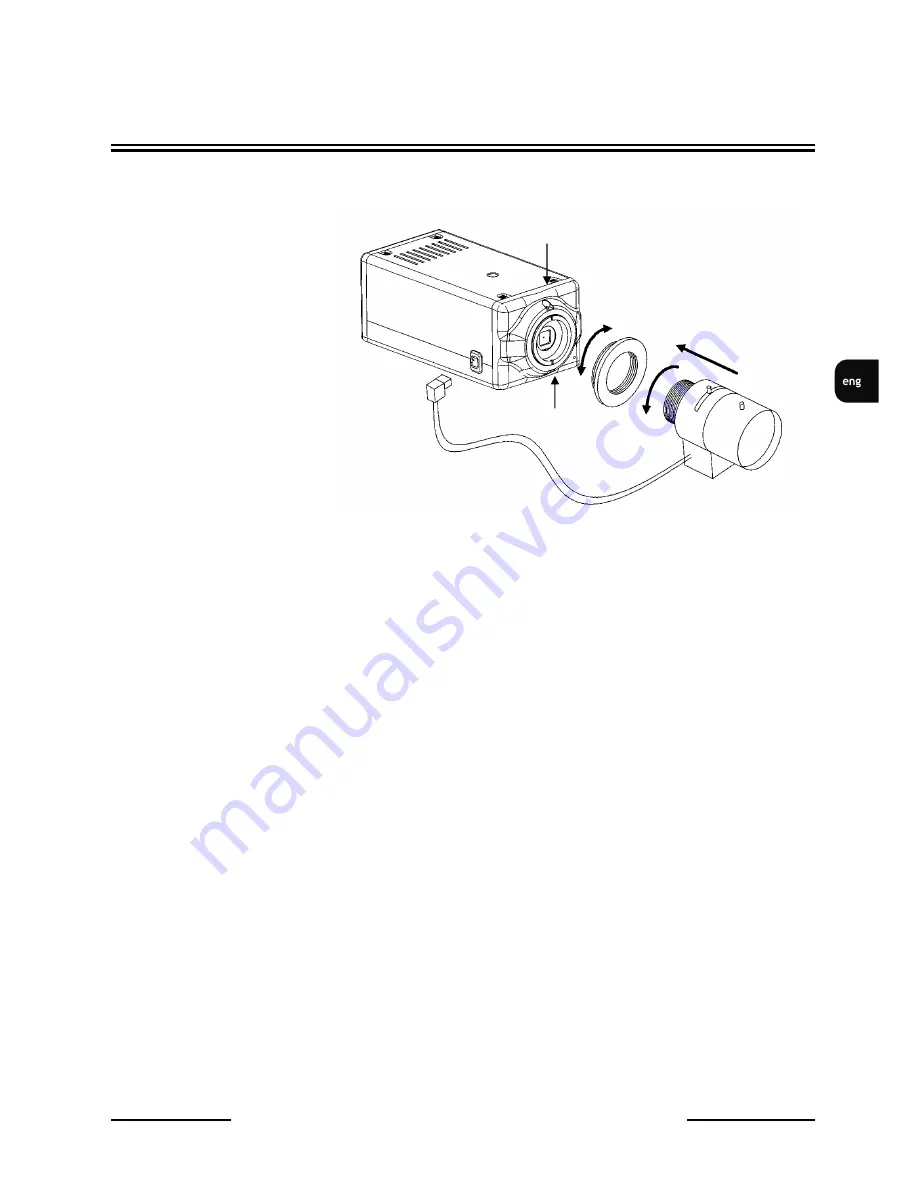
2.2. Lens Mount
Lens Mount:
1. Remove the protecting cap.
2. Attach the C/CS lens adapter .
3. Attach the lens to the camera by turning it clockwise.
AI lens mount:
1. Attach the lens to the camera (see above).
2. Connect the lens plug to the auto iris connector on the side of the camera.
3. Adjust the lighting level using Phillips screwdriver.
In NVIP-TC2400D/MPX1.3-II and NVIP-TDN3400H/IR-3 cameras lens is mounted by default,
and you only have to adjust zoom and focus.
2.3. Starting up of IP camera
To run NOVUS IP camera you have to connect it directly to the power supply or by using power
supply adapter. Next, connect the Ethernet cable between the PC or network switch and IP cameras.
After connecting power supply green
STATUS
led blinks once. That is information about started
initialization process witch takes about 30 seconds. You can then proceed to connect the camera via
the web browser.
If the connection is successfully established
STATUS
led (green) begins to blink with a frequency
proportional to the quantity of sent data. Then you can connect to camera via web browser.
If connection isn’t established (the network cable is disconnected)
STATUS
led isn’t active, and when
it is lit it means that network connection is ok but camera doesn't receive or send any data, it can be PC
network setting error.
Blocking screw
Blocking screw
START-UP AD IITIAL CAMERA COFIGURATIO


